Tampilkan postingan dengan label nuts. Tampilkan semua postingan

Senin, 17 Desember 2012

Quick Maple Pecan Cinnamon Scrolls

* This recipe includes support for Paprika * 


Cinnamon scrolls are a favourite breakfast at Christmas time in our family. Usually I'll make a batch of yeast dough scrolls and freeze or refrigerate them unbaked, then thaw and bake them on Christmas morning. I'll be explaining more about that in the next post. But if you're wanting a quick, yeast-free version, this is a great one to try. It'll only take you about an hour from start to finish. A word of warning, though - this recipe is a little bit naughty! LOTS of butter and rapadura... But it is Christmas - that's my excuse! ;-)

For a dairy free version, you could try ghee if you can have it; or use macadamia oil in the dough, and coconut cream on the rolled out dough instead of melted butter. It won't be quite as caramelly and sticky, but still good.

Okay, keeping this short as I've been trying to get this posted for two days, and I'd better hurry up before there's a riot on Facebook!!

Oh, and speaking of my Facebook page, there are now over 10,000 of you following!! WOW! So thank you to all who follow and contribute to the discussions - I learn so much and really enjoy hearing from you all. ❤


Quick Cinnamon Scrolls
*This recipe has Paprika support*

Preheat oven to 220C. Grease a 24 cm springform tin with butter and set aside. (Or you can use ghee or coconut oil, or baking paper.)

1. Prepare filling - mix together first five ingredients on speed 5 for 5 seconds - then set aside.
- 100g Rapadura
- 100g pecans or walnuts
- 2 tsp cinnamon
- pinch of sea salt
- 1 Tbspn butter

2. Mix dry ingredients on speed 8 for 6 seconds to 'sift'.
- 450g plain, unbleached spelt flour (not wholemeal)
- 1 tsp baking powder
- 1/2 tsp baking soda
- 1/2 tsp sea salt

3. Add wet ingredients and mix on speed 6 for 6 seconds, then on interval speed for 20 seconds. (Don't forget to lock the lid, or interval speed won't work!)
- 200g almond or rice-almond milk
- 1 tsp apple cider vinegar or lemon juice (helps with rising)
- 80g soft butter
- 80g pure maple syrup

4. Sprinkle silicon dough mat (or counter top) with a light dusting of flour, and turn dough out of bowl. Give it a quick, gentle knead to form a ball, then press out gently with your hands to form a rectangle about 1 1/2 cms thick.

5. Melt butter. Spread 2 tbspns over dough and sprinkle with filling, leaving a 1 cm border around the edges.
- 4 Tbspns melted butter (Note: Reserve 2 tbspns for topping. Can be melted in tmx at 100C for 30 seconds or so, speed 1.)
- prepared filling

6. Roll up the dough into a log shape, lift carefully, and place on a cutting board. (If the dough is too sticky, roll it up in the bread mat and place in the fridge or freezer to chill until firmer and easier to handle.)

7. Cut the rolled up dough into scrolls with a large serrated knife, making the slices 2-3 cms thick. Place them in the prepared springform tin, bunched up together, cut side up. Drizzle with remaining 2 tbspns melted butter.

8. Place in hot oven and cook for 20-25 minutes, until golden brown.

9. While scrolls are cooking, make the maple glaze. Place ingredients in Thermomix bowl and cook at 100C for 2 minutes, speed 1.
- 50g pure maple syrup (or Rapadura)
- 50g coconut cream (or regular cream)
- 1/2 tsp vanilla extract

10. When scrolls are cooked, drizzle over the glaze. Serve warm.

Keep in an airtight container for a couple of days. Best eaten on day of baking. (That shouldn't be a problem. Ha ha!!)


This recipe inspired by my mum and sister's recipes, this one from Bakingdom,
and my own version, all rolled into one. :)

Sabtu, 13 Oktober 2012

Raw Superfood Fudge


Warning: this fudge disappears quickly!
(naturally sweetened with dates & stevia; gluten free, grain free, dairy free, egg free)

Here's a chocolate treat that you can eat guilt-free, which will help to control those chocolate cravings without overloading your body with sugar. It is not only raw and naturally sweetened, but full of antioxidants, vitamin C, protein, fibre, magnesium, immune system boosters and other nutrients to nourish your body. The raw cacao is a great pick-me-up, and I often find myself reaching for it after lunch when I need an energy boost. I tell my kids this is one sweet treat they can eat as much as they like of, which makes them pretty happy! (Although it's quite rich, so they never eat more than two or three pieces at a time.)

To maximise the goodness of this fudge, I've used two of Loving Earth's superfood powders. Rainbow Superfood Blend is quickly becoming my favourite superfood powder, because instead of opening lots of packets and jars and combining powders, I can just grab this one jar and scoop out a spoonful of maqui berry, acai, AFA, gubinge (Kakadu plum) and camu camu powders. It just simplifies things. I also add some extra maqui berry powder as this is a 'fruity' fudge! It gives it an extra depth of flavour, plus even more goodness. (If you're not sure what any of those are and why they're so good for you, click on the links to see an explanation, as well as ideas of how to use them.)

I also like to add dried, organic cherries to my fudge, or a couple of handfuls of goji berries. If you don't have any, you can either leave them out, or add some sultanas instead.

 
WIN a jar of Loving Earth's Maqui or Rainbow Superfood Powders!

Okay, so here's the exciting news... You have the chance to WIN one of the above superfood powders from Loving Earth!! They have kindly sent me some goodies to give away, so for your chance to win one of these amazing jars of goodness, just leave a comment on this post saying what you would make with it if you had some to try. There will be two winners drawn randomly in one weeks' time, on Saturday 20th October, 2012, at 5pm. The first winner will receive a 150g jar of Rainbow Superfood Blend (worth $44.90), and the second winner will receive a jar of Maqui Powder (worth $39.90). (This competition is only open to Australian residents - sorry to my overseas followers, but postage is horrendous these days! If you are desperate to try it, you can order online from Loving Earth.)

Okay, so here's my recipe for Raw Superfood Fudge ~ try it out, and don't forget to leave a comment! Enjoy :)

1. Grind up in your Thermomix on speed 9 for 30 seconds:
- 1 whole vanilla bean, snipped in a couple of pieces (no need to scrape out seeds)
- 100g raw cacao nibs

2. Add and grind on speed 9 for 10 seconds:
- 100g raw walnuts
- 100g raw cashews


[Note: nuts that are high in enzyme inhibitors (like walnuts) are easier to digest if they have been 'activated' - soaked, rinsed, then dehydrated. You can do this yourself, or you can buy them activated here. You can use regular raw nuts if that's all you have. Any combination of nuts will work - I like cashews & walnuts as they are oily, so they make a 'creamier' fudge.]

3. Add and process on speed 9 for a minute, or until fudge is smooth and begins to form a ball (as in picture below):
- 100g raw dates
- 80g coconut butter
(make your own from dried coconut)
- 60g coconut oil (sometimes called coconut butter)
- 1 heaped tsp Rainbow Superfood Blend
- 1 heaped tsp Maqui Berry Powder
- 10 drops vanilla stevia or a pinch of green stevia powder (optional)
- pinch of Himalayan salt


4. Mix in on speed 3 for a few seconds:
- a handful of dried sour cherries or goji berries

5. Press mixture into a square or small rectangular dish (I use a Pyrex glass dish), and pop into the fridge to set. If you like, you can make the mixture into balls instead of squares. Keep refrigerated or it will soften and crumble.


(This is not a paid post, although Loving Earth did send me some samples and giveaways. But even if they hadn't, I would still link to them because I LOVE their products!! I think I should maybe just move into their warehouse...)

Sabtu, 23 Juni 2012

Sticky Pecan Muffins


This morning I managed to get up before everyone else, so I decided to make something a bit special for breakfast. I found this recipe here, and tweaked it to make it healthier and Thermomix friendly. This is what I came up with. It's almost dairy free - there's 1 tablespoon of butter in the caramel topping - but you could use coconut cream instead to make it completely dairy free. I didn't have any coconut cream left, so I just used butter. It only uses 1/2 a cup of flour - I used spelt flour, but I'm sure it would work fine with plain gluten free flour or almond flour as well.

Here's a time-saving tip: when you're making cakes or muffins that have chopped nuts in them, don't bother chopping the nuts first, just add the whole nuts with all the other ingredients and chop and stir all at once on speed 4-5 for a few seconds. If you have a look at the original recipe, you'll notice I cut the steps down from 5 steps to 1 step for the muffin mixture. Yep, I like 1-step recipes. Well, okay, the caramel topping is another step or two, but it's easy as. And really delicious, so don't leave it off!


I'm really happy with the way these muffins turned out using macadamia oil instead of butter - the texture is perfect. For those of you wanting to convert your own muffin recipes for the Thermomix, just remember you have to be really careful not to overmix, or you'll have heavy, dense muffins. Notice that I only mix these for a few seconds, scrape down the bowl, and gently mix for another few seconds - that's it! Don't beat all the air out of them. You could use this basic mixture for all sorts of muffins - blueberry-pecan is next on the list for me I think!

Makes 12 large muffins.

Preheat oven to 180C. Generously butter (or oil) a 12-cup muffin pan (or madeleine tin).

1. Chop pecans on speed 4 for a couple of seconds, just until roughly chopped:
- 70g raw pecans
    Remove to a bowl.

2. Melt in Thermomix at 100C for 2 minutes at speed 1, or until just melted and combined:
- 3 Tbspns Rapadura
- 2 Tbspns honey
- 1 Tbspn butter or coconut cream

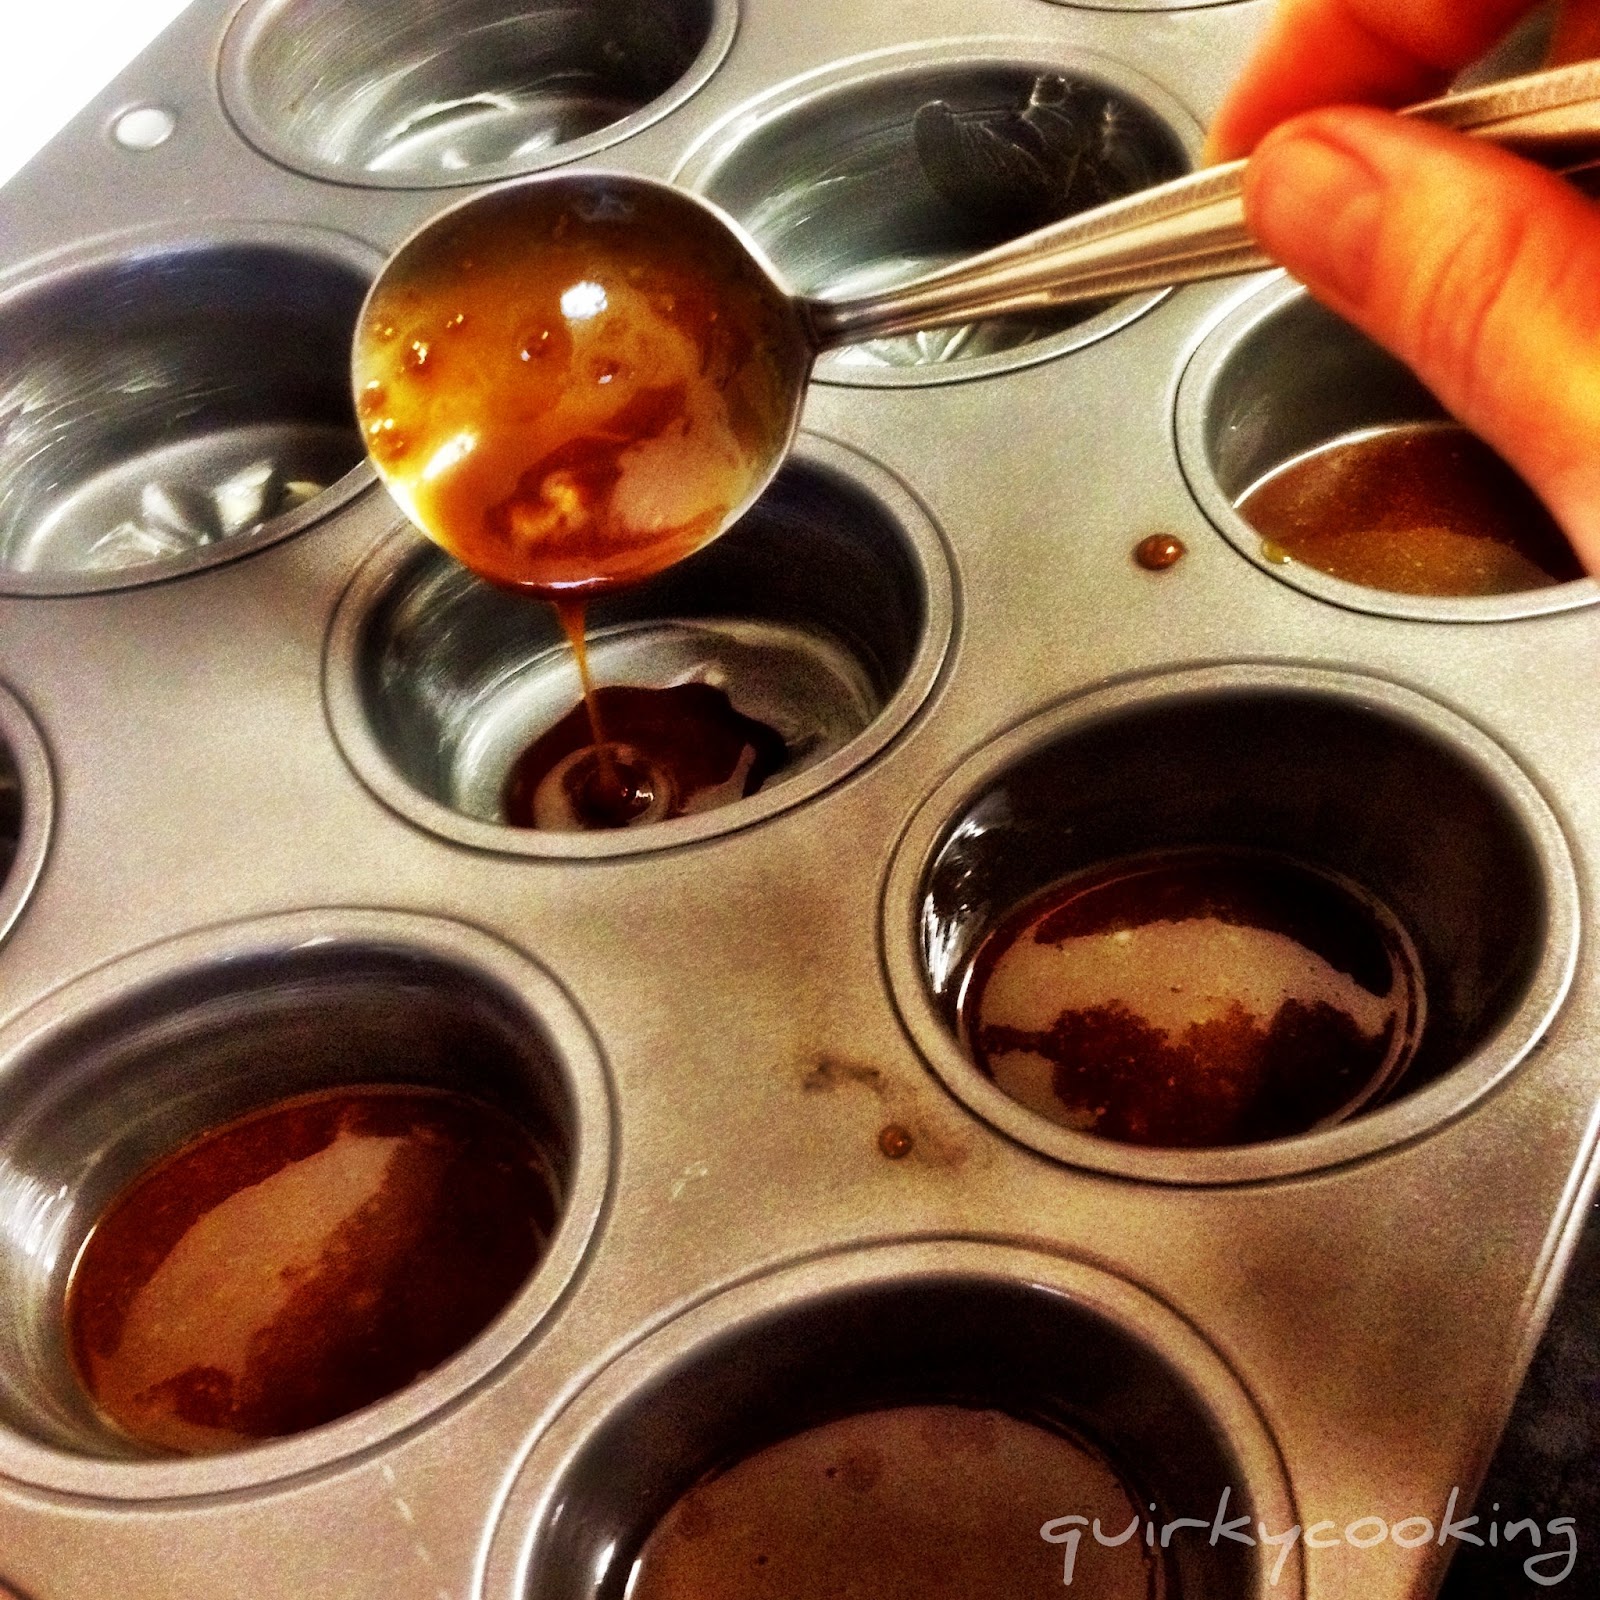
3. Spoon 1 Tablespoon of caramel mixture into each muffin cup.


Add a sprinkling of chopped pecans, and set aside.


No need to wash out Thermomix bowl.

4. Add all remaining ingredients to Thermomix bowl and mix on speed 4 for 6 seconds; scrape down sides of bowl and mix for another 5 seconds on speed 3 to combine.
- 130g raw pecans
- 110g macadamia oil
- 80g Rapadura
- 80g spelt flour (or gluten free or almond flour)
- 3 large eggs (55-60g each)
- 1 tsp vanilla extract
- 1/2 tsp baking powder
- 1/2 tsp sea salt

5. Divide mixture evenly between muffin cups. Bake for about 20 minutes at 180C, or until skewer poked into centre of muffins comes out clean.


Enjoy! I'm off to sneak the last one now that the kids have gone to bed...

Rabu, 02 Mei 2012

Salted Caramel Macadamia Banana Ice Cream {dairy free}


I had a very sad little girl this morning, with a bad case of 'schoolitis'... It really is impossible to teach an eight year old girl about state-of-being verbs when all she can do is cry because her brothers have already finished their school work and she hasn't! So we had a break and made a pre-lunch snack. Salted caramel macadamia banana ice cream works every time - no more tears, smiles all round. Only problem is, now she's bouncing off the walls and giggling crazily at everything. Sigh. Oh well, we'll try again after lunch.

Here's the recipe, just in case anyone else needs a pick me up too! (Hopefully you won't get the giggles.) Now I'm off to make a quinoa salad for lunch...

1. Make the caramel sauce by melting together some Rapadura, coconut cream, vanilla and salt for 3 minutes at 100 degrees, speed 2:
- 100g Rapadura or coconut sugar or pure maple syrup
- 100g coconut cream
- 2 teaspoons vanilla extract (or 1 large tsp vanilla bean paste)
- a pinch of Himalayan salt
    Pour sauce into a small jug and set aside.

2. Add to the Thermomix bowl and mix on speed 9 for 30 seconds, using the spatula to push it onto the blades:
- 450g frozen bananas, chopped in 1 inch pieces
- 2 handfuls of raw macadamias (or however much you want!)
- a good drizzle of caramel sauce (reserve at least half for topping)


3. Serve the ice cream straight away in small dishes, drizzled with the caramel sauce, and sprinkled with chopped macadamia nuts. You can also add a tiny sprinkle of Himalayan salt over the top as well, if you like.
- extra macadamia nuts, chopped roughly
- extra sprinkle of Himalayan salt (optional)


Jumat, 06 Januari 2012

Homemade Ferrero Rocher Chocolates (Dairy free & Gluten free!)


I've been meaning to post this recipe since before Christmas, as this was one of my Christmas treat ideas - homemade Ferrero Rochers that are gluten free and dairy free! But in the holiday rush, they never actually got made. Well... I got a few made, but I ate them as quick as I made them, so there never were enough to put in the kid's Christmas stockings, or to take to the parties I intended to take them to! *grins sheepishly*


I think I should warn you that these are very dangerous, and should only be made when you are really full and don't feel like eating any chocolate. Unless you have super-human self control - then just go ahead and make them anytime. ;)

At least they're pretty healthy. That's my excuse anyway.

My recipe is simply a homemade nutella type chocolate mixture (based on my hazelnut chocolate spread recipe), molded around a roasted hazelnut and coated in crushed, roasted hazelnuts. I didn't bother with the biscuit layer - too tricky, and besides, I wanted them to be gluten free. And I never got around to coating them with chocolate - maybe next time. I thought they were chocolatey enough without the extra chocolate coating, and besides, I wanted to hurry up and eat them so I didn't want to take the time for an extra step! But if you're feeling industrious, and you have the self-control to not eat them all before you actually get the chocolate ready to dip them in, here's my recipe for homemade chocolate, which I think would work best because it's quite thin before it's set, so it would be easy to coat the balls with.


Homemade Ferrero Rocher Chocolates
(Dairy Free & Gluten Free!)


First you need to roast the hazelnuts (if they're not already roasted):

- Spread about 3 cups of raw hazelnuts on a baking tray (in a single layer) and roast at 180 degrees C for about 10-15 minutes, stirring once or twice, until slightly browned. (I buy my nuts bulk from Trumps through a co-op, so it's not so expensive.)


Then once they're cool, rub the skins off as best you can, either with your hands, or in a tea towel. Discard skins.

Take a third of the nuts and set them aside. Roughly chop the other two thirds in the Thermomix by pulsing a few times with Turbo speed. Check in between pulses so you don't overdo it.

Now make the hazelnut chocolate for the centre:


1. Grind in Thermomix on speed 9 for 10 seconds:
- 90g Rapadura

2. Add and grind on speed 9 for 10 seconds:
- 60g roasted hazelnuts

3. Then add and grind again for 10 seconds:
- 50g good quality, dairy free dark chocolate broken into pieces
(70-85% cocoa dairy free chocolate - I use Lindt)

4. Add and heat for 6 minutes, 60 degrees, speed 3:
- 20g cacao powder (or good quality cocoa)
- 50g rice/almond milk or other milk
- 70g coconut oil (I use a flavourless variety for this recipe)

5. Scrape the chocolate mixture into a bowl and refrigerate for a few hours until very firm. (Or pop it in the freezer if you're in a hurry!)

Once your chocolate has set, you can make the balls. You need to work quick, as the chocolate gets too soft to work with after a while.


Take a thin scoop of the chocolate mixture with a teaspoon, and put a roasted hazelnut on top. Mold the chocolate around the hazelnut to form a rough ball.

Roll the balls in the crushed hazelnuts, squishing them into shape as you go. Place the balls on a plate or in a container, and keep them in the fridge as you make them. They do melt pretty quickly as I found out when trying to take photos of them... I got distracted with a phone call and came back to soggy chocolate balls. So I had to eat them. ;)


Once they're firm, you could dip them in melted, raw dark chocolate if you like, then re-chill. I wrapped them in little squares of foil, but it's not really necessary - the nuts keep them from sticking together.

You can keep these in the fridge or freezer - they keep well for ages. That is, if they're well hidden!

Jumat, 16 Desember 2011

Rapadura-Maple Syrup Butter Toffee


I love to make homemade sweets for a special treat at Christmas time. There are way too many nasties and refined sweeteners in bought lollies, so it's nice to have some homemade ones to keep the kids happy. Okay, and the adults. :) This toffee recipe has been a favourite at our house for a couple of years now, ever since I found it on a great website called Deliciously Organic! Check out the original recipe here.

Unfortunately, you can't make it in the Thermomix, as you can't cook at temperatures higher than 114 degrees celcius, and to get toffee to the hard crack stage you need to get up to 150 degrees celcius. So, it's back to stirring over a hot stove for this one - but it's worth it! I do make the chocolate (or melt the chocolate) and chop the nuts in the Thermomix though.

If you don't have a candy thermometer, don't worry - neither do I. I've always cooked candies the old-fashioned way, ever since I was a little kid. Mum taught me the method of holding the wooden spoon up to see how the candy drips, and dropping bits in a cup of cool water to see how it sets. Here's an explanation of the cold water testing method, and how to tell what temperature your toffee has reached. For this recipe (or any toffee or lollipop recipe where you want 'crunch'), your syrup needs to reach the hard crack stage (300 degrees F / 150 degrees C). I'll explain a bit more about the 'how to' below.

You can do all sorts of variations with this recipe - the photo above has dark chocolate and sprinkles on some, and toasted pecans and dark chocolate on the other. You can use whatever nuts you like, or leave the nuts out and top with sprinkles instead. I use Hopper sprinkles - they are made from fruit & vege extracts, no artificial colours, flavours or preservatives. They are also gluten free, dairy free, egg free and nut free. For the chocolate, I prefer to make my own (with this recipe), but since I didn't have any cacao butter left I used Lindt 70% cocoa chocolate.


Here's how I make it:

1. First, toast 2 cups of nuts if you want nuts in the toffee. (Whatever nuts you like - almonds, macadamias, pecans, brazil nuts - even pine nuts.) Start with raw, unsalted nuts and toast them in the oven on 180 degrees C for 10-15 minutes, stirring once or twice, then roughly chop in the Thermomix (or leave whole if you like).

2. Then prepare a tray for the toffee - either grease a pizza or biscuit tray with butter, or line it with baking paper.

3. Measure into a large, heavy based saucepan and mix with a wooden spoon over medium heat:
- 1 1/4 cups Rapadura
- 1/3 cup pure maple syrup
- 1/3 water

4. Once it starts to bubble, turn the heat down to low and let it simmer for 3-4 minutes.

4. Stir in the butter:
- 225g (1 cup) butter (place a bowl on the Thermomix & weigh the butter into it - it's easier than measuring it into a cup!)

5. Continue to simmer until mixture reaches 150 degrees celcius (if you have a candy thermometer) - or hard crack stage (if you don't).

Testing to see if toffee is at hard crack stage:

Have a cup of cool water handy. As mixture simmers over low heat, try to only stir it a little now and then. Don't constantly stir it or you'll end up with a grainy, fudge-like texture. You want to keep the sugar from crystallizing on the sides of the pan - if it starts to do that, brush down the sides with a pastry brush (preferably silicon) dipped in water.

You'll notice the mixture starting to get darker and thicker after a few minutes. Give it a gentle stir, then hold the spoon up and let most of the mixture drip off. The last couple of drips will become a string of toffee - if the string thins out to a fly-away hair, it's about ready. (See picture below)

Let the string of toffee drip into the cup of cool water. If it hardens quickly into a brittle thread that snaps when you bend it (or crunches when you bite it) the toffee is ready - take it off the heat immediately! There's a fine line between ready and burnt. (Be careful it's not too hot before you pop it into your mouth to taste it!!)

6. Quickly stir in the salt, baking soda and nuts, making sure there's no soda lumps:
- 1 tsp fine sea salt
- 1/2 tsp baking soda
- 1 cup toasted, roughly chopped nuts (optional)

7. Pour the toffee onto the prepared tray, working quickly before it sets in the pan. Spread it flat with the spoon and leave in a cool place to set.

8. Meanwhile, chop (speed 5) then melt the chocolate in the Thermomix on 50 degrees for 3-4 minutes, speed 3:
- 200g dark chocolate, broken in pieces

9. Spread the melted chocolate over the toffee with a spatula, then sprinkle with the remaining chopped nuts, or with sprinkles. Place toffee in the freezer to set hard.

10. When it's ready, crack the toffee into shards with the point of a sharp knife.

I find this keeps best in the freezer in our hot, humid climate - I leave it in one big piece and crack some off as we want it, or break into smaller pieces and place in ziploc bags.


Make a couple of batches and share it with your friends - it's perfect for Christmas presents! You can make a little paper box, line it with baking paper, add the toffee pieces and pop on the lid. Sweet!

Here's a link to making your own paper gift boxes - I use a large, square sheet of scrapbooking paper for the lid of the box, and another for the bottom of the box. Cut 1 centimetre off two adjacent sides of the second sheet for the bottom of the box, so the lid will fit over. Use the offcuts to make a curly decoration for the lid, stuck on with double sided tape.

Rabu, 19 Oktober 2011

Quick Quinoa Granola


I got up this morning to hungry kids and nothing much to eat, so I made a quick batch of quinoa granola with some quinoa flakes I picked up at the supermarket yesterday. It was so easy and delicious, I just had to share it with you all! While it was toasting I made a banana & chia seed custard (no eggs or dairy) to have with it - but I'll save that for the next post.

Making granola is not an exact science. Just throw in handfuls of your favourite ingredients and spices, drizzle over some oil or melted butter plus honey or syrup, sprinkle with salt, mix it up, and toast it. Mine is a little different every time. I just made a small batch this morning, mixing it straight on the baking tray - if you want to make a big batch, mix it in a large mixing bowl and adjust amounts to suit.

So here's a basic recipe for a quick quinoa granola that you can mix up in seconds, toast in minutes, and enjoy before dashing out the door for the day. Tweak to your heart's delight! :)

Preheat oven to 180 degrees. OR you can toast this under the grill for quicker results, but you'll have to watch it closely and stir it every couple of minutes.

Okay, just throw all these ingredients together, either straight onto your baking tray, or in a mixing bowl:


3 big handfuls of quinoa flakes. (If you like you can mix with some rolled oats to save money)

a handful or two of roughly chopped almonds or other nuts, eg. pecans, hazelnuts (chop in Thermomix on speed 5 for a few seconds) If you can't have nuts just add more seeds.

- a couple of handfuls of sultanas (or other dried fruit)

- a handful of sesame & sunflower seeds (or other seeds, like chia)

- a pinch or two of celtic sea salt or himalayan salt (I like to use a flaked or roughly ground salt to get that occasional slightly salty crunch in my granola)

- a big pinch or two of ground cinnamon

- a smaller pinch of ground nutmeg

[Note: Try grinding up your own nutmeg and a cinnamon quill in the Thermomix for more flavour!]

- a good drizzle of melted coconut oil or butter (I don't measure, I just add more as I'm mixing if I think it needs to be 'wetter'. It depends on how crunchy you like it. More oil, crunchier granola.)

- a good drizzle of raw honey or pure maple syrup or agave syrup (again, I don't measure, just drizzle some over)

- a splash of vanilla extract

Now for the fun bit - get your hands in there and mix it up! Use your fingertips to rub the oil and honey/syrup into the dry ingredients, until it's evenly mixed. Spread out evenly on the tray.


Pop it into the hot oven (180 degrees) and cook for about 10 minutes. Remove from oven, stir with a fork, place back in oven and give it another 5 minutes or so.

I don't even bother letting it cool - just dig in! But if you want to cool it first you can - it gets crispier as it cools.


Sprinkle your granola over some fruit and/or yoghurt. If you're dairy free, try this coconut milk yoghurt!

It's also great sprinkled over banana or vanilla custard.

And of course, it's delicious with cold rice-almond milk or cashew milk too.

My favourite time to eat granola is actually supper time... think I'll go have some now! :)

Senin, 03 Oktober 2011

Shrek Juice & Juicing in the Thermomix


We call this drink 'Shrek Juice'. I'm sure you can see why! It's so simple it's hardly a recipe, but I thought I'd go ahead and post it as I get lots of questions about the best way to make juice in the Thermomix.

The Thermomix is great for making delicious, healthy juices. The best way to do it is to make a 'boost juice' style of juice... just whiz up your fruit and/or veges with a couple of handfuls of ice, speed 10 for a minute or two, add a little water if you need to thin it down to a drinkable consistency, and there you are - no wasted pulp, the fibre is there in a drinkable form, and the bowl is easy to clean up afterwards. All you do when you've finished juicing is whiz up some water in the bowl, rinse under the tap, and voila - it's clean! There's no messy filter to scrub out - which makes it much more likely that you'll drink fresh juice every day, right? I know when I had to rely on a juice extractor for juices, I didn't juice too often - those things are such a pain to clean.

The reason you add the ice is because it helps grind up the fibres of the fruit and veges, stops the juice from becoming foamy, and also helps retain the enzymes in the juice by keeping them cool. So don't leave out the ice.

One of my favourite things about making juice this way is that I can afford to use organic fruit and veges and not feel like I'm wasting money by throwing out the fibre, because it's all incorporated into the juice. A couple of carrots, a couple of apples, a handful of baby spinach, a stick of celery and a little ice makes juice for four people - no need to use half the fruit and veges in the fridge! It also makes it a lower GI drink, as the fibre prevents your blood sugar levels from soaring because of concentrated sugars. And the juice is more filling, so it's great when you're in a hurry in the mornings and don't have time for breakfast; or if you're trying to lose weight. So my advice is keep the fibre in your juices - don't strain it all out!

Shrek Juice - makes about 3 serves

Grind up in the Thermomix on speed 10 for 1 minute or so:
- 3 oranges, peeled (cut off skin & pith, leave whole)
- 2 handfuls baby spinach
- a handful or two of ice

That's it!

I love to add baby spinach or other greens to smoothies and juices - you can't taste them, and fresh greens are so good for you. And most of us don't get enough of them.

Sometimes I add nuts to my juices, to make a creamy fruit drink like Pecan Orange Milk, or Creamy Citrus Smoothie. They're great for a breakfast drink, as the protein helps you wake up and gives you energy.

There's so many different types of juices you can make in the Thermomix - this is just a very simple one that's a favourite at our house. So what are your favourite juice combinations?

Oh, by the way, just in case you have little princesses at your house who are totally not interested in Shrek, here's a Princess Fiona Juice too... ;)


(Okay, it's more of a smoothie...)

This one is made from a few handfuls of frozen blueberries, a handful of baby spinach, a handful of raw almonds, a few dates, a frozen avocado or banana (chopped in bits), a handful of ice, water to cover, and a little agave syrup or honey to taste if needed. I don't really measure with juices and smoothies - just keep adding til it tastes right!

Enjoy!

Kamis, 08 September 2011

Grain Free Sultana Spice Bread


Did you know that if you're suffering from bloating, fibromyalgia, headaches, exhaustion, hay fever, sinus problems, brain fog and weight problems it could very well be all the bread you're eating? I know that when I eat a lot of bread, I have less energy, and my allergies start playing up - even if it's my healthy, homemade, low gluten breads. So I try not to over do it with bread.

Today I decided we needed to be a bit more proactive about getting rid of the coughs, colds and sniffles that have been plaguing our family lately! Our yearly youth camp is coming up in a week and a half, and it would be awful if the kids were sick for that. And I can't afford to be sick either as I'm cooking at camp... So for the next two weeks, breads and most grains, all dairy, and most sugars will be strictly off limits! (I'll still use some natural sweeteners like raw honey, dates, a little rapadura, pure maple syrup, and stevia, but will cut down on them.) And of course we'll be avoiding additives, preservatives and colours as usual.

I've asked on my Quirky Cooking Facebook Page if anyone else wants to join me in getting rid of breads, dairy and refined sugars for two weeks, to see if it makes a difference for them too. We're going to share our menus each day, and hopefully recipes too, to help inspire each other. Do any of you want to join us?

Here's what we had today:

Breakfast: Boiled jacket potatoes (organic) with homemade mayo; fruit

Morning Tea: Fruit salad with berry sorbet


Lunch: Leftover pasta e fagioli warmed up in the varoma (it was made with rice & corn pasta, but we needed to finish it off)

Afternoon Tea: Grain free sultana spice bread (recipe below!) and strawberries (loving strawberry season!)

Dinner: Grain free, dairy free lasagne and coleslaw with homemade mayo

The lasagne was a hit! Instead of pasta, I used thinly sliced eggplant, as I had a few in my vege box. I salted them, let them sit for a while in the Varoma, rinsed them, then steamed them in the Varoma while the bolognese sauce was cooking in the Thermomix bowl.


Once it was all cooked (about 25 mins) I layered the eggplant and bolognese sauce in a baking dish and topped it with a dairy free 'cheese' sauce, made from 500g rice-almond milk, 2 Tblspns (or so) nutritional yeast flakes, 30g macadamia oil, 1 tsp vege stock paste and 40g cornflour - cooked at 90 degrees for 7 mins, speed 4. Then I popped it in the oven, turned oven on to 180, and dashed out the door to a demo! When I got home there was only the tiniest bit left (2 litres of bolognese sauce and 3 eggplants, plus 'cheese' sauce!!)... Apparently the kids LOVED it! So we'll definitely be having that one again. :) (By the way, they did leave me a little bit, and I loved it too!)

Anyway, if you'd like to share some grain free, dairy free, naturally sweetened ideas (or check out others' ideas), please come on over to my facebook page. The more the merrier! :)

How to make Grain Free Sultana Spice Bread
This bread is based on the Pecan Bread I made a few weeks ago. Spicy, naturally sweetened and delicious, even without any butter!

1. Grind up in Thermomix on speed 8 for 10 seconds:
- 200g raw almonds

2. Add the pecans and chop on speed 5 for 6 seconds:
- 120g raw pecans (or use hazelnuts for a low salicylate version)
   Remove the ground nuts to a bowl and set aside.

3. Place in the Thermomix bowl the following ingredients, and mix on speed 6 for 10 seconds:
- 60g coconut butter
- 1 apple, quartered (no need to peel)
- 5 large (or 4 very large) free range eggs
- 50g macadamia oil (or grapeseed, or other light oil)
- 1 tbspn lemon juice (or 2 tsp apple cider vinegar)
- 3/4 tsp bicarb soda
- pinch of fine sea salt
- 1 Tblspn ground cinnamon
- 1 tsp ground nutmeg
- 1 tsp ground ginger
- 50g raw honey (optional)


4. Scrape down sides and add the ground nuts back in to the mixture, with the sultanas, and mix for a few more seconds on speed 6:
- 100g sultanas

5. Pour into the lined tin and bake at 160 degrees for an hour or so, until risen and browned; a skewer poked down into the centre of the bread will come out clean when it's ready.

6. Let the bread cool for 10 minutes before removing carefully from the tin. Pull it up with the paper so you don't break it. It will firm up as it cools.

Note: If you won't use it within a day or two, it can be sliced thinly, frozen in loose layers, then when completely frozen, wrapped and kept frozen to use a slice at a time.

We'll be having what's left as toast for breakfast, with some homemade strawberry jam. Yum!

Jumat, 19 Agustus 2011

Pecan-Orange Milk (Dairy Free)


Okay, don't die of shock, but here's another recipe - two in two days!! This is just a little one... I was going to post it on my Quirky Cooking Facebook Page but sometimes my 'little recipes' get a bit lost over there, never to be found again. A bit like yesterday's recipe, which was nearly lost in my handbag, and I've been strongly encouraged by Helene of Super Kitchen Machine to use 'post-it' notes for my scribbles, not scraps of shopping lists, so that doesn't happen again! (You've got to see her hilarious video here; so funny!)

This is a 'juice' I've been making for years, with many variations. Change it around with:
- raw cashews or blanched almonds or a handful of fresh coconut (or dry shredded coconut) instead of pecans;
fresh pineapple or grapefruit or tangellos instead of the oranges;
- a raw egg added for extra protein;
- a big handful or two of raw baby spinach or other greens.

It's a great way to start off the day - the enzymes and vitamin C in the fresh fruit and the minerals and protein in the nuts make a great combination! It's thick and creamy like a smoothie, but without the dairy. If you like it sweeter, add a little raw honey or agave syrup. If you want it thinner, just add a little more water. Hope you like it!


Toss into your Thermomix bowl:
- 3 or 4 peeled oranges, depending on size (or grapefruit, or pineapple)
- a couple of handfuls of raw pecans (or raw cashews, blanched almonds or fresh coconut)
- a couple of handfuls of ice cubes
- 100g water

Whiz it all up on speed 9 for 2 minutes. Add some more water if you want it thinner, or a little honey or agave syrup if you want it sweeter.

Enjoy! :)

Kamis, 18 Agustus 2011

Pecan Bread (Grain Free)


I've been meaning to try pecan bread for a while now, ever since a friend who can't eat any grains told me about it. So last week when I got a big bag of local, organic pecans through my co-op, I decided the time had come. I made it and loved it! It has a lovely texture, with a crisp, almost buttery, crust.  Have I ever mentioned how much I love nuts? Yeah. I do. So I'm really sorry if you have a nut allergy, but I can't cover all bases at once, and this bread is gluten free, grain free, dairy free, sugar free, low salicylate (with tweaks), high protein, low carbs, and... okay, it's not egg free, but we're running out of ingredients here, guys! 

Anyway, I googled 'pecan bread' and found this amazing blog, "Straight Into Bed Cakefree and Dried" (the quirky title immediately catching my attention), which has delicious SCD recipes (which means 'grain free' for the uninitiated!). Naomi is a homeopath and nutritionist in London who is herself a coeliac and coaches people through "the process of healing their gut and learning how to eat without gluten". A worthy cause. So I decided to try her Gluten Free Pecan and Apple Bread because it looked so good, and I loved her blog title. :) And here it is, with a few Thermomixin' tweaks of my own. Enjoy!

P.S. Even though it has apple in it, that is more for moistness than sweetness - this is not a 'sweet' bread like banana bread - it's a bread that can be used for sandwiches or toast or just eaten happily on its' own.

P.P.S. This also has almonds in it. In fact it has more almonds than pecans. So I'm not really sure why it's called pecan bread without any allusion to almonds, but it is. And also, if you are on the *Failsafe diet, you can cut down the salicylates by using hazelnuts instead of pecans. Of course, then you might like to call it hazelnut bread or it could get confusing. Okay. On to the recipe...

* For more Failsafe tips, see the comment from Naomi below!


Preheat oven to 160 degrees C. Line a bread tin with baking paper and set aside.

1. First you need to make some coconut butter. (I loooove this stuff!) This is what gives the bread that buttery crispness. You could use creamed coconut (which is what the original recipe calls for), but if you have a Thermomix, coconut butter is much cheaper and so quick and easy. It only takes 4 minutes, and the only ingredient is shredded coconut. So just pop over to "Super Kitchen Machine" and get the recipe, then pop back here. Thanks. :)

2. Now, after you've scraped the coconut butter out of your Thermomix into a dish, place the almonds in the Thermomix bowl (no need to wash the bowl) and grind up on speed 8 for 10 seconds:
- 200g raw almonds

3. Add the pecans and chop on speed 5 for 6 seconds:
- 120g raw pecans (or use hazelnuts for a low salicylate version)
   Remove the ground nuts to a bowl and set aside.

4. Place in the Thermomix bowl the following ingredients, and mix on speed 6 for 10 seconds:
- 1 apple, quartered (no need to peel)
- 5 large free range eggs
- 50g macadamia oil (or grapeseed, or other light oil)
- 1 tbspn lemon juice (or 2 tsp apple cider vinegar)
- 3/4 tsp bicarb soda
- pinch of fine sea salt
- 60g coconut butter

5. Scrape down sides and add the ground nuts back in to the mixture, mixing for a few more seconds on speed 6.


6. Pour into the lined tin and bake for an hour or so, until risen and browned; a skewer poked down into the centre of the bread will come out clean when it's ready. (I know the original recipe says 40 mins, but mine took over an hour - may depend on the oven, or I may have used less nuts than she did - I was kind of guessing amounts. Never mind, it worked!)


7. Let the bread cool for 10 minutes before removing carefully from the tin. Pull it up with the paper so you don't break it. It will firm up as it cools.

We ate it warm with naturally sweetened apricot jam, then had it the next day toasted. It makes lovely toast! It's great for sandwiches too. I really wanted to try it with grilled strawberries and Rapadura, but the strawberries were all gone. Next time.

If you won't use it within a day or two, it can be sliced thinly, frozen in loose layers, then when completely frozen, wrapped and kept frozen to use a slice at a time.


Hope you like it!

And thanks Naomi. :)