Tampilkan postingan dengan label breakfasts. Tampilkan semua postingan

Minggu, 06 Oktober 2013

Quick & Easy Pancakes - 3 Ways


Someone mentioned to me the other day that they love my Blender Batter Pancakes recipe, but that sometimes they're in too much of a rush to do the whole 'prepare the night before' thing, and they needed a simple pancake recipe for times like that. I agree - I don't always soak the grains the night before, because pancakes are sometimes a spur of the moment thing. Like last night.

We arrived home from our road trip to Mackay in the afternoon, and I managed to scrounge through the fridge and freezer to find mince and veges for a quick dinner. But by 8pm I was hungry again. That's when it dawned on me that while I was away my mum had stocked up the big freezer with half a pig (homegrown by a friend and butchered locally). AND I had just bought a litre of organic pure maple syrup from Sprout in Townsville. Perfect. Pancakes, bacon and maple syrup, coming up! (Yes, I know, soup for breakfast and pancakes for supper... I'm weird like that.)


I used to work at a roadside cafe for a Canadian lady when I was 18, and she found it very strange that I didn't know how to make pancakes just off the top of my head. It made her quite impatient when I'd ask her 'How much flour was that again? How much milk?' So I soon learnt, and nowadays I don't usually measure, just chuck in a bit of this and a bit of that until they look right. But just in case you are like my 18 year old self and need a recipe, I've written out the measurements for you. Feel free to tweak to taste - more milk for thinner pancakes, less milk for thicker. And I've added a few variations, so you can pick between spelt, gluten free and grain free coconut flour pancakes. If you need an egg free or nut free variation, check out the notes below the recipes.

Enjoy!


Quick & Easy Pancakes

250g spelt flour (white and/or wholemeal) or 220g plain gluten free flour
2 tsp baking powder
1/4 tsp fine sea salt
300g rice-almond milk or coconut milk (or alter amount depending on preferred thickness)
30g macadamia oil or soft butter
1 tsp vanilla extract
1 egg (optional - see notes)
coconut oil for cooking pancakes

Place dry ingredients into mixing bowl and blend 5 sec/speed 5.

Add remaining ingredients (except oil for cooking) and blend 10 sec/speed 5.

Heat a heavy based frying pan over medium-high heat and add 1-2 Tbsp coconut oil. Once it melts, pour in 10cm circles of pancake batter, and turn heat down slightly to make sure the pancakes don't burn.

Cook until bubbles are forming and popping in the batter, and edges are becoming crisp. Turn over and cook until lightly browned.

Remove pancakes to a plate, add another 1-2 Tbsp coconut oil, and continue cooking pancakes until batter is finished.

Serve hot with butter (opt) and pure maple syrup, or sprinkled with Rapadura or coconut sugar and freshly squeezed lemon juice. Leftover pancakes can be stored in an airtight container for up to 2 days and served with jam as pikelet, or reheated under the grill.

This batter also works well for waffles.

Notes:

To make these egg free you can use egg replacer, or chia eggs (1 Tbsp chia seeds + 3 Tbsp water), or half a mashed banana, or just add a little extra milk.

For nut free, use olive oil, coconut oil or butter, and coconut milk instead of rice almond milk.


Coconut Flour Pancakes

5 eggs
170g almond milk or coconut milk
70g coconut flour
30g macadamia oil
1/2 tsp vanilla extract
1/8 tsp fine sea salt
2 tsp baking powder

Place all the ingredients into the mixing bowl and blend 10 sec/speed 6. Scrape down sides of bowl and reblend briefly on speed 3 if needed.

Cook as above.

Notes:

To make almond milk, just mill 100g raw almonds 10 sec/speed 9, add 500g water and blend 
1 min/speed 9. No need to strain the milk for this recipe.

Coconut flour really needs the eggs to work, although maybe banana would work instead. 
I haven't tried that yet - let me know if you do!

For nut free, use soft butter or coconut oil instead of the macadamia oil, and coconut milk instead of almond milk.

Sabtu, 06 Juli 2013

Weekly Highlights


This week has been super busy, and although some of you may think I'm Super Woman and keep up with everything effortlessly, I'm not, and I don't. In fact, today I feel a bit like my little nephew after a hard day of being Super Man...

(Isn't he just too cute?)

Yep. That's me right there.

This week has been: school holidays and lots of kids coming and going; an exciting project I'm working on (which I'll tell you about soon); lots of cooking (mostly for the exciting project); wrapping up loose ends with my job (I'm scaling down there - can't do everything!); sight seeing tours with a visitor from overseas; a birthday party with a bunch of noisy boys (plus a few girls who don't like to miss out on nerf wars and messy fun, ie. my 16 yr old and her friends); plus everything else. Result: exhausted 'super woman' with saggy muscles. Lol.

So here's a quick update, with the highlights from our discussions on the Quirky Cooking Facebook page...


I bumbled my way through the boys' birthday BBQ on Thursday. I'm not great at organising amazing kids' parties. I'd rather just supply some food and let them entertain themselves by running around outside, so a BBQ at the lake seemed like the easiest option. Sadly, the weather turned bad so we arrived at the lake, took one look at the wet and windy BBQ 'shelter', then turned around and drove back to town. Thankfully my lovely friend Giselle was happy for a party of 14 boys (plus a few girls) to descend upon her home and run around crazy in her yard, so a fun time was had by all despite the rain.


Of course, being a country kids' birthday party, it included things like an 'epic' nerf war (I borrowed that word from Mr I, who seems to say it a lot), bushwalking to a waterfall, throwing rocks into a volcanic crater, and eating sausages and fried onions in bread with plenty of tomato sauce. No lollies at this party, or party games or party bags - but I'm pretty sure they all had a good time. :)


I managed to get a birthday cake made before dashing out the door in the morning - another Zebra cake (Mr I's request), but with a few changes to make it healthier and yummier. The kids loved it. It's a bit messier than my last one as I was in a hurry, but I really don't think the kids noticed.


It's funny how we mums sometimes think that if we don't do everything 'just right' the world will fall apart. I'm always reminding myself that there are more important things to worry about in life than whether a cake is beautifully decorated, or a party is perfectly organised. Sure, if you can do it and enjoy it, that's great! But getting stressed out over things like that just spoils the fun. So we had a slap dash, informal party, and a fun day was had by all. 


Here's what's been happening on my Quirky Cooking Facebook page this past week... 


FOOD


Pear recipes: This 'Whole Poached Pear Cake' was being tested and tweaked this week in my kitchen. I'm working on a dairy free, grain free version, and although it's not quite there yet, it still tasted delicious! What are you favourite pear recipes? Try some of these out.

Flourless Chocolate Espresso Cake: the lovely girls from Confetti Mag shared my cake recipe on their blog - check out the recipe here, and make sure you subscribe to their beautiful online magazine!

I'm also working on a recipe for a gluten free, dairy free shortcrust pastry... lots of pies being cooked here lately! (No one's complaining.) No recipe yet, all part of the 'project'.


Weird breakfasts: I explain why I eat weird things for breakfast, like chicken soup and fried rice, here.

How to make soft eggs, poached in the shell: too easy, very quick, and delicious! Photo and recipe here.

Don't have time for a 'proper' breakfast? My quick protein smoothie recipe.

A very interesting version of my Creamy Chicken & Brown Rice Soup: You know that soup that everyone's making? Well, you may not want to make it like this. Then again, maybe you will, just for fun!! :D

15 foods that can be regrown from scraps: great tips from Mrs Happy Homemaker

Favourite thermomix chicken recipes: Got chicken? Try these!

Trout recipes: some tips and recipes for cooking trout here.

Homemade two minute noodle seasoning mix: healthier versions you can make yourself!

Healthier biscuits to replace Tiny Teddies: some great ideas here for little homemade bikkies for kids, without the nasties.

10 reasons to make your own bone broth: check out this article by Alexx Stuart - I call bone broth 'liquid gold'. 

How to dry ripe olives: tips for drying and perserving olives here.

How to make dairy free dulce de leche with honey to sweeten: a reader's tip!

Homemade fruit chutney: readers' favourite recipes here.

Chilli jam recipes: find some recipes and links here.

Fig jam recipes: made with dried figs - ideas here.

Pickles: I also made pickled cucumber slices this week, so if you're wanting to try them yourself, the recipe is here - first half of recipe is in the comment on the photo, second half of recipe in the last comment on the photo. (These are not sweet pickles, they're the salty, vinegarry type.)


HEALTH

Homemade face masks: no need to spend big bucks on fancy schmancy facial treatments! Try these homemade face mask recipes!

10 reasons you should be using coconut oil: here's why I love coconut oil...

Why sugar makes us sleepy and protein wakes us up: ...and this is why I eat protein at breakfast time!

A reader's experience: how a mum got her daughter have more energy by giving her a protein breakfast before school! Her story here.

Sucrase Isomaltase Deficiency: a disorder that affects a persons ability to breakdown sucrose (fruit/table sugar) and maltose (grain sugar). Donna asked for some recipe ideas, in particular snacks & lunch box treats, for her 5 year old with SID - here's the answers and ideas that were shared.


AND OTHER STUFF

French Rules for Feeding Children: the French are known for having children who will eat all sorts of things - fussy eaters are just about unheard of! Here's some tips for developing great little eaters.

Nut milk bags: what do you use to strain your nut milk? Reader's tips and favourite brands.

How do you store recipes you find online? Here's readers' favourite ways to keep track of recipes they want to make.


Have a great week everyone!


Miss C and Shadow have the right idea...

Rabu, 06 Februari 2013

Banana Raspberry Muffins


Do you know what's so special about these muffins? (Besides the fact that they look and taste awesome?) You can make them with whatever bits and pieces of grains and seeds and nuts and flours you have lurking in your fridge, freezer and cupboard, and they will be a.m.a.z.i.n.g.

Really.

Here's the secret... Soaking!

Yes, if you soak your grains, seeds, nuts, etc, overnight in water with a little bit of something acidic (like apple cider vinegar, lemon juice, whey or yoghurt), you will be amazed at the difference in the texture. The soaking softens the grains/seeds/nuts so that you don't have that dry, gritty texture that can often be the outcome in gluten free baking. And it helps to break down the anti-nutrients that cause irritation to the gut, and helps to release the beneficial nutrients. Basically, it makes them much easier to digest, AND yummier!

[Note: If you're worried about using the soaking water, don't be. You don't need to throw out the water that the grains have been soaked in, as the soaking actually causes the phytase to increase and break down the phytates. The phytates aren't just leaching out into the water and staying there, they are being broken down. The only reason you would throw out the water and rinse the grains is if the water tasted sour or bitter.]

Okay, so don't think I'm telling you this because I've got this soaking thing all under control. I'm the world's worst 'last minute' cook - I get a sudden inspiration and have to make it right away! Which means....ummm... unsoaked. But when you can, it is best to think ahead - prepare, soak, ferment, sprout... all that good stuff. :)

A good way to plan ahead is to think about breakfast tomorrow at dinner time tonight. If you'd like to have muffins, pancakes, waffles or crepes for breakfast, either grind the grains up and then soak overnight with the liquids from the recipe, or in some cases (like these muffins), soak the grains & nuts whole. To use whole grains/nuts it needs to be a recipe that has quite a lot of liquid - a batter, not a dough. When you blend it, it needs to be able to create a 'vortex' in the Thermomix - if it doesn't, it's too thick for this method.

I have posted a few of these 'blender batter' recipes before, but I've been going through a lot of my older recipes and tweaking them to reduce the sugars. So here's one of my latest versions of the Blender Batter Muffins, with a lot less sweetening, and my latest combo of grains, seeds and nuts.

By the way, if you don't have a Thermomix, you can try this method in a really powerful blender that crushes ice. But please don't burn out the motor and blame it on me. Unless you just really want a Thermomix, so you're purposely breaking all your appliances so your partner will give in and let you buy one. ;) Otherwise, you could just buy the pre-ground flours and mix them in a mixer with the liquids, then soak overnight, and continue with recipe. Your call.


Makes approx. 2 dozen regular sized muffins

1. First of all, prepare the grains, seeds & nuts for soaking. This needs to be done at least 12 hours (or up to 24 hours) ahead. Weigh them into a glass bowl or dish, then weigh in the liquids. (Set the empty dish on the top of the Thermomix, zero scales, and weigh in the grains, water, etc.) Cover, and set aside for the night.
- 290g whole grains and seeds, your choice *(see note)
- 40g raw almonds (or sunflower seeds/pepitas for nut free version)
- 200g water
- 1 tsp apple cider vinegar (or whey/yoghurt/lemon juice)

(Note: For the muffins in the photo above, I used a couple of handfuls of buckwheat kernels, some millet, a little bit of quinoa, some brown rice and a couple of Tbspns mesquite flour. There's so many different gluten free grains and seeds that you can use - amaranth, teff and sorghum are great too - whatever you have, just so long as it all adds up to 290g. Although if you use a lot of buckwheat you'll need more water as it soaks up the moisture. And don't use coconut flour because it works differently and the ratio of flour to water would be totally out.)

2. When you're ready to make the muffins, tip the soaked grains, seeds & nuts into the Thermomix bowl (with the soaking water) and add oil, syrup, cream, bananas and eggs; then blend on speed 9 for 2 minutes.
- 20g macadamia oil (or other light flavoured oil)
- 60g pure maple syrup (or honey)
- 30g coconut cream (or milk of choice)
- 2 large bananas
- 2 large eggs

3. Scrape down sides of bowl and make sure mixture is smooth. If not, reblend for another minute. Once smooth, add the baking powder, soda and salt, and just barely mix in on speed 5 for 5 seconds.
- 2 tsps baking powder
- 3/4 tsp baking soda
- 1/2 tsp fine sea salt

4. Pour mixture into muffin cups, filling to 3/4 full. Top with a few raspberries, and bake in 190C oven for 20-25 minutes, or until skewer inserted in muffin comes out clean.

Variation: For Banana Spice Muffins, add 1 tsp cinnamon & 1/2 tsp nutmeg to batter, leave the berries off, and sprinkle muffins with cinnamon and Rapadura or coconut sugar before baking. Can also add a couple of handfuls of pecans or walnuts to batter with the baking powder & soda.

Minggu, 23 Desember 2012

Brioche Cinnamon Scrolls ~ Prepare Ahead


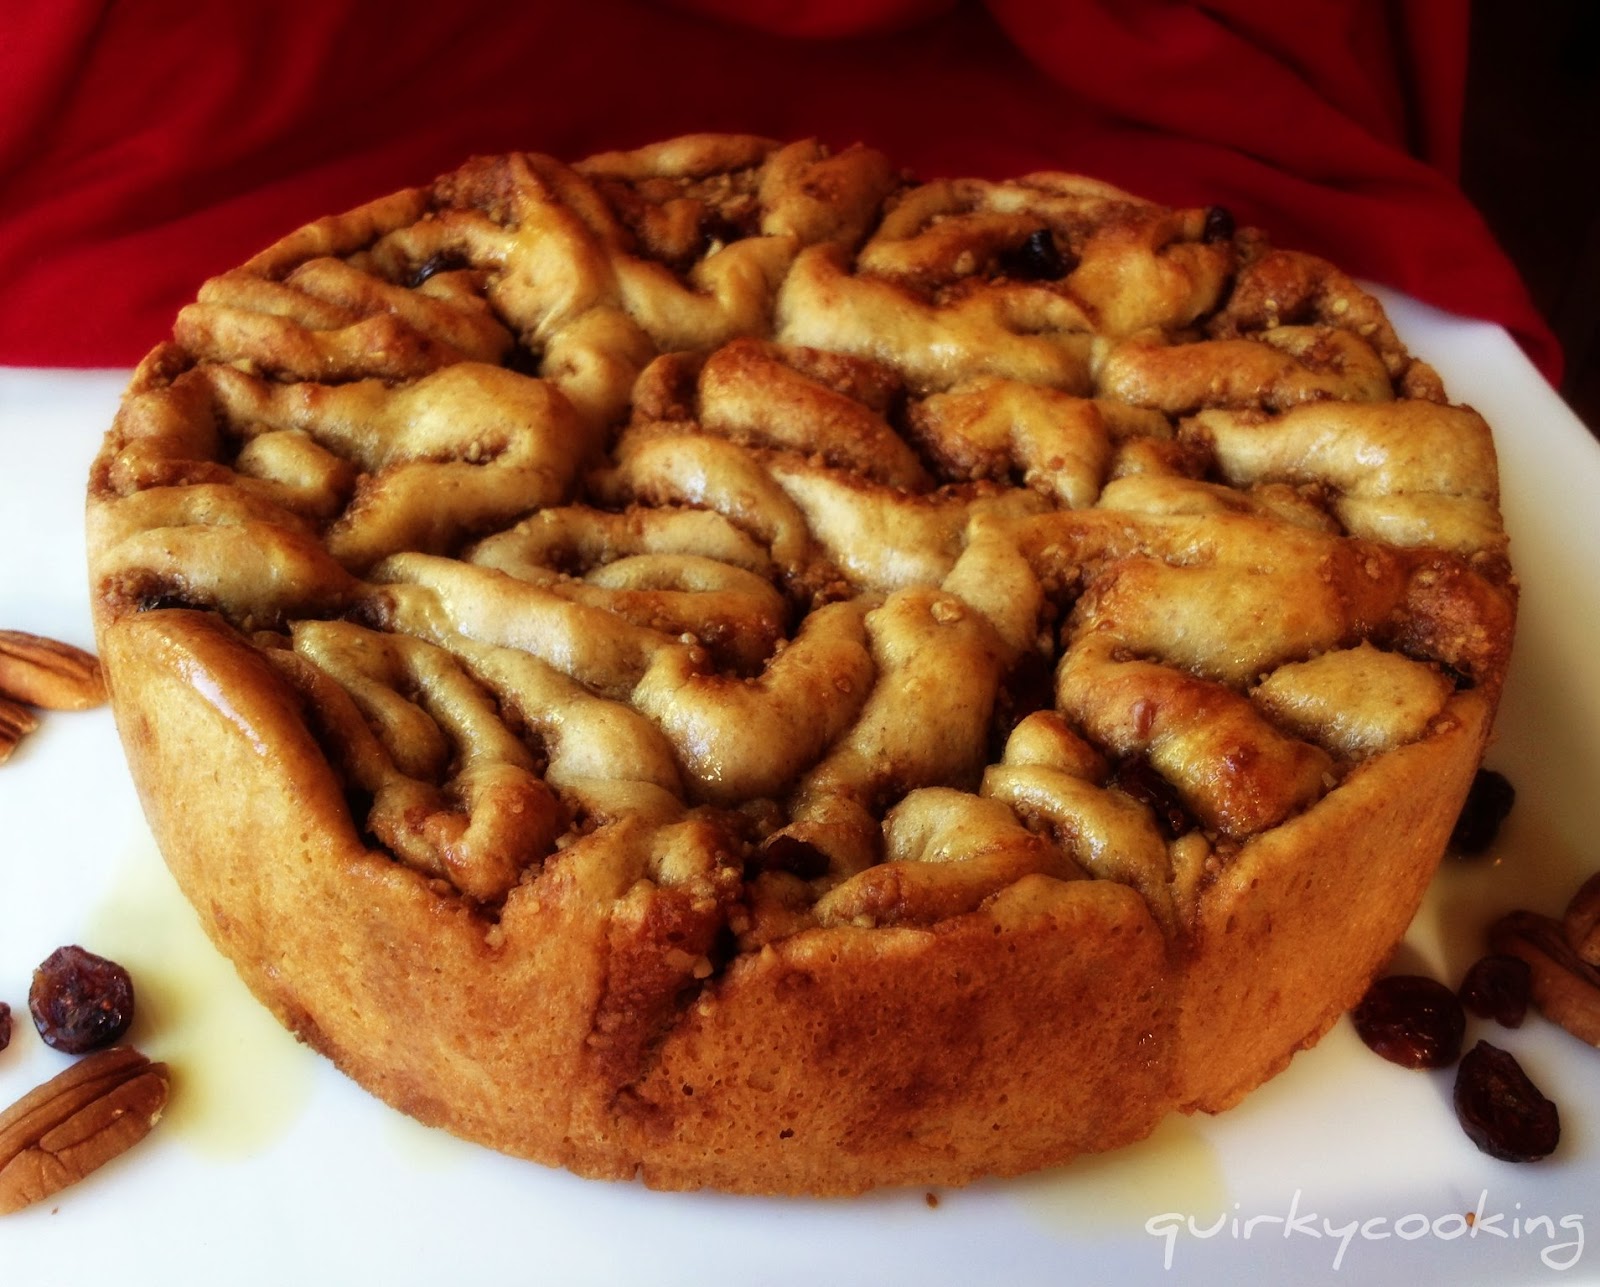
Okay, by popular demand, here's my recipe for dairy free cinnamon scrolls made with brioche dough, that you can prepare ahead and bake another day. We usually have cinnamon scrolls for Christmas breakfast, but we've had so many in the last month while I've been testing my recipes, that I really think we'll give it a miss and have something else this year. I never thought I'd say this, but I'm all cinnamon-scrolled out. But for those of you who aren't, here's the recipe! (Don't worry, by New Year's I'll probably be craving these again... these would be perfect for a lazy New Year's breakfast!) :D

By the way, if you're gluten free and wanting some cinnamon scrolls too, here's a recipe that looks good - I'm hoping to try it out soon, but if you beat me to it, let me know how it goes!


First, make brioche dough. (This is my spelt, dairy free version - if you're not dairy intolerant, you can use the regular recipe in the Thermomix Everyday Cookbook.)

1. Warm milk and rapadura at 37C for 2 minutes, speed 1:
- 300g rice-almond milk (or preferred milk)
- 30g Rapadura

2. Add remaining ingredients and mix for 10 seconds on speed 7, then lock lid and knead on interval speed for 2 minutes.
- 2 tsps instant yeast (1 sachet)
- 1 tsp salt
- 80g macadamia oil (or butter)
- 650g white spelt flour
- 1 egg

3. Wrap dough in a silicon bread mat (or place in oiled bowl and cover), and rise in a warm spot until doubled. Meanwhile, prepare filling.

4. Filling: Mix ingredients on speed 5 for 5 seconds, then set aside:
- 120g Rapadura
- 120g pecans or walnuts
- 2 tsp cinnamon
- pinch of sea salt
- 2 Tbspns coconut cream (or ghee or butter)

5. When dough is risen, roll it out on silicon bread mat to make a large rectangle, about 1 cm thick. Spread with soft butter or coconut cream. Sprinkle with all the filling, and dried cranberries or other berries.
- 2 Tbspns coconut cream (or soft butter)
- filling
- a couple of handfuls of dried, naturally sweetened cranberries (or fresh blueberries)
(I love these cranberries from
Honest to Goodness - they're sweetened with apple juice concentrate, and are very plump and delicious!)

6. Roll dough up into a log, lift carefully onto a cutting board, and cut slices about 3cms thick with a serrated knife. (If dough is too sticky, chill until firmer and easier to work with.) Lay slices in two greased or lined springform tins, bunched up together to fit them all in. (You can also cook these in cake tins, or even just on pizza trays. I find an enclosed tin works best though, so they don't spread out too much. They will dry out if they're too thin.)

7. If cooking straight away, drizzle with butter or coconut cream, then leave to rise until nearly doubled. Preheat oven to 200C while scrolls are rising. Bake for about 30 minutes, or until golden brown.
- 2 Tbspns coconut cream (or melted butter)

Drizzle with glaze while warm:

8. Glaze: Place ingredients in Thermomix bowl and cook at 100C for 2 minutes, speed 1:
- 50g pure maple syrup (or Rapadura)
- 50g coconut cream (or regular cream)
- 1/2 tsp vanilla extract


Preparing ahead to bake later:

- Quickest prepare ahead method: Don't drizzle with cream or butter, just cover the tin with plastic bags and place in the coldest part of the fridge overnight. The next morning, remove bags, drizzle with the melted butter or coconut cream, place in cold oven and turn it on to 200C. The bread will finish rising as the oven warms up, and will be baked in about half an hour. Drizzle with glaze and serve.

- Freeze ahead method: as above, but half rise then freeze. When ready to bake, allow to thaw in a warm spot (I place in cold oven with a pan of boiling water underneath) for about 1 1/2 to 2 hours (less if you are making scrolls in small tins). Set the timer so you don't forget they're there! They should be risen and thawed out before you turn on the oven. Drizzle with butter/cream, cook at 200C for about 30 mins or until golden brown. Top with glaze and serve.

Tip: You can make this a few days ahead, freeze, thaw in the fridge Christmas Eve, then finish thawing Christmas morning in a warm spot, then bake - that cuts down on thawing time for frozen scrolls.


Jumat, 09 November 2012

Layered Maqui Chia Pudding


Chia pudding (or porridge) is a staple part of my diet. I eat it for breakfast or morning tea, afternoon tea or supper. Sometimes all four! If I'm rushed, I eat it for lunch too. I'm kind of addicted to it. Here's why:

1. It's delicious. Think berries and cream with a chocolatey-nutty crunch!

2. It's quick and easy. It only takes 5-10 minutes to make my quick version.

3. It makes lots and lasts for a week in the fridge. So I can make up a big batch and have enough for a few days.

4. It's versatile. Every batch I make is slightly different to the last, depending on what I have on hand. (See variations below)

5. It's healthy. Chia has approximately 6 times more calcium than milk, as well as being high in Omega 3 and 6 fatty acids, and other essential minerals. Then there's all the goodness of the Maqui berry powder with it's high level of antioxidants, the coconut cream with it's lauric acid, and the benefits of whatever other superfoods you add, like goji berries and cacao nibs.

6. It's the perfect low GI, natural, 'sweet treat'. It keeps me from getting 'hangry' halfway through the morning or afternoon. {Hangry: 'A state of anger caused by a lack of food.' Know what I mean?} Chia seeds and mesquite powder are both great blood sugar stabilizers. As my mum used to say when she gave us porridge for breakfast, "It'll stick to your ribs!"

7. It travels well. I pop a batch into a jar and take it with me as I dash out the door. I even took some on the aeroplane the other day for my lunch... The guy next to me was looking at me a little strangely as I ate my pudding and drank my green smoothie from a jar, but hey, I'd rather that than the dry white bread sandwich and softdrink he had for lunch!

And if that's not enough, here's Jess the Wellness Warrior's 13 Reasons to Eat Chia Seeds Every Day!


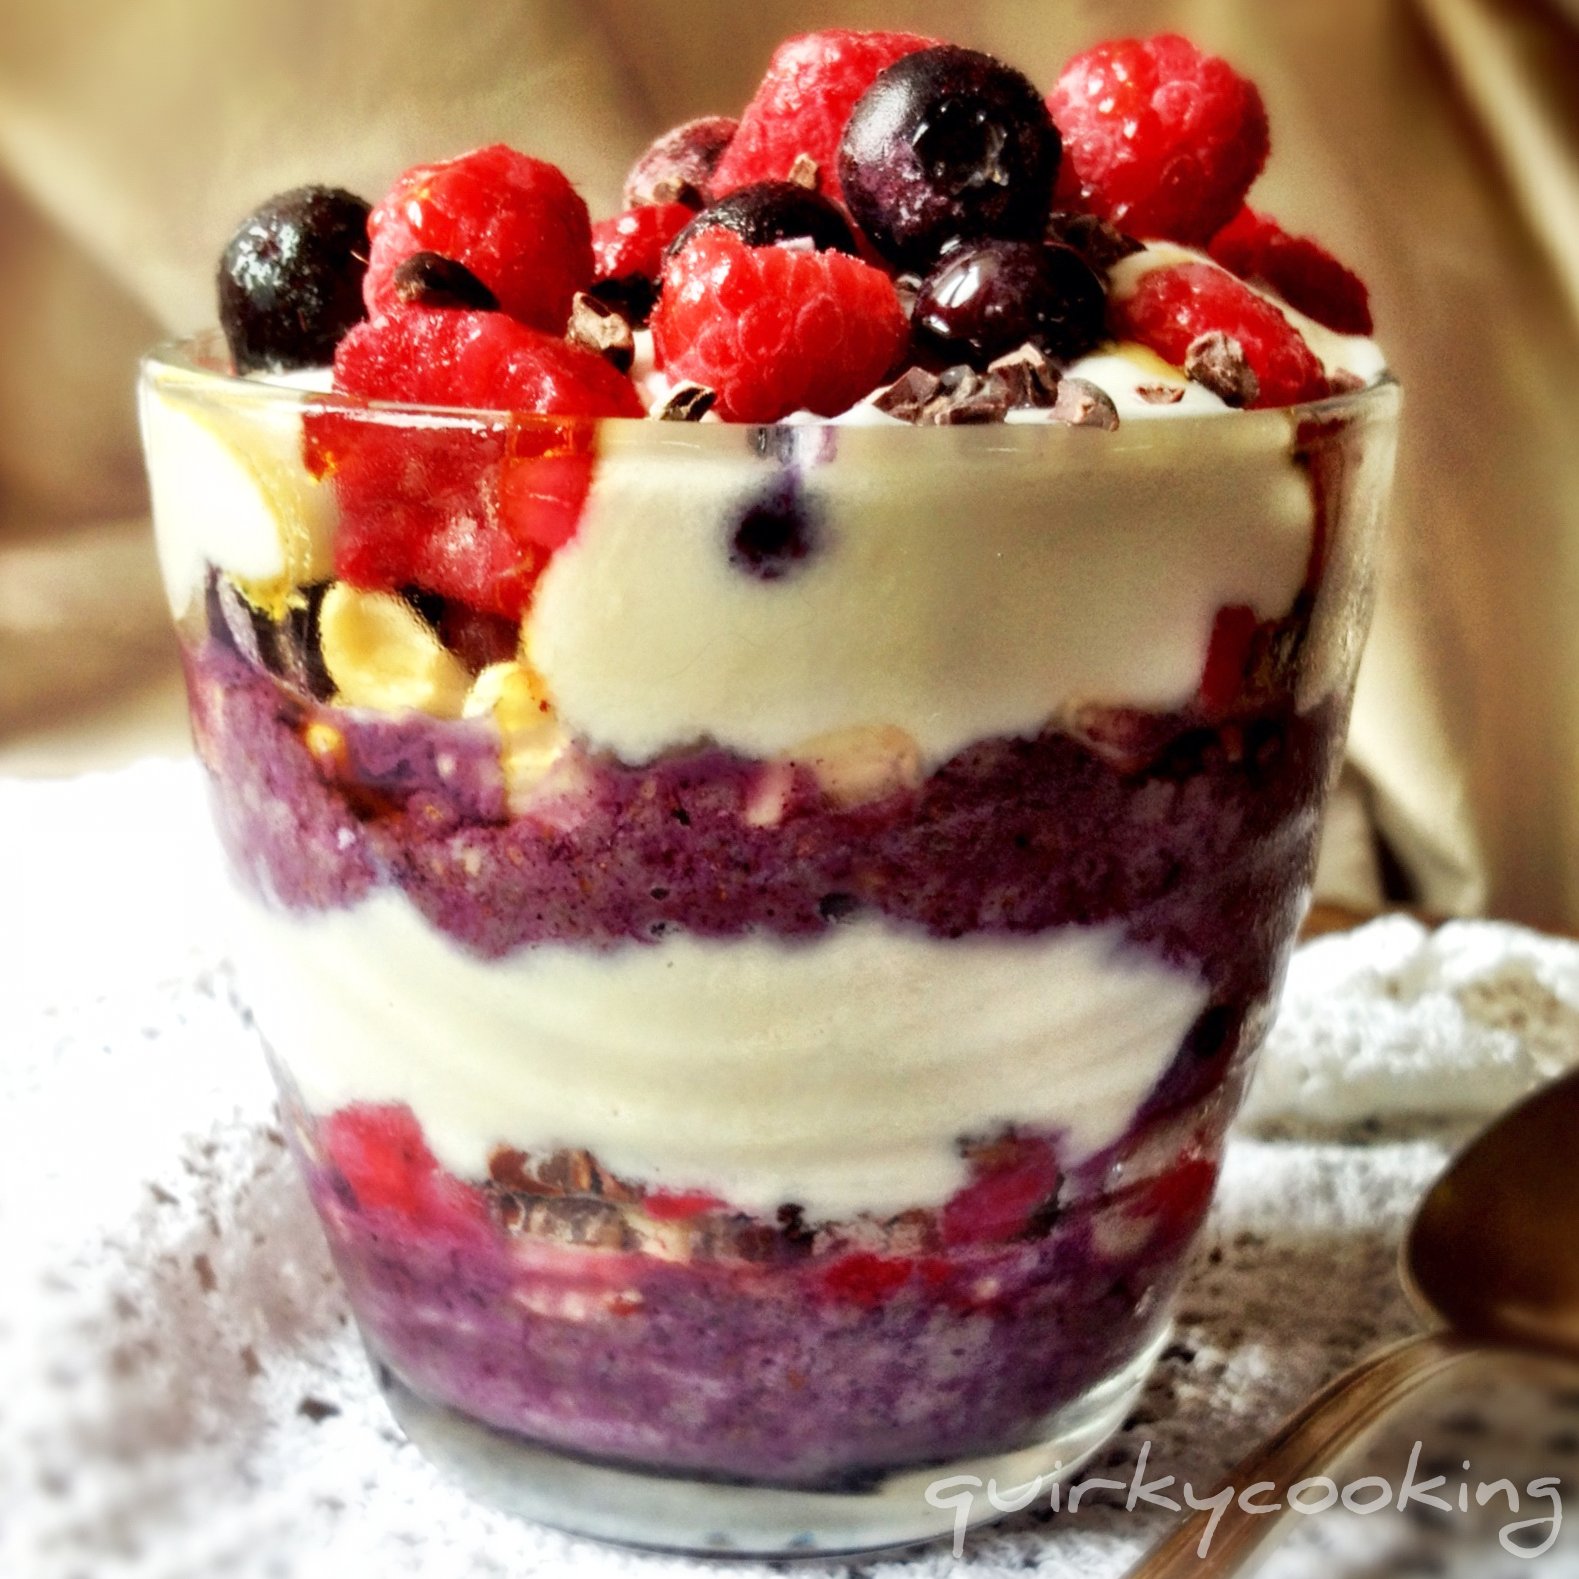
One Layered Maqui Chia Pudding to go...

And just in case that's not enough reasons for you to try chia pudding - it looks pretty! Especially when you layer it.


There's lots of different recipes around for chia puddings and porridges, usually involving at least 40 minutes of soaking time, or soaking overnight. Sarah from 'Homemade, Healthy, Happy' has a delicious one here that I love, but I decided I wanted a quicker version - I'm usually in a last minute rush in the mornings, so 40 minutes seems a bit too long to wait for the soaking time. I find that by warming the pudding gently for a few minutes at 37C, the chia seeds soak up the liquid just as well as when they are soaked, without being 'cooked' and losing their goodness. I also wanted to make one that was kind of fun - which is why I layered it and called it a pudding instead of a porridge. ;-)

I've tried lots of different versions of chia pudding, and pretty much love them all. But this one is how I make it most of the time - with superfood Maqui powder for an antioxidant boost, plus lots of other yummy bits and pieces. My Instagram friends come up with some great combos, and I'm continually being inspired by other people's versions, like these on my Facebook page. To give you some more ideas of possible variations, here's a few others I've seen that look great!

- Coconut Water Chia Porridge (I keep meaning to try this, but I love coconut water so much that I always drink it before the porridge gets made!)

...and if you google 'chia pudding' and 'chia porridge' you'll come up with heaps more! The variations are endless.

{Note: Some people find too much chia can bother their tummy, especially if it's not soaked. If you find my quick version doesn't agree with you, try soaking the chia in the almond milk overnight in the fridge, then continue recipe as below. This is usually only the case for people with gut issues.}


Layered Maqui Chia Pudding 

First make the almond milk (below), or you can use coconut milk or coconut water instead.

1. Weigh almonds into Thermomix bowl and grind on speed 9 for 20 seconds:
- 100g raw almonds

2. Add water and blend on speed 9 for 1 minute:
- 550g filtered water

3. Add following ingredients, and cook at 37C for 5 minutes, speed 1:
- 85g chia seeds
- 1-2 tsp Mesquite powder
- 2 Tbspns Yacon syrup or raw honey
- 1 tsp ground cinnamon (optional)
- pinch of ground nutmeg (optional)
- 1 tsp vanilla bean paste
- a handful of raw cacao nibs
- a handful or two of goji berries and/or sultanas


Maqui berry powder - full of antioxidants!

4. Remove pudding to a dish or large jar to keep in the fridge. (It will be a little runny at first, but I make it like that on purpose because it gets thicker as it sits, and I don't like it too thick.) For each serving, layer the following in a glass or jar in the order given:
- a few Tblspns chia pudding
- a handful of raw cashews or macadamias
- a few blueberries
- a few raspberries
- a couple of blobs of coconut cream
- a drizzle of pure maple syrup

Repeat the layers.


Variations:

- Instead of vanilla bean paste, you can use a whole vanilla bean. Pop it in with the almonds and grind them up, then add water and blend.

- If you don't have Maqui powder or Mesquite powder, that's okay. I like to use them because they add extra goodness and the Maqui makes the chia such a lovely colour, but it will taste fine without. Try stirring in some homemade (sugar free) strawberry jam instead - my friend Emma suggested this, and it's delicious!!

- Try a coconut version: blend up the water and flesh of a young (green) coconut and use that instead of almond milk; leave out the yacon syrup or honey as the coconut water is sweet enough on it's own.

- If you can't have nuts, try coconut flakes instead, or maybe some toasted pepitas.

- Swap the coconut cream for coconut milk yoghurt, and instead of berries try some slices of mango. Drizzle over some passionfruit pulp instead of pure maple syrup.

- Try cherries with cacao nibs and chocolate covered goji berries, topped with coconut flakes. Mmmm....

- Fresh and juicy peaches, nectarines or strawberries are great too, instead of the berries.

- You could use other sweeteners besides Yacon syrup or honey or pure maple syrup - some prefer agave syrup, or coconut nectar, or carob syrup. Even stevia would work in the chia pudding. I would suggest sticking to a liquid sweetener though, as granulated sugars such as Rapadura wouldn't mix in so well.

Let me know what other great variations you come up with!


Now, for those of you who would like to try some Yacon Syrup, Mesquite Powder or Agave Syrup, Loving Earth has kindly given me some to give away. So leave a comment below saying what variation of Chia Pudding you'd like to try, and next Saturday (17th November) I'll pick 3 comments via Random.org and the winners will receive one of the above products to try! One comment each please, and let me know which product you'd prefer to win in your comment, so I can put you in the right prize draw. Woo hoo, thank you Loving Earth!!

{To find out more about all these interesting ingredients I use, click on the links and they will take you to pages with more info.}


Sabtu, 29 September 2012

Buckwheat & Almond Crepes (or Wraps)


Buckwheat & Almond Crepes
filled with Strawberries & Vanilla-Cashew Cream

This morning I decided to make crepes out of buckwheat and almonds for breakfast. They were the best I've ever made! The secret? Partly the recipe (which was one I made up on the spur of the moment, knowing the basic ratio for crepe recipes), and partly the way I cooked them. I couldn't wait to share the recipe on Facebook, but I held back a bit of info so I'd have something to blog about... lol!

I don't know about you, but I've always found crepes a bit of a pain to make. Unless you have a good crepe pan, they can get stuck, or tear when you try and turn them over. So this morning I decided to save time and effort, and, well, CHEAT!! I cooked them in my sandwich press. :) It worked SO well that I won't cook them any other way now. It was really, really easy. No messed up crepes, not even one! This really is the simplest, quickest way to make crepes EVER.


This recipe is obviously gluten free; practically grain free (since buckwheat is not a grain); and it's also dairy free. (It's not egg free, but I'm thinking it could be if you used chia seeds instead of the eggs, and increased the amount of water a little. I'll try that soon and let you know how it goes.) The ground up almonds plus the water make the 'milk' for the recipe. It just so simple. I love recipes that really get back to the basics, and this is one of those.

These crepes are also perfect to use as savoury wraps; just leave out the vanilla. Gluten free wraps are generally awful - they are dry, and crumble when you try to wrap them around your food. But these crepes are soft and pliable, and are fine the next day so you can make them ahead. I also find these ones don't go soggy like the last gluten free crepes I tried to use as wraps, so that's another big plus! So make up a batch, and keep them in the fridge in a sealed ziploc bag, ready for school lunches - much cheaper and healthier than bought gluten free wraps, and they taste lots better.

Oh, and by the way, you can cook them longer and they'll turn into crisp 'wafers', which you can cut into wedges and serve with ice cream! Such a versatile recipe :) Hope you like them!


Buckwheat & Almond Crepes/Wraps

Soaked method:

1. Soak buckwheat and almonds in water, with vinegar, in a glass bowl (covered), overnight:
- 150g buckwheat, hulled
- 100g raw almonds
- 450g water
- 1 tsp apple cider vinegar

2. Next morning, blend soaked buckwheat and nuts in the soaking water on speed 9 for 2 minutes, adding a little water if needed. The mixture should form a vortex while blending - if it doesn't, it's too thick and you need to drizzle in water until it does. You should be able to see the metal top of the blades while it blends.

3. Add remaining ingredients and blend again for 1 minute, speed 9:
- 3 large eggs
- a pinch of salt
- 2 tsps vanilla extract (leave out if making savoury wraps)
- 45g macadamia oil (or other light flavoured oil)

4. Leave the batter to sit for 15 minutes in a cool spot, or in the fridge. It will get a bit thicker, so check it to see if you need to add any water. It shouldn't be as thick as pancake batter. (You can always add more water after the first crepe is made, if it's too thick.)

5. Preheat sandwich press. When it's ready, pour in the crepe batter, making sure you only make the crepe half the size you want it, as it will spread. (You can of course cook these in a crepe pan or frying pan instead of a sandwich press. You'll need a little oil or butter in the pan for each crepe. I would use coconut oil or ghee.)


6. Gently close lid and allow to cook until ready (about a minute, maybe a little more). If you want crispy 'wafers', cook until brown. (Don't worry if your crepes are a little bit crisp around the edges when you remove them - they soften up as they cool.)


7. Place crepes on a plate as you cook them, covering with a tea towel to keep warm. Leftover crepes can be stored in a plastic bag in the fridge for a few days.


Non-Soaked Method
(for those of you who are in a hurry to make these and can't wait!)

1. Grind up the dry buckwheat in your Thermomix bowl on speed 9 for 1 minute:
- 150g buckwheat, hulled

2. Add almonds and grind for another 20 seconds, speed 9:
- 100g raw almonds

3. Add remaining ingredients and mix for 30 seconds on speed 9:
- 3 large eggs
- 450g water
- pinch of salt
- 2 tsps vanilla extract (leave out if making savoury wraps)
- 45g macadamia oil

4. Cook as per instructions above.

I like my crepes filled with fresh strawberries and vanilla-cashew cream, and drizzled with a little pure maple syrup... How do you like yours?

Selasa, 25 September 2012

Huevos Rancheros and Vegetarian Nacho Sauce with Kidney Beans

 
Huevos Rancheros for one!
{Dairy-Free, Gluten-Free, Grain-Free}
 
Okay, lots of people are asking for this recipe, so here it is. This is actually two recipes in one, as I use the same sauce for both recipes. Huevos Rancheros (or 'Ranch Style Eggs'), and Vegetarian Nachos.
 
Huevos Rancheros are great for a hearty, protein-rich breakfast, or for a quick dinner when you really don't feel like cooking. Or pretty much any time in between. :) Basically, for those of you who are wondering, they are eggs poached in a spicy, Mexican style tomato sauce. Kind of like a salsa, but a little more soupy. I add kidney beans to mine, but they're optional. As the eggs poach in the simmering sauce, it will thicken up, so the end result is more like a cooked salsa with poached eggs.
 
I use the same sauce for nachos, only I don't add water. I make the sauce in my Thermomix, and it's so, so easy and quick. If you keep a couple of tins of kidney beans and a bag of plain (preferably organic) corn chips in the cupboard, and always have tomatoes and eggs on hand, you'll never be stuck for a quick meal or two.
 
Here's both recipes, starting with the nacho topping:
 
 
Nachos with Kidney Bean Topping (and Avocado Cheese)
{Recipe for avocado cheese still in the 'tweaking' stage...}
 
 
Vegetarian Nacho Topping with Kidney Beans
 
1. Place in Thermomix bowl and mix on speed 5 for 5 seconds:
- 1 onion, halved
- 2-3 cloves garlic
 
2. Add oil and saute for 2 minutes, 100C, speed 1:
- 30g olive oil
 
3. Add and chop for 5 seconds on speed 6:
- 400-450g fresh tomatoes, halved (4-5 tomatoes)
 
4. Add and cook for 5 minutes, 100C, speed 1:
- 160g tomato paste
- 2 Tblspns Rapadura or 1 Tblspn honey
- 1/2 to 1 tsp chilli powder (depending on how spicy you like it)
- 1 tsp cumin powder
- 1 tsp coriander powder
- 1 tsp dried oregano
- 1 tsp smoked paprika
- 1 tsp balsamic vinegar
- 1 tsp vegetable stock paste OR salt to taste
 
5. Add beans and cook for 2 minutes, 100C, reverse speed 1:
- 2 tins of kidney beans, drained & rinsed

Serve over the top of corn chips or fried/baked corn tortillas; top with dairy free sour cream and guacamole if you like.

OR

Use the sauce to make Huevos Rancheros!
(I often make nachos, then use the lefover sauce for Huevos Rancheros for one or two people.)


Huevos Rancheros

1. Pour sauce into a heavy based frying pan. (I use my big Scanpan if I'm making this for the whole family, or my small cast iron skillet if it's just for one or two.)

2. Add a little water, so the sauce is a bit soupy and will be able to simmer, and won't just bubble and spit and stick to the bottom of the pan. (Depends on how much sauce you're using as to how much water to add - I just guess.)

3. Turn stove on to medium heat and warm sauce until it's bubbling. Turn heat down to a simmer and let it simmer for a minute or two.  Make indents in the sauce with a large spoon, and crack eggs into the sauce. I usually use 2 eggs per person, so again, it depends on how many you're cooking for.
- 2 eggs per person

{Note: if you can have cheese, you might like to grate some cheese over the top of the eggs. I skip this step - they still taste great without the cheese.}

4. Place a lid on the pan and allow the eggs to poach in the sauce for a minute or so, depending on how you like your eggs... I only cook mine briefly, as I like them gooey, like this:


But feel free to cook them longer if you don't like them gooey. :)

5. Huevos Rancheros are traditionally served on a fried corn tortilla, but I generally have them by themeselves for breakfast. Or if it's dinner, I'll serve them over some plain corn chips, with a green salad on the side.

So simple! Enjoy :)


Selasa, 03 Juli 2012

Fajita Chicken & Salad Pizza on Quinoa & Chia Seed Flatbread

* This recipe includes support for Paprika * 


This morning when I got up I decided that the last thing I wanted for breakfast was porridge or granola or eggs - I was starving! I wanted PIZZA!!

I looked in the fridge and spied a lonely chicken breast and some baby spinach, and decided on a quick chicken and salad pizza... I know, that doesn't sound much like breakfast food, but I tend to have all sorts of odd things for breakfast. I prefer a savoury breakfast to a sweet one. (Although I will make an exception for chocolate.)

The base of this pizza is made from quinoa and chia seeds, so it's a lot higher in protein than a traditional base. Protein is great in the morning as it fills you up for longer and gives you energy, whereas carbs will make you feel stodgy and sleepy. So skip the cereal and toast and go for pizza! ;-) That is, healthy pizza - not a stodgy, carby pizza. This one is gluten free, dairy free, egg free... even grain free if you don't count quinoa as a grain! (Which I don't, since it's really a seed.)

You can make the base soft or crunchy, depending how you like it. I use this pizza base recipe for flatbread too - I make mini ones for the kids lunches quite often. Spread them thin and cook them until just cooked, and they'll wrap around a filling. Or cook them longer so they're crisp like crackers and serve them with dips.


Snack size quinoa & chia seed flatbread with avocado & fire-roasted capsicum

Try some different toppings, like smoked salmon, sheep's fetta (if you can have it), olives, avocado, or fire-roasted capsicum. Or for a more 'breakfast-y' breakfast, top with scrambled eggs, sun-dried tomatoes and spinach, or a poached egg! Yum.


Quinoa & Chia Seed Flatbread (gluten free, dairy free)

Makes 2 large pizza size flatbreads, or a few mini ones

1. Toast the quinoa in a dry frying pan by stirring over medium heat for a few minutes. Or toast in Thermomix at 100C for 10 mins, speed 1, with MC off. [Optional - to get rid of saponins on outside of quinoa as it may otherwise taste bitter.]
- 150g white quinoa

2. Grind quinoa, chia and salt in Thermomix bowl for 1 minute, speed 9:
- toasted quinoa
- 2 Tbspns chia seeds
- 1/2 tsp sea salt

3. Add water and mix on speed 5 for 10 seconds:
- 180g water

Note: For a soaked version of the flatbread, skip the toasting of the quinoa. Instead, cover quinoa in water and leave overnight, strain in the morning and add quinoa to the Thermomix bowl with the chia, salt and water. Blend on speed 9 for 2 minutes, adding a little more water if needed, and scraping down now and then with the spatula.


4. Drizzle pizza trays with some extra virgin olive oil (use baking paper if needed), and divide dough between trays. (The dough will be more like a sticky batter.) Drizzle the dough with some more oil.


Using your fingertips, pat the dough out evenly into a thin circle, about 3mm thick. I find it's easier to use my fingers than a spatula, as the dough is very sticky. The oil will stop it sticking to your hands.


There should be oil all around the edge of the dough, and a thin sheen over the top. This will make it crispy. If you want it soft, there's no need to use much oil.


5. Bake at 200C for 20-30 minutes, depending how crispy you like it.


(You'll notice mine's quite brown after 30 minutes - don't cook it this long if you want it soft like the picture of the snack size flatbread.)


Fajita Chicken & Salad Topping (gluten free, dairy free)

While the pizza bases are cooking, make the toppings.

1. Chop garlic on speed 7 for 3 seconds

- 2 garlic cloves

2. Add the remaining ingredients except the chicken and mix on speed 5 for 5 seconds

- 20g extra virgin olive oil
- 10g tamari or gf soy sauce
- 1 Tbspn honey
- juice of 1/2 a lime
- 1/2 tsp ground cumin
- 1/2 tsp dried oregano
- 1/4 tsp sea salt
- 1/4 tsp smoked paprika
- 1/8 tsp onion powder
- dash of mesquite smoke seasoning (optional)

3. Add chicken and cook for 5 minutes, Varoma temperature, reverse speed soft, with MC off

- 1 chicken breast, thinly sliced

   (There will be a bit of 'juice' left after cooking the chicken - you can just lift the chicken out with a fork or slotted spoon. I actually drizzled the juice over the top of the pizza because it was too yummy to waste!)
 

4. When flatbread is cooked, remove from oven and top with
- baby spinach
- chopped tomato
- thinly sliced Spanish onion
- fajita chicken
- dairy free sour cream (optional - I didn't have any and was in a hurry to eat!)


Warning: this can be messy to eat, but it's worth it. :)