Tampilkan postingan dengan label desserts. Tampilkan semua postingan

Rabu, 05 Februari 2014

Chocolate-Cherry-Berry Dessert Pizzas


Last Saturday my niece came to visit from down south, so we got the kids' friends over for a pizza party to celebrate. There were at least 20 teenagers, plus a few other younger kids, and we all had a lot of fun!


To make the food side of things simpler, I got them to all bring pizza toppings to share. They chopped up the toppings while I made enough spelt pizza dough for about 20 pizzas (easy peasy in the Thermomix!), and then they all made their own pizzas. (In between soccer games, board games, remote control aeroplane flying, chatting, laughing, singing, and everything else!) So much more fun than buying pizzas, not to mention cheaper, healthier and yummier. Oh, and in case you're wondering, we used two ovens - mine and mum's - she just lives two doors down. :)


I also made mango sorbets with magic chocolate topping (see 'Day 7') for afternoon tea, which they loved, and no one complained about the lack of softdrink or junkfood, so they must be getting used to my strange ways! :D

After dinner I had a bit of a brainwave, and whipped up these dessert pizzas with the leftover pizza dough. I topped them with my homemade Chocolate Hazelnut Spread, some cherries and blueberries, zabliagone (a kind of egg yolk custard, no milk, a bit like sabayon), and flaked almonds. Delish!!

I used spelt bases for the kids, but if you're gluten free, don't despair. Use my recipe for Gluten Free Pizza Bases, adding 1 Tbspn of rapadura or coconut sugar to the batter. Blend it well so that the seeds are blended in. You could also use an almond meal pizza base recipe if you want a grain free, yeast free option. Try this one, leaving out the rosemary and garlic; swap the olive oil for macadamia oil, and add 2 tsp coconut sugar per base. See suggestions in recipe for a nut free version.


These pizzas are best served hot, so if you don't want to invite 20 hungry teenagers over for a party and your family won't eat three in one go, try this:

- Make the dough and divide into three portions; place remaining dough in bags and refrigerate or freeze dough for another day. (Dough can stay in fridge for up to a week.) 

- The chocolate spread will last in the fridge for a couple of weeks no problem, as will the cherries if left in the juice in the jar. The blueberries can be frozen. 

- Make zabliagone with 2 egg yolks, 1 tsp maple syrup and 1/2 tsp vanilla, for 10 mins cooking time total. 


Chocolate-Cherry-Berry Dessert Pizzas
Dairy free, with gluten and grain free options, and nut free option

(Makes 3 large pizzas)


Ingredients

Bases:
500g unbleached, plain spelt flour
2 tsp instant yeast
1 1/2 tsp fine sea salt
1 Tbspn Rapadura or coconut sugar
50g macadamia oil (or olive oil for nut free), plus extra for shaping dough
260g water

(or see gf options above)

Toppings:
1 batch of Chocolate Hazelnut Spread (or nut free chocolate spread/ganache, from this recipe)
  (freshly made - or use your own version of 'Nutella' or ganache)
1 800g jar of Morello cherries, drained
1 125g punnet fresh blueberries, rinsed
zabliagone (see below)
80g flaked almonds (or flaked coconut for nut free)

Zabliagone:
3 egg yolks
2 tsp pure maple syrup
1 1/2 tsp vanilla or almond extract

Method

Line 3 large pizza trays with baking paper, and set aside.

Place all base ingredients into mixing bowl and mix 6 sec/speed 6.

Knead on interval setting for 1 1/2 mins, then wrap dough loosely in Thermomat (or silicon bread mat, or place in oiled bowl and cover) and let it rest for 20 mins while you prepare the toppings.

Preheat oven to 200C, with pizza stones on racks if you have them.

After dough is risen, divide into three portions and press out into circles using a little more oil, and place on trays.

Divide chocolate hazelnut spread between the three pizzas and spread evenly over bases.

Scatter the cherries and blueberries over the pizzas, and set aside to rise while you make the zabliagone.

Zabliagone: Place egg yolks and maple syrup into mixing bowl, insert butterfly, and mix 6 mins/50C/speed 4. Add vanilla or almond extract and mix another 6 mins/50C/speed 4.

Drizzle pizzas with zabliagone and sprinkle over the flaked almonds.

Bake for approx 18-20 mins in hot oven on pizza stones (if you have them), until the zabliagone is lightly browned and the bases are cooked through.

Best served hot, while the base is crisp.

(Leftovers can be stored in the fridge in an airtight container, but they will get a bit soggy and the zabliagone will melt into the chocolate - although my kids don't complain! They still taste good.)


Selasa, 10 September 2013

Coconut Vanilla Sorbet


Spring is here, and the weather is finally beginning to warm up, yippee! At least, it is here, up in the mountains in Far North Queensland. 

For the last couple of months I've been putting off testing ice cream recipes for my book, as it's just been too cold. But today was absolutely gorgeous, and the sunshine encouraged me to get started. I decided to begin with a coconut sorbet, and it turned out so delicious I just couldn't wait to share it. (Don't worry, I have way too many recipes to fit in my book anyway, so I can afford to pop one on the blog instead.) :)


Photo taken this evening on our street ~ Spring is here!

I got the idea for this recipe a few weeks ago, when I saw a coconut sorbet in the freezer section of the grocery store. The ingredients were: coconut water (60%), cane sugar, coconut cream and flavour, desiccated coconut, dextrose, natural stabilizers (xanthan, guar gum, carrageen, maltodextrine). I figured I could make my own with less ingredients, no highly processed sugar, no flavours, and no carrageen. For less money. So that was my challenge... I hope you'll let me know what you think of the outcome! I haven't actually tasted the one from the grocery store so I have no idea if mine is the same sort of flavour, but I love this one and am very happy knowing it's healthier and costs less.

This sorbet actually took me right back to my childhood, when mum would make ice cream for us from fresh snow. Have you ever eaten 'snow ice cream'? When I was 4-5, we were travelling around the USA in a camper van for a year. When it snowed we would go outside and scoop up the clean snow, take it back into our warm camper van, and Mum would mix in some sugar and vanilla. We thought it was the most amazing treat ever. It's funny, I haven't thought about snow ice cream for years, but with my first mouthful of this sorbet, that's all I could think of! So I popped some into a bowl and dashed down to mum's house to give her a taste, and mum and dad agreed - just like snow ice cream. Great memories.

I hope you enjoy it as much as we did. 


Coconut Vanilla Sorbet
(dairy, egg, nut, gluten, and cane sugar free)

Makes just under a litre.

800ml unsweetened coconut water (eg. Natural Raw C coconut water)
100g thick coconut cream, preservative free (eg. Ayam)
60-80g pure organic maple syrup
1/2 - 1 tsp pure vanilla extract or vanilla bean paste (to taste)
dessicated coconut to serve (preservative free, available at health food shops) OR fresh coconut, grated

Freeze the coconut water in ice cube trays until frozen solid.

Place 400g of the coconut water ice cubes into the Thermomix mixing bowl, and blend
5 sec/speed 9, or until it becomes 'snow'.

Add remaining 400g frozen coconut water and blend 10 sec/speed 9, until 'snow'.

Add coconut cream (the thickest part from top of tin), maple syrup and vanilla, and blend 
1 min/speed 9, using the spatula to help it along. Remove lid and scrape down sides, reblending until sorbet is smooth and creamy, approx. 30 sec/speed 9.

Serve immediately, sprinkled with a little dessicated coconut.

Note: If you need to freeze some for later, freeze in ice cube trays and reblend when ready to serve.

Variations:

If you have fresh coconuts on hand, freeze the coconut water, and grate up the flesh to make coconut cream (see this recipe for instructions), saving a little of the freshly grated coconut to sprinkle over the finished sorbet. Delicious! (And dirt cheap!) 

Sweetener can be reduced to taste, or changed to a 1/4 tsp green stevia powder for a sugar free version.


Jumat, 23 Agustus 2013

Gooey Flourless Fudge Brownies {with Video}


Okay, I'll keep this short and sweet.

You guys want brownies. Grain free, dairy free, nut free brownies. At least I'm pretty sure you do, because when I posted the above photo on my Facebook page it got 181 shares, 1014 likes, and 229 comments!

So here it is. Your weekend treat. Enjoy :D

[Note: This is a Thermomix recipe - see end of page for tips for making this without a Thermomix.]


Gooey Flourless Fudge Brownies

- 200g dark, dairy free chocolate (I use either Green & Black's 70% cocoa chocolate which 'may contain traces of dairy', or Loving Earth dark chocolate which is completely dairy free)
- 130g raw Medjool dates, pitted
- 180g organic cold-pressed coconut oil
- 30g coconut flour
- 4 eggs
- 1/2 tsp vanilla extract
- 1/4 tsp sea salt

Preheat oven to 190C. Line a 22cm square baking dish with baking paper. I use 'If You Care' baking paper, which is non-toxic.

Place the chocolate (broken into pieces) into the mixing bowl and mill for 10 sec/speed 9.

Add the dates to the bowl and chop 15 sec/speed 10.

Add the coconut oil and cook 5 mins/60C/speed 2.

Add remaining ingredients and mix 20 sec/speed 8. Scrape down lid and sides of bowl and mix another 10 sec/speed 6.

Scrape mixture into a lined, square baking dishBake in preheated 190C oven for 18-20 mins. Be careful not to overcook or they won't be gooey! Just until a skewer inserted in the centre comes out clean.

Cool, cut into small squares, and refrigerate until cold.

Of course, you probably won't be able to wait, but they really do taste so much more AMAZING when they're cold and gooey and fudgey! Trust me.

Can be dusted with some raw cacao powder, or if you want to be really decadent, top with this dairy free ganache, or some dairy free dulce de leche!

PS It might be best to 'share the love' and invite a friend over for a cuppa and brownies... these are RICH, so don't eat them all yourself! Lol!!

Have a great weekend xx


This one was quite popular with the taste testers!!


* Note: If you don't have a Thermomix, you'll need to finely chop the chocolate and dates (in a food processor if you have one) and melt together over a double boiler with the coconut oil, whisking until smooth. Then stir in the remaining ingredients with a wooden spoon. 

Jumat, 21 Juni 2013

Dairy Free Condensed Milk & Dulce de Leche


The other day I asked on my Facebook page, "What's something you reeeeaaallly wish you had an allergy-friendly recipe for (and what's the ingredient/s that is stopping you make the original recipe)?" Well. I got lots of comments. Like about 180 of them. And one that was mentioned a few times was dairy free condensed milk, so I thought it was about time I had a go at it.

There are a few dairy free condensed milk recipes online - I had a quick look for Thermomix versions and found this one over at The Thermomix Diaries, which linked back to this one on the Thermomix Recipe Community. Of course, I had to have a play with the recipe to reduce the sugar (too much for me!), change it to a sweetener I prefer, and start with a creamier (dairy free) base instead of milk. And this is what I came up with... So delicious!! 

I've made it a few times now, each time a little different, so here's two different versions - one is just a basic dairy free condensed milk made with bought coconut cream, and the other is a dairy free dulce de leche (caramel) made from homemade coconut cream, inspired by this recipe over at the UK Thermomix FB page. I'm thinking you could use the dulce de leche recipe and just cook it for less time to make a 'from scratch' version of the condensed milk - that will be my next experiment! (Thought I'd better just hurry up and get this posted!!) 

By the way, great news - not once has it boiled over, or even gotten close. I know that's the dreaded danger when you make condensed milk or dulce de leche with cow's milk. (I remember the horror stories my friend Bel told me about the sticky mess all over her countertop and under her Thermomix! Eek!) Cow's milk has a tendency to do this when boiled, but I have never had a problem with dairy free milks and creams. (Hopefully no one proves me wrong!) 


Dairy Free Condensed Milk

Place ingredients in the Thermomix bowl and cook at Varoma temperature for 45 minutes on speed 4, with the rice basket on the lid (instead of the MC) to let the steam out.

- 1000g organic coconut cream (I used 18+% fat Spiral brand)
- 200g pure organic maple syrup

Leave to cool for a bit in the bowl, blend gently again on speed 3-4 for a few seconds (as it sometimes separates a little), then carefully scrape into a glass jar. This recipe will make about 400g, so it can be used to replace a tin of condensed milk in recipes.

[Note: When it's cold in the fridge you may notice little bits of coconut cream flecked through it that have kind of solidified - don't stress, if you whiz it up they disappear. And for most recipes, it wouldn't matter anyway as it will be cooked or blended with other ingredients.]

Okay, and now for the amazing Dairy Free Dulce de Leche!


Dairy Free Dulce de Leche

First make the coconut cream. Because it's going to be cooked anyway, just make raw coconut cream, it's quicker. 

[Note: If you're thinking of making this raw coconut cream to go in your fridge to be used for other things, just be aware that it will separate quite drastically - when you cook it, it stays 'together'. If it's going to be added to a recipe straight away it doesn't matter, but if you like it in your coffee (like I do), cooked is best. (Recipe for cooked coconut cream is here.)]

1. Grind up the coconut for 20 seconds on speed 9.
- 300g organic dessicated or shredded coconut 
(you can buy preservative free coconut from the health food shop)

2. Add water and blend for 1 minute on speed 9.
- 1000g (1 Litre) water

3. Strain coconut milk through a nut milk bag into a bowl, squeezing it out really well to get as much cream as you can. 

[Set the cream aside and tip the coconut pulp back into the Thermomix. Add another 300g water, blend once more for a minute on speed 9, re-strain into a separate bowl, and you have milk for another recipe. Freeze the coconut pulp, and when you have enough you can dehydrate it then grind it up to make coconut flour.]

4. Measure the coconut cream back into the Thermomix bowl. Add other ingredients and cook at Varoma temperature for 55 minutes, speed 4, with the rice basket set on top of the lid (instead of the MC) to let the steam out.
1000g (1 litre) of coconut cream
- 200g organic pure maple syrup
- 1/4 tsp bicarbonate of soda (baking soda)
- 1/2 tsp vanilla extract (not essence)

That's it! Too easy. I was jumping around the kitchen in excitement when I opened the lid of the Thermomix after making this! And if you don't believe me, just ask my taste testers - they all agreed that it was totally amazing and exciting and were very happy they'd happened to stop by for a visit at just the right time!! ;)

This recipe results in about a little over a cup of dulce de leche. Sorry I can't be more definite than that - after eight people sampled it I realised I'd forgotten to weigh out the amount! Ah well, must make it again... :D


My taste testers... and the verdict was YUM!!
(You really should try dulce de leche on warm, freshly baked spelt bread rolls - mmmm!!)

Variations: 
- Try fresh grated coconut (brown skin removed) instead of dessicated coconut for the coconut cream.
- Try a different sweetener - honey, yacon syrup, rice malt syrup, rapadura, coconut sugar... different sweeteners will result in different colours, but they should all work fine. Adjust amount to taste.
- If you can't have coconut, you could use other dairy free milks, but make sure they're thick and creamy enough that you'll get a nice thick result, or just cook for longer if needed.

Minggu, 24 Maret 2013

Raw Macadamia Lime 'Cheesecake' (dairy free)


One thing I love about living in tropical Far North Queensland is the abundance of delicious produce grown here. I love that I can go to the local markets and buy locally grown coconuts (and coconut oil), locally grown vanilla beans and cacao nibs and cacaco beans, luscious limes, macadamias, avocadoes, pineapples, lychees, passionfruit, mangoes, and I've even bought sugar cane juice that's juiced while you wait! Even better, lots of these yummy things are given to you by friends, family and acquaintances who just have too much and need to share. Love that.

Last week I did a Thermomix demo for a lady who sent me home with a big bag full of limes and bunches of fresh herbs and rocket from her garden. At other times I've come home with a box of vine ripened tomatoes, pumpkin, avocadoes, lychees and mangoes. I get given bags of passionfruit, boxes of black sapotes, chokos and lettuces. I always say to my husband, 'There's really no way you could starve living here. Why would anyone want to live in the city??' Besides, where in the city can you walk around the corner from your house and see views like this...


But I digress... back to the cheesecake.

So the other day I thought I should make something with some of the limes filling my fruit basket, and the avocados from mum's tree. I really wanted something a bit special, as I had a photo shoot with an online magazine on Friday (Confetti Mag - 1st issue, coming out in May, stay tuned!), and I thought something made with local ingredients would be a good thing to photograph. (We ended up choosing something else to make, and we had lots of fun cooking and taking photos! Two of my favourite things to do.)

{Photo taken by Karen of Confetti Mag}

I remembered a lime and avocado tart I'd made last year and really enjoyed, but I felt it needed to be creamier and less... well... tart! Okay, I know 'raw lime cheesecakes' are all over the internet and I didn't really need to make up another recipe, but I just like to play. I did get some inspiration from this lovely raw lime tart from Fragrant Vanilla Cake (a blog you really should visit if you're into raw food, vegan food, or just delicious desserts) - but I ended up changing it to make the most of some of our lovely local produce, plus whatever I had on hand.


It turned out amaaaaazing!!

My husband is very partial to a good cheesecake, and was very sceptical that my dairy free version would be something he'd want to eat... But after one bite he changed his tune and begged for more. :)

I had a lot of 'drop-ins' that day, and each one had to taste my cheesecake. I made them. (They didn't argue.) They all agreed it was a gem of a recipe, and they all told me I should save it for my book. But being the kind and generous blogger that I am, I dedided to go ahead and share it. And besides, I was a bit worried that after getting 235 comments on the photo I posted on Facebook, plus many private messages, asking for the recipe, I might have a riot if I didn't share!! (But I will have to start being a bit more secretive with new recipes I think, or there won't be any surprises left for the book!)

Consider this your Easter present from me. I think it would make a great Easter Sunday treat... because as much as I love chocolate, it can get a little 'overdone' at Easter time. I'm thinking lime will be a good change.


So here it is, the long-awaited recipe...

Oh, and just a couple of tips: buy the macadamia pieces, they're heaps cheaper than whole nuts and you don't need whole nuts for this recipe. And use organic or homegrown limes if possible, as you don't really want to be eating the zest from limes sprayed with pesticides. Just my opinion.

Raw Macadamia Lime 'Cheesecake'
(Makes one 20cm cheesecake)

Base:

Grind all the base ingredients up together in the Thermomix on speed 9 for 20 seconds, or until finely ground.
- 130g raw macadamia nuts (either unsoaked, or soaked and dehydrated)
- 70g organic shredded or flaked coconut (additive free)
- 8 fresh dates (eg. Medjool), pitted
- a pinch of fine Himalayan salt

   Grease the inside of a 20cm springform cake tin with coconut oil. Press the base mixture firmly into the base of the tin, and up the sides if you like. Set aside.

Filling:

Blitz vanilla beans and lime zest on speed 10 for 10 seconds.
- 2 vanilla beans, snipped into 4 pieces (can use 1 bean in a pinch)
- zest from 2 limes (just peel off with a sharp potato peeler)

Add cashews and grind on speed 10 for 8 seconds.
- 150g raw cashews*

Add remaining ingredients and blend on speed 9 for 1 minute, scraping down as needed, until lovely and smooth.
- flesh of 1 lime
- 320g fresh avocados (or frozen, cut in 1-2cm cubes)
- 100g pure maple syrup
- 55g coconut oil
- a pinch of fine Himalayan salt

Pour filling into springform tin, spreading over the base. Place in freezer for at least half an hour.

* If using soaked raw cashews, only soak for up to 6 hours, drain well and pat dry with tea towel, then mix with the other ingredients (lime, avocado, etc) all at once, blending until smooth.


Just look at those lovely little vanilla bean seeds in the filling.... Mmmm!

Topping:

Mix together until smooth on speed 9:
- 150g raw macadamias (soaked for a few hours, then drained and dried off a bit)
- 150g Ayam coconut cream (or other thick coconut cream)
- 1 tsp vanilla extract or vanilla bean paste
- juice of 1 lime
- 30g pure maple syrup

Pour over filling and smooth with spatula.

Decoration:

While topping is still soft, before freezing, add extra macadamia nuts and lime zest for decoration, sprinkling first the nuts, then the zest, around the edge of the cheesecake. (See photos)
- a good sized handful of macadamia nuts, roughly chopped (if you haven't bought them already in pieces)
- zest of one lime, grated with a zester

Place the finished cheesecake, covered with a plastic bag, in the freezer and leave it alone for at least 2 hours, preferably more. It's best eaten semi-frozen. It will last for weeks in the freezer... but we all know that's not going to happen. ;)

Enjoy!


Rabu, 13 Februari 2013

Chocolate Fudge Hearts with Raspberry Swirl Topping


It's Valentine's Day tomorrow, and although I'm not into the whole commercialised idea of spending heaps of money on flowers and chocolates and fuzzy teddy bears, I do like to cook something special for the family. (Okay, I admit it. If someone bought me flowers and chocolates I wouldn't say no, as long as it was good chocolate. And fuzzy teddy bears are pretty cute too.)

Anyway, this year I came up with this recipe for dense, fudgey chocolate heart cakes, and just for fun I decorated them with a dairy free chocolate ganache spread, coconut cream, and raspberry coulis. (There's a little video clip below showing how I did the raspberry swirl heart at the bottom of this post.) Of course, we already ate them all because I had to get this blog post done before Valentine's Day. And then I didn't get time to do it til now... oops! So by the time you read this it may be too late to make these for Valentine's Day, but hey, if you love someone you shouldn't need to wait for a certain date on a calendar to show it... so just go make these anyway!


P.S. These cakes are gluten free, grain free, and dairy free. If you can't have nuts you can use flour instead. If you can't have eggs you can probably substitute for those too, I just haven't had a chance to try it.


Chocolate Fudge Hearts

I make these in little heart shaped flan tins - you could use heart shaped muffin tins too, or just make them in regular muffin tins and decorate with a raspberry swirl heart on top. Or you could use a regular cake tin, but you'll need to cook it for a little longer.

Recipe inspired by Tash's Rich Chocolate Cake 

Preheat oven to 190C.

1. Grind chocolate in Thermomix bowl for 10 seconds on speed 9.
- 200g roughly chopped dark chocolate (I use a good quality, dairy free, naturally sweetened 65-70% cocoa chocolate like Valrhona or Rapunzel chocolate)

2. Add dates and chop for 10 seconds on speed 9.
- 150g pitted dates

3. Add coconut oil and melt at 60C for 5 minutes on speed 2.
- 180g coconut oil (or butter or ghee)

4. Add walnuts, salt and eggs and mix on speed 8 for 10 seconds.
- 70g walnuts (or you can use 50g of gluten free or regular plain flour if you can't have nuts)
- 1/4 tsp fine Himalayan or sea salt
- 3 large eggs*

5. Pour mixture into tins (greased with coconut oil or butter) and bake at 190C for approx. 20 minutes for small cakes or muffins, to 30 minutes for a cake. Skewer inserted into centre of cake should come out clean.

Allow cakes to cool, then ice with chocolate ganache spread.

* I didn't have time to try these cakes with an egg replacement, but apple sauce or chia gel are both great replacements. If you use apple sauce, cut down on the amount of dates. Not sure of amounts - will test when I can!


Chocolate Ganache Spread

This is a recipe I developed as a dairy free, nut free substitute for Nutella, and I found it also works perfectly for a chocolate sauce when hot. You can pour it over a cake like ganache and it will set all firm and glossy in the fridge. Or spread it on toast when it's cold. It's a kind of multi-purpose ganache-spread-topping... for now and then of course. :)

1. Break up chocolate and grind in Thermomix for 10 seconds on sp 9.
- 100g dark dairy free chocolate
    Scrape down bowl.

2. Weigh remaining ingredients into Thermomix bowl and cook for 2 minutes at 60C speed 2.
- 30g coconut oil (or ghee or butter)
- 30g rice malt syrup (or honey)
- 200g thick coconut cream (or less if you like your chocolate darker)

- 1 tsp vanilla extract

3. Place in the fridge to cool a little, then when it's slightly less runny, spread over cake/s and place cakes in fridge to set.*


If there's any ganache spread left, pour it into jar and keep in the fridge for up to 2 weeks. (Tastes lovely swirled with sunflower seed butter or nut butter on toast or crepes, and topped with slices of banana!)

* Note: I found it was easiest to make the raspberry-coconut cream swirl hearts on top of the cakes if the chocolate ganache was set and firm. The first batch I made while the chocolate was still warm and runny, and although it looked pretty, it was difficult to keep in a heart shape as it tended to run off the edges. (See photo below) So it's up to you - if you want a more freeform swirly heart, go ahead and do it while the chocolate is warm, then put it straight into the freezer to set.


Raspberry Swirl Topping

These  cakes are best served within an hour, once the heart swirls are made, as the raspberry coulis eventually will sink into the cream if it's in the fridge for too long. So make the cakes with the chocolate topping on them and keep them in the fridge until you're ready to finish them off. They can stay in the fridge for days, and actually taste best cold from the fridge.

For the Raspberry Swirl Topping, all you need is:
- tin of smooth coconut cream (do not shake it up!)
- a batch of Raspberry Coulis.

To make the Raspberry Coulis:


Cook raspberries and Rapadura (or preferred sweetener) in Thermomix for 4 minutes at 90C on speed 4. Strain through a fine seive to remove seeds. Set aside to cool.
- 200g raspberries
- 40g Rapadura (or preferred sweetener - see this list sugar alternatives)

Don't shake up the tin of coconut cream! When you open the tin, scoop the thicker cream off the top into a small dish. Whisk cream with a fork until it's nice and smooth.

Using a teaspoon, blob some cream onto the top of the chocolate covered heart cake in the shape of a heart, rounding edges with a butter knife to neaten.

Drizzle on a few small blobs of raspberry coulis.

Using a toothpick, swirl the cream and the coulis together - don't 'over-swirl' or it will all run together. Less is more.

Here's a little video clip showing how I make the topping. (Okay, you can't actually see the 'swirling' process, but hopefully you get the idea!)

Happy Valentine's Day!

Jo xx


Senin, 17 Desember 2012

Quick Maple Pecan Cinnamon Scrolls

* This recipe includes support for Paprika * 


Cinnamon scrolls are a favourite breakfast at Christmas time in our family. Usually I'll make a batch of yeast dough scrolls and freeze or refrigerate them unbaked, then thaw and bake them on Christmas morning. I'll be explaining more about that in the next post. But if you're wanting a quick, yeast-free version, this is a great one to try. It'll only take you about an hour from start to finish. A word of warning, though - this recipe is a little bit naughty! LOTS of butter and rapadura... But it is Christmas - that's my excuse! ;-)

For a dairy free version, you could try ghee if you can have it; or use macadamia oil in the dough, and coconut cream on the rolled out dough instead of melted butter. It won't be quite as caramelly and sticky, but still good.

Okay, keeping this short as I've been trying to get this posted for two days, and I'd better hurry up before there's a riot on Facebook!!

Oh, and speaking of my Facebook page, there are now over 10,000 of you following!! WOW! So thank you to all who follow and contribute to the discussions - I learn so much and really enjoy hearing from you all. ❤


Quick Cinnamon Scrolls
*This recipe has Paprika support*

Preheat oven to 220C. Grease a 24 cm springform tin with butter and set aside. (Or you can use ghee or coconut oil, or baking paper.)

1. Prepare filling - mix together first five ingredients on speed 5 for 5 seconds - then set aside.
- 100g Rapadura
- 100g pecans or walnuts
- 2 tsp cinnamon
- pinch of sea salt
- 1 Tbspn butter

2. Mix dry ingredients on speed 8 for 6 seconds to 'sift'.
- 450g plain, unbleached spelt flour (not wholemeal)
- 1 tsp baking powder
- 1/2 tsp baking soda
- 1/2 tsp sea salt

3. Add wet ingredients and mix on speed 6 for 6 seconds, then on interval speed for 20 seconds. (Don't forget to lock the lid, or interval speed won't work!)
- 200g almond or rice-almond milk
- 1 tsp apple cider vinegar or lemon juice (helps with rising)
- 80g soft butter
- 80g pure maple syrup

4. Sprinkle silicon dough mat (or counter top) with a light dusting of flour, and turn dough out of bowl. Give it a quick, gentle knead to form a ball, then press out gently with your hands to form a rectangle about 1 1/2 cms thick.

5. Melt butter. Spread 2 tbspns over dough and sprinkle with filling, leaving a 1 cm border around the edges.
- 4 Tbspns melted butter (Note: Reserve 2 tbspns for topping. Can be melted in tmx at 100C for 30 seconds or so, speed 1.)
- prepared filling

6. Roll up the dough into a log shape, lift carefully, and place on a cutting board. (If the dough is too sticky, roll it up in the bread mat and place in the fridge or freezer to chill until firmer and easier to handle.)

7. Cut the rolled up dough into scrolls with a large serrated knife, making the slices 2-3 cms thick. Place them in the prepared springform tin, bunched up together, cut side up. Drizzle with remaining 2 tbspns melted butter.

8. Place in hot oven and cook for 20-25 minutes, until golden brown.

9. While scrolls are cooking, make the maple glaze. Place ingredients in Thermomix bowl and cook at 100C for 2 minutes, speed 1.
- 50g pure maple syrup (or Rapadura)
- 50g coconut cream (or regular cream)
- 1/2 tsp vanilla extract

10. When scrolls are cooked, drizzle over the glaze. Serve warm.

Keep in an airtight container for a couple of days. Best eaten on day of baking. (That shouldn't be a problem. Ha ha!!)


This recipe inspired by my mum and sister's recipes, this one from Bakingdom,
and my own version, all rolled into one. :)

Jumat, 09 November 2012

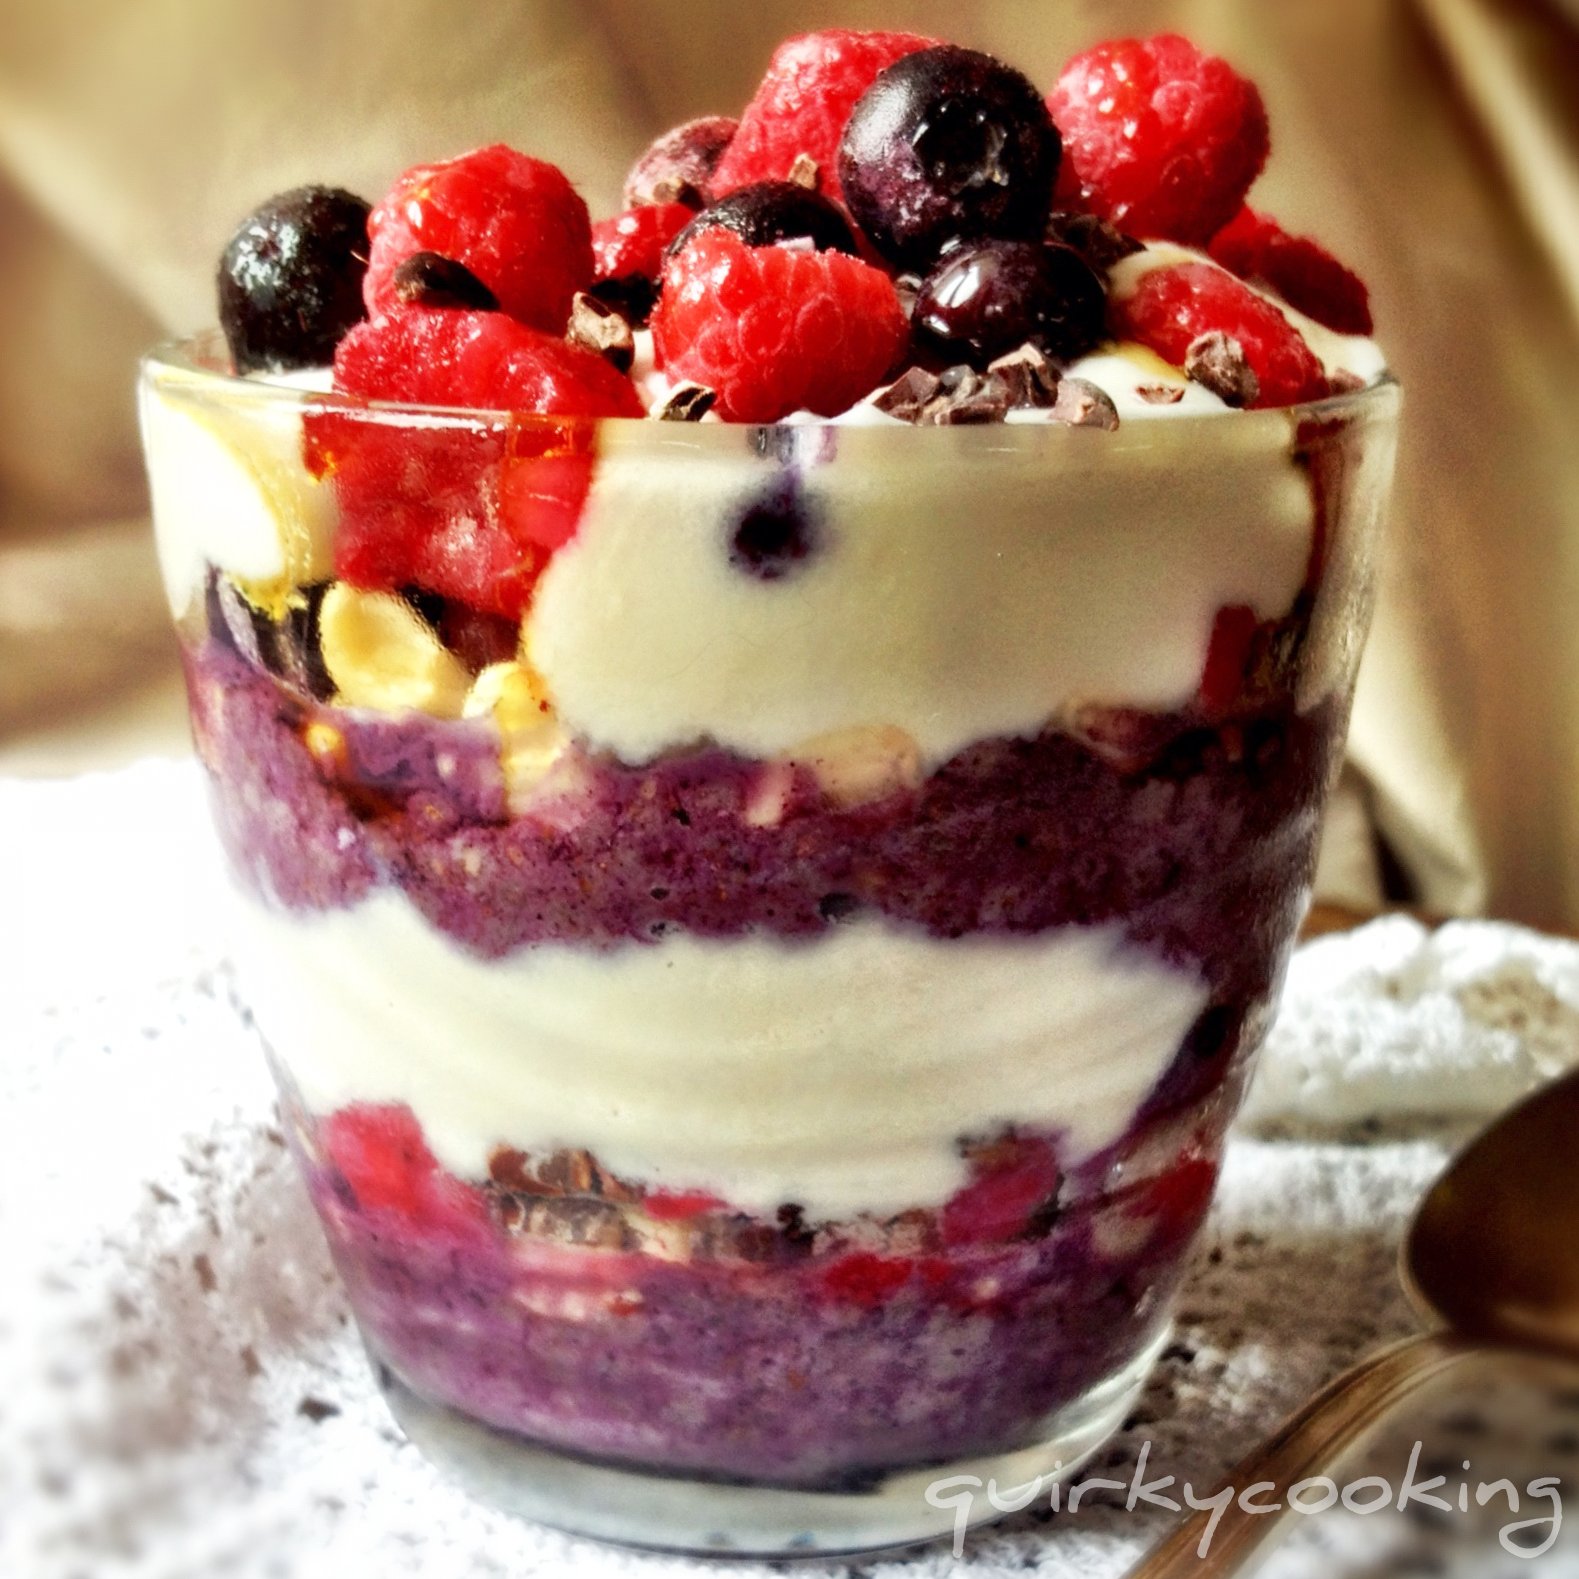
Layered Maqui Chia Pudding


Chia pudding (or porridge) is a staple part of my diet. I eat it for breakfast or morning tea, afternoon tea or supper. Sometimes all four! If I'm rushed, I eat it for lunch too. I'm kind of addicted to it. Here's why:

1. It's delicious. Think berries and cream with a chocolatey-nutty crunch!

2. It's quick and easy. It only takes 5-10 minutes to make my quick version.

3. It makes lots and lasts for a week in the fridge. So I can make up a big batch and have enough for a few days.

4. It's versatile. Every batch I make is slightly different to the last, depending on what I have on hand. (See variations below)

5. It's healthy. Chia has approximately 6 times more calcium than milk, as well as being high in Omega 3 and 6 fatty acids, and other essential minerals. Then there's all the goodness of the Maqui berry powder with it's high level of antioxidants, the coconut cream with it's lauric acid, and the benefits of whatever other superfoods you add, like goji berries and cacao nibs.

6. It's the perfect low GI, natural, 'sweet treat'. It keeps me from getting 'hangry' halfway through the morning or afternoon. {Hangry: 'A state of anger caused by a lack of food.' Know what I mean?} Chia seeds and mesquite powder are both great blood sugar stabilizers. As my mum used to say when she gave us porridge for breakfast, "It'll stick to your ribs!"

7. It travels well. I pop a batch into a jar and take it with me as I dash out the door. I even took some on the aeroplane the other day for my lunch... The guy next to me was looking at me a little strangely as I ate my pudding and drank my green smoothie from a jar, but hey, I'd rather that than the dry white bread sandwich and softdrink he had for lunch!

And if that's not enough, here's Jess the Wellness Warrior's 13 Reasons to Eat Chia Seeds Every Day!


One Layered Maqui Chia Pudding to go...

And just in case that's not enough reasons for you to try chia pudding - it looks pretty! Especially when you layer it.


There's lots of different recipes around for chia puddings and porridges, usually involving at least 40 minutes of soaking time, or soaking overnight. Sarah from 'Homemade, Healthy, Happy' has a delicious one here that I love, but I decided I wanted a quicker version - I'm usually in a last minute rush in the mornings, so 40 minutes seems a bit too long to wait for the soaking time. I find that by warming the pudding gently for a few minutes at 37C, the chia seeds soak up the liquid just as well as when they are soaked, without being 'cooked' and losing their goodness. I also wanted to make one that was kind of fun - which is why I layered it and called it a pudding instead of a porridge. ;-)

I've tried lots of different versions of chia pudding, and pretty much love them all. But this one is how I make it most of the time - with superfood Maqui powder for an antioxidant boost, plus lots of other yummy bits and pieces. My Instagram friends come up with some great combos, and I'm continually being inspired by other people's versions, like these on my Facebook page. To give you some more ideas of possible variations, here's a few others I've seen that look great!

- Coconut Water Chia Porridge (I keep meaning to try this, but I love coconut water so much that I always drink it before the porridge gets made!)

...and if you google 'chia pudding' and 'chia porridge' you'll come up with heaps more! The variations are endless.

{Note: Some people find too much chia can bother their tummy, especially if it's not soaked. If you find my quick version doesn't agree with you, try soaking the chia in the almond milk overnight in the fridge, then continue recipe as below. This is usually only the case for people with gut issues.}


Layered Maqui Chia Pudding 

First make the almond milk (below), or you can use coconut milk or coconut water instead.

1. Weigh almonds into Thermomix bowl and grind on speed 9 for 20 seconds:
- 100g raw almonds

2. Add water and blend on speed 9 for 1 minute:
- 550g filtered water

3. Add following ingredients, and cook at 37C for 5 minutes, speed 1:
- 85g chia seeds
- 1-2 tsp Mesquite powder
- 2 Tbspns Yacon syrup or raw honey
- 1 tsp ground cinnamon (optional)
- pinch of ground nutmeg (optional)
- 1 tsp vanilla bean paste
- a handful of raw cacao nibs
- a handful or two of goji berries and/or sultanas


Maqui berry powder - full of antioxidants!

4. Remove pudding to a dish or large jar to keep in the fridge. (It will be a little runny at first, but I make it like that on purpose because it gets thicker as it sits, and I don't like it too thick.) For each serving, layer the following in a glass or jar in the order given:
- a few Tblspns chia pudding
- a handful of raw cashews or macadamias
- a few blueberries
- a few raspberries
- a couple of blobs of coconut cream
- a drizzle of pure maple syrup

Repeat the layers.


Variations:

- Instead of vanilla bean paste, you can use a whole vanilla bean. Pop it in with the almonds and grind them up, then add water and blend.

- If you don't have Maqui powder or Mesquite powder, that's okay. I like to use them because they add extra goodness and the Maqui makes the chia such a lovely colour, but it will taste fine without. Try stirring in some homemade (sugar free) strawberry jam instead - my friend Emma suggested this, and it's delicious!!

- Try a coconut version: blend up the water and flesh of a young (green) coconut and use that instead of almond milk; leave out the yacon syrup or honey as the coconut water is sweet enough on it's own.

- If you can't have nuts, try coconut flakes instead, or maybe some toasted pepitas.

- Swap the coconut cream for coconut milk yoghurt, and instead of berries try some slices of mango. Drizzle over some passionfruit pulp instead of pure maple syrup.

- Try cherries with cacao nibs and chocolate covered goji berries, topped with coconut flakes. Mmmm....

- Fresh and juicy peaches, nectarines or strawberries are great too, instead of the berries.

- You could use other sweeteners besides Yacon syrup or honey or pure maple syrup - some prefer agave syrup, or coconut nectar, or carob syrup. Even stevia would work in the chia pudding. I would suggest sticking to a liquid sweetener though, as granulated sugars such as Rapadura wouldn't mix in so well.

Let me know what other great variations you come up with!


Now, for those of you who would like to try some Yacon Syrup, Mesquite Powder or Agave Syrup, Loving Earth has kindly given me some to give away. So leave a comment below saying what variation of Chia Pudding you'd like to try, and next Saturday (17th November) I'll pick 3 comments via Random.org and the winners will receive one of the above products to try! One comment each please, and let me know which product you'd prefer to win in your comment, so I can put you in the right prize draw. Woo hoo, thank you Loving Earth!!

{To find out more about all these interesting ingredients I use, click on the links and they will take you to pages with more info.}