Tampilkan postingan dengan label Rapadura. Tampilkan semua postingan

Selasa, 25 Desember 2012

Pomegranate Lemonade

* This recipe includes support for Paprika * 


It's Boxing Day. A day to clean up the messes, enjoy the leftovers, eat lightly, and relax.  And it's also the day I started my blog, four years ago!

Seems a long time ago that my friend Bel gave me my first blogging tips, and I posted my first little blog post... Thanks to all of you who have followed along! I've learnt a lot over the last four years, and it's partly thanks to all of you, from near and far, who have cooked with me and shared your results, thoughts and tips. I hope I've encouraged you in your creative cooking adventures - I know you've encouraged me in mine! So thank you.


I thought I'd better keep up the tradition of posting something on my blog birthday, so here's a celebration drink which is perfect for this time of year - Pomegranate Lemonade.

I love pomegranates, and the other day when I was browsing the shelves of our local health food store I found a bottle of pomegranate juice concentrate. I just had to buy it, as I'd never seen it in the shops here before, and I knew my Grandmother uses it as dressing for fruit salad. Well, the other day I started to make some of my Raspberry Lemonade, but I had a brainwave and made this instead. It's mouth-wateringly refreshing. I hope you enjoy it too!

Have a lovely, relaxing Boxing Day... and if you happen to have a pomegranate, some lemons, and some pomegranate juice on hand, I hope you'll try this!


Pomegranate Lemonade


1. Grind rapadura on speed 9 for 10 seconds.
- 60g Rapadura

2. Add ice and grind on speed 10 for 10 seconds.
- 300g ice

3. Add lemons, water and pomegranate juice and cover hole in lid with a cup that seals the hole. (I don't use the MC for this as the water squirts out the gap as you pulse - you'll need to hold the cup onto the lid firmly so it doesn't make a mess!) Lock lid, and pulse 3 times on Turbo, or until lemon is chopped roughly.
- 2 lemons, washed, ends cut off, and quartered (not peeled)
- 100g pomegranate juice concentrate
- 500g water

4. Remove bowl lid, add soda water to the 1 1/2 litre mark and push rice basket carefully down into bowl. Pour the juice into a large 2 or 2 1/2 litre jug, holding the basket in the bowl with the spatula to strain. Add more soda water to bowl, swish around, and pour. Repeat until jug is full or soda water is all added. I use a full 2 litre bottle of soda water, so it works out to about 2 1/2 litres of juice.
- 2 litre bottle of soda water

5. Add pomegranate arils and lemon slices if desired, and serve with extra ice.
- arils from 1/4 of a pomegranate
- a few slices of lemon

Minggu, 23 Desember 2012

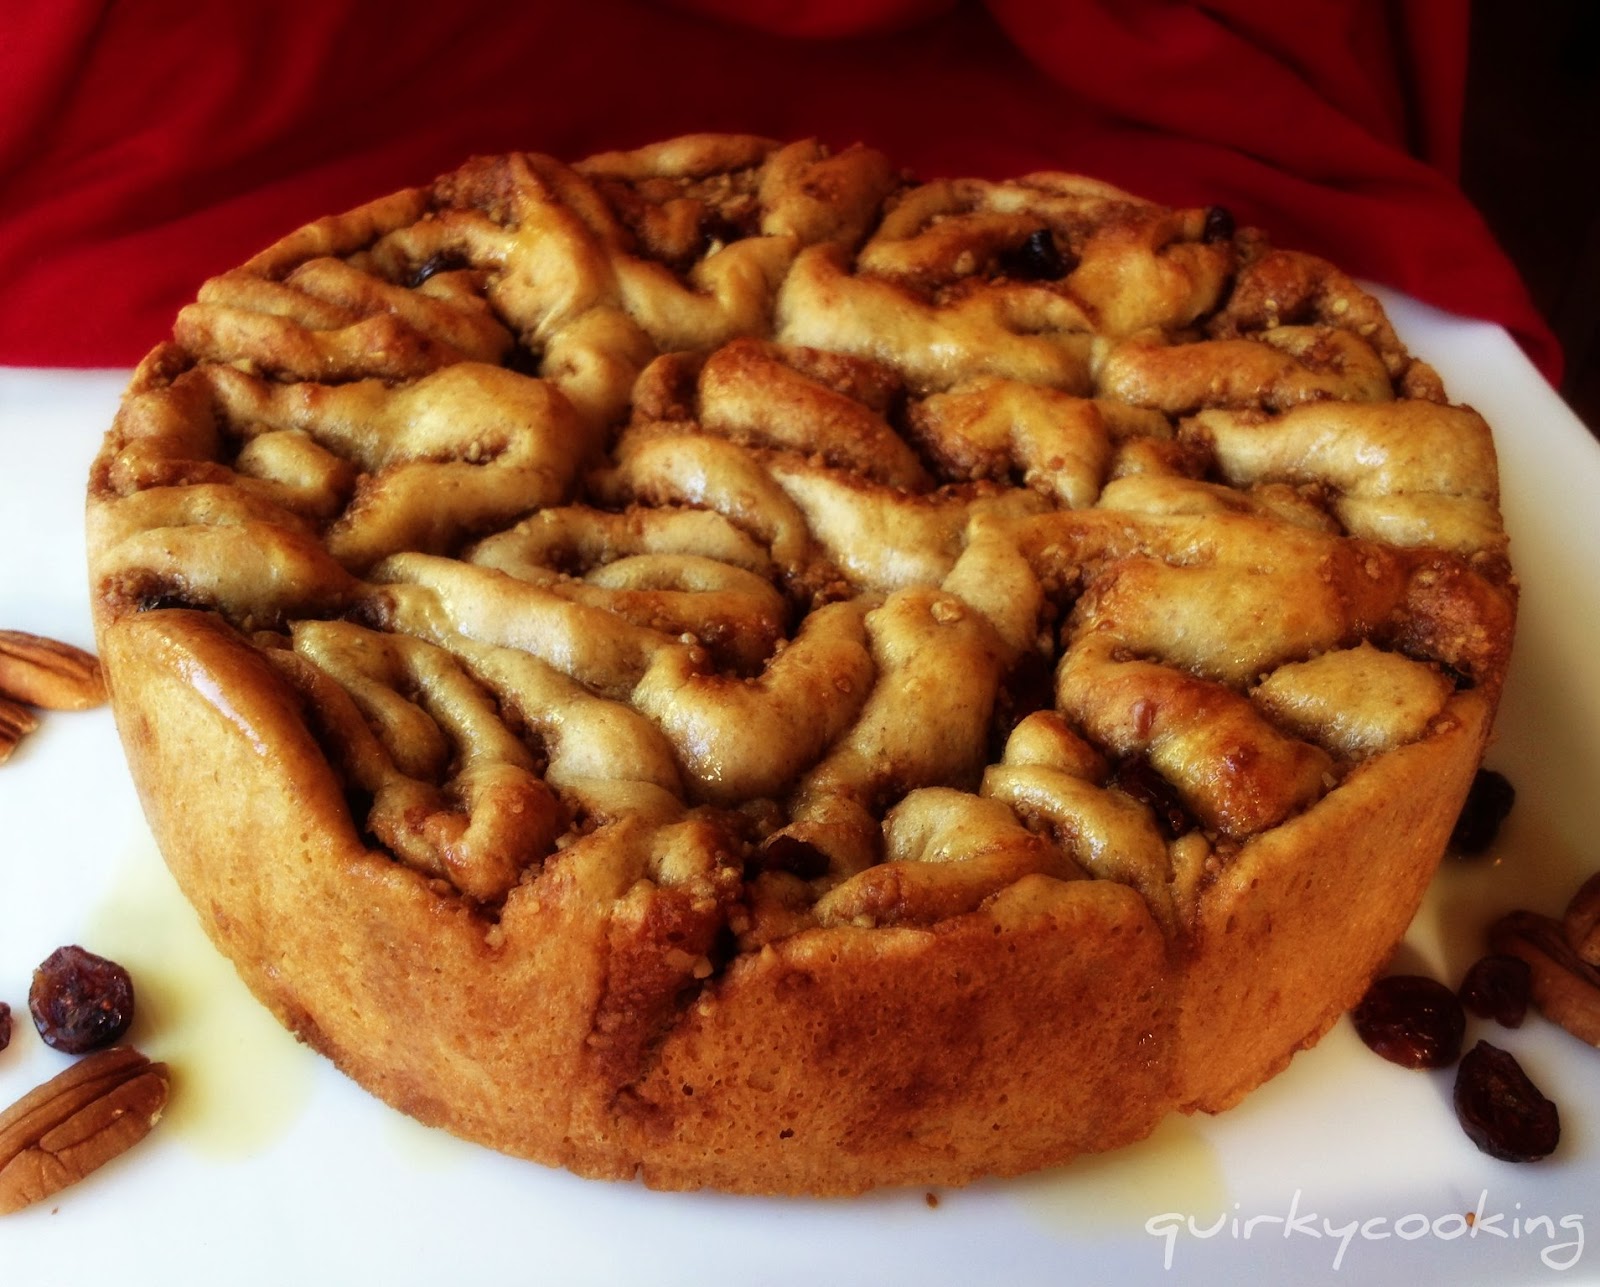
Brioche Cinnamon Scrolls ~ Prepare Ahead


Okay, by popular demand, here's my recipe for dairy free cinnamon scrolls made with brioche dough, that you can prepare ahead and bake another day. We usually have cinnamon scrolls for Christmas breakfast, but we've had so many in the last month while I've been testing my recipes, that I really think we'll give it a miss and have something else this year. I never thought I'd say this, but I'm all cinnamon-scrolled out. But for those of you who aren't, here's the recipe! (Don't worry, by New Year's I'll probably be craving these again... these would be perfect for a lazy New Year's breakfast!) :D

By the way, if you're gluten free and wanting some cinnamon scrolls too, here's a recipe that looks good - I'm hoping to try it out soon, but if you beat me to it, let me know how it goes!


First, make brioche dough. (This is my spelt, dairy free version - if you're not dairy intolerant, you can use the regular recipe in the Thermomix Everyday Cookbook.)

1. Warm milk and rapadura at 37C for 2 minutes, speed 1:
- 300g rice-almond milk (or preferred milk)
- 30g Rapadura

2. Add remaining ingredients and mix for 10 seconds on speed 7, then lock lid and knead on interval speed for 2 minutes.
- 2 tsps instant yeast (1 sachet)
- 1 tsp salt
- 80g macadamia oil (or butter)
- 650g white spelt flour
- 1 egg

3. Wrap dough in a silicon bread mat (or place in oiled bowl and cover), and rise in a warm spot until doubled. Meanwhile, prepare filling.

4. Filling: Mix ingredients on speed 5 for 5 seconds, then set aside:
- 120g Rapadura
- 120g pecans or walnuts
- 2 tsp cinnamon
- pinch of sea salt
- 2 Tbspns coconut cream (or ghee or butter)

5. When dough is risen, roll it out on silicon bread mat to make a large rectangle, about 1 cm thick. Spread with soft butter or coconut cream. Sprinkle with all the filling, and dried cranberries or other berries.
- 2 Tbspns coconut cream (or soft butter)
- filling
- a couple of handfuls of dried, naturally sweetened cranberries (or fresh blueberries)
(I love these cranberries from
Honest to Goodness - they're sweetened with apple juice concentrate, and are very plump and delicious!)

6. Roll dough up into a log, lift carefully onto a cutting board, and cut slices about 3cms thick with a serrated knife. (If dough is too sticky, chill until firmer and easier to work with.) Lay slices in two greased or lined springform tins, bunched up together to fit them all in. (You can also cook these in cake tins, or even just on pizza trays. I find an enclosed tin works best though, so they don't spread out too much. They will dry out if they're too thin.)

7. If cooking straight away, drizzle with butter or coconut cream, then leave to rise until nearly doubled. Preheat oven to 200C while scrolls are rising. Bake for about 30 minutes, or until golden brown.
- 2 Tbspns coconut cream (or melted butter)

Drizzle with glaze while warm:

8. Glaze: Place ingredients in Thermomix bowl and cook at 100C for 2 minutes, speed 1:
- 50g pure maple syrup (or Rapadura)
- 50g coconut cream (or regular cream)
- 1/2 tsp vanilla extract


Preparing ahead to bake later:

- Quickest prepare ahead method: Don't drizzle with cream or butter, just cover the tin with plastic bags and place in the coldest part of the fridge overnight. The next morning, remove bags, drizzle with the melted butter or coconut cream, place in cold oven and turn it on to 200C. The bread will finish rising as the oven warms up, and will be baked in about half an hour. Drizzle with glaze and serve.

- Freeze ahead method: as above, but half rise then freeze. When ready to bake, allow to thaw in a warm spot (I place in cold oven with a pan of boiling water underneath) for about 1 1/2 to 2 hours (less if you are making scrolls in small tins). Set the timer so you don't forget they're there! They should be risen and thawed out before you turn on the oven. Drizzle with butter/cream, cook at 200C for about 30 mins or until golden brown. Top with glaze and serve.

Tip: You can make this a few days ahead, freeze, thaw in the fridge Christmas Eve, then finish thawing Christmas morning in a warm spot, then bake - that cuts down on thawing time for frozen scrolls.


Senin, 17 Desember 2012

Quick Maple Pecan Cinnamon Scrolls

* This recipe includes support for Paprika * 


Cinnamon scrolls are a favourite breakfast at Christmas time in our family. Usually I'll make a batch of yeast dough scrolls and freeze or refrigerate them unbaked, then thaw and bake them on Christmas morning. I'll be explaining more about that in the next post. But if you're wanting a quick, yeast-free version, this is a great one to try. It'll only take you about an hour from start to finish. A word of warning, though - this recipe is a little bit naughty! LOTS of butter and rapadura... But it is Christmas - that's my excuse! ;-)

For a dairy free version, you could try ghee if you can have it; or use macadamia oil in the dough, and coconut cream on the rolled out dough instead of melted butter. It won't be quite as caramelly and sticky, but still good.

Okay, keeping this short as I've been trying to get this posted for two days, and I'd better hurry up before there's a riot on Facebook!!

Oh, and speaking of my Facebook page, there are now over 10,000 of you following!! WOW! So thank you to all who follow and contribute to the discussions - I learn so much and really enjoy hearing from you all. ❤


Quick Cinnamon Scrolls
*This recipe has Paprika support*

Preheat oven to 220C. Grease a 24 cm springform tin with butter and set aside. (Or you can use ghee or coconut oil, or baking paper.)

1. Prepare filling - mix together first five ingredients on speed 5 for 5 seconds - then set aside.
- 100g Rapadura
- 100g pecans or walnuts
- 2 tsp cinnamon
- pinch of sea salt
- 1 Tbspn butter

2. Mix dry ingredients on speed 8 for 6 seconds to 'sift'.
- 450g plain, unbleached spelt flour (not wholemeal)
- 1 tsp baking powder
- 1/2 tsp baking soda
- 1/2 tsp sea salt

3. Add wet ingredients and mix on speed 6 for 6 seconds, then on interval speed for 20 seconds. (Don't forget to lock the lid, or interval speed won't work!)
- 200g almond or rice-almond milk
- 1 tsp apple cider vinegar or lemon juice (helps with rising)
- 80g soft butter
- 80g pure maple syrup

4. Sprinkle silicon dough mat (or counter top) with a light dusting of flour, and turn dough out of bowl. Give it a quick, gentle knead to form a ball, then press out gently with your hands to form a rectangle about 1 1/2 cms thick.

5. Melt butter. Spread 2 tbspns over dough and sprinkle with filling, leaving a 1 cm border around the edges.
- 4 Tbspns melted butter (Note: Reserve 2 tbspns for topping. Can be melted in tmx at 100C for 30 seconds or so, speed 1.)
- prepared filling

6. Roll up the dough into a log shape, lift carefully, and place on a cutting board. (If the dough is too sticky, roll it up in the bread mat and place in the fridge or freezer to chill until firmer and easier to handle.)

7. Cut the rolled up dough into scrolls with a large serrated knife, making the slices 2-3 cms thick. Place them in the prepared springform tin, bunched up together, cut side up. Drizzle with remaining 2 tbspns melted butter.

8. Place in hot oven and cook for 20-25 minutes, until golden brown.

9. While scrolls are cooking, make the maple glaze. Place ingredients in Thermomix bowl and cook at 100C for 2 minutes, speed 1.
- 50g pure maple syrup (or Rapadura)
- 50g coconut cream (or regular cream)
- 1/2 tsp vanilla extract

10. When scrolls are cooked, drizzle over the glaze. Serve warm.

Keep in an airtight container for a couple of days. Best eaten on day of baking. (That shouldn't be a problem. Ha ha!!)


This recipe inspired by my mum and sister's recipes, this one from Bakingdom,
and my own version, all rolled into one. :)

Jumat, 13 Juli 2012

Chocolate Chilli Chai {dairy free}


My daughter India and I love making chai in the Thermomix with cashew milk -
it's gorgeous! So creamy. (I cashew milk! Especially vanilla cashew milk...)


Creamy vanilla cashew milk - just add some vanilla bean paste (or the seeds from a vanilla pod) to your cashew milk. Drink it chilled, or heat and froth in the Thermomix to add to cappucinos, hot chocolate, or chai. Make a batch of vanilla cashew milk before you make the chai if you like, so you can drizzle a little into the cups of chai and swirl through to make it look pretty.)


The other day I decided we really needed to add some chocolate and chilli to our chai for a change. It was so good. Although I admit I added a little too much chilli the first time - I didn't mind it, but the kids had to keep adding cashew milk to their cups to tone it down - oops! So the next day I made it again for friends, and used half the chilli - they pronounced it to be just right. I think it's better to not use too much chilli, or you just get a numb mouth and can't appreciate the chocolatey, spicey flavours. :-)


There are so many possible variations when making chai. I started with the Chai Masala Tea recipe in the Thermomix cookbook, 'Fast and Easy Indian Cooking' (yes, I write all over my cookbooks as I tweak, don't you??) adding and substracting spices to taste, as well as grinding up raw cashews and chocolate to make a creamy chocolate milk base. I ended up with a big mess, on a day when I was supposed to be madly cleaning the house, but the results were worth it!

(And I must say here a big THANK YOU to Lucy, who sent me a whole pack of organic New Guinea vanilla beans - so lovely of you, and very much appreciated!)

So here's my recipe, but feel free to change and tweak it to taste - use more or less chilli or cinnamon, maybe some coriander seeds roasted in the Thermomix bowl and ground up with the other spices - there's plenty of ideas in the Indian cookbook recipe, so have a look and tweak to your heart's content. The purpose of a recipe is to give you a starting point - you don't have to stick to it. I never do. Not even my own. ;-)

Enjoy!

Serves 6


A whole nutmeg

1. Make sure your Thermomix bowl is very dry. Turn the speed dial to 7, and drop a whole nutmeg onto the blades through the hole in the lid (quickly popping the MC in place) and let it grind for 30-40 seconds. Remove to a small dish. (The reason you grind the nutmeg separately is because it needs to be added in the last minute as it loses flavour quickly when heated.)
- 1 whole nutmeg


Spices ready to grind
(a bit too much chilli in this batch - I used half a chilli in the second batch)

2. Roughly grind remaining spices in Thermomix bowl on speed 7 for 10 seconds. (You don't want them ground too fine, or else the 'bits' will get through the strainer.)
- 1 cardamom pod
- 2 large or 3 smaller sticks of cinnamon
- 2 whole cloves
- 5 peppercorns
- 1/2 a dried red chilli
- 1 vanilla bean, cut into a few pieces
Set spices aside in a small bowl.

3. Add to Thermomix bowl and grind on speed 8 for 10 seconds:
- 80g raw cashews
- 80g dark, dairy free chocolate, broken in bits (eg. Green & Black's 70% cocoa, or a 65% cocoa chocolate if you like it a little milder)


4. Add water and blend for 30 seconds on speed 9:
- 1200g water

5. Carefully push strainer basket down into the chocolate milk in the bowl, and add the ground spices (except the nutmeg), tea, fresh ginger and sweetener. Cook for 10 minutes at 80C on speed 4.
- ground spices (except nutmeg)
- 5 teabags of organic black tea (or 5 tsp loose tea leaves)
- 3 or 4 thin slices of fresh ginger
- 40g Rapadura (or other natural sweetener, to taste)


[Note: you may get a bit of foam coming out of the hole in the lid, but it shouldn't be enough to be a problem. Just take the MC off and it'll be fine.]

6. Add nutmeg through hole in lid and cook for 1 minute at 80C on speed 4:
- a couple of pinches of ground nutmeg, to taste

7. Remove basket from bowl (carefully - can get messy!), squeezing tea bags against sides with spatula.


8. Pour the chai through a strainer into a jug. (Not a fine mesh strainer, as it'll take too long and drive you crazy!)


9. Pour into cups and add a little hot, frothed cashew milk and swirl through (optional), then grate over a little more chocolate for decoration.


Minggu, 01 Juli 2012

Almond, Lemon & Coconut Steamed Puddings {grain free, dairy free}


Today I decided to experiment with a grain free recipe for the steamed lemon and coconut puddings we make at the Thermomix Varoma demos. My daughter absolutely loves those puddings, but she reacts to gluten (and I think grains), and isn't supposed to have all that sugar. There is a grain free version of the puddings on the Varoma recipe cards, but I find that recipe a bit heavy - I wanted them to be lighter, and also dairy free and more naturally sweetened. I was really happy with the result of my experimenting! Anyway, I think I'd better not chit chat too much here and just hurry up and post the recipe... seems like there's a few people on Facebook who want it NOW!! Lol :D So here it is...

1. Peel the lemon zest into the Thermomix bowl with a potato peeler:
- zest of one lemon
    (Make sure your bowl is nice and dry.)

2. Add and blend for 10 seconds on speed 10:
- 100g blanched almonds*
- 40g coconut flour** (not dessicated coconut ground up, it's too oily)
- 40g Rapadura
- 1/2 tsp green stevia powder (or white stevia if that's all you have)

3. Add and mix for another 6 seconds on speed 5:
- 100g macadamia oil
- 2 yolks + 2 eggs (save the whites for fruity dream or sorbet)
- 180g coconut milk**
- 2 tsp baking powder
  Scrape down bowl and reblend for another 5 seconds on speed 5. Don't overmix.

4. Pour batter into silicon cupcake cups (or greased ramekins) and place in two layers in the Varoma trays. (No need to grease silicon cupcake cups.) Rinse out the Thermomix bowl and fill to just above the blades with water (just cool tap water), and place on base with lid on. Place the Varoma on top and cook the puddings for 20 minutes at Varoma temp, speed 2.


(Tip: When you lift the lid off the Varoma at the end of the cooking time,
tilt it back so the steam escapes away from you, and the condensation
on the lid drips down into the vent on the side of the Varoma dish,
and not onto the puddings! Soggy puddings are not so nice.)

5. Set the puddings aside. Tip the water out of the bowl and place back on the base.

6. Weigh into bowl and cook for 2 minutes at 100C, speed 2:
- 50g Rapadura
- 50g pure maple syrup
- 50g fresh lemon juice (approx. 1 lemon)
  Meanwhile, turn puddings out of silicon cupcake cups (or ramekins) onto plates. They come out easiest while warm.

7. Drizzle puddings with a little syrup, top with a raspberry (or some fruity dream), and serve.


* To blanch your own almonds, weigh raw almonds into a bowl, pour boiling water over and leave for about 10 minutes, then the skins will pop off when you 'pinch' them between your fingers. Spread on a tea towel to dry out before grinding.

** If you want to make your own coconut flour, you need to first grind up 100g of dried shredded (or dessicated) coconut, add 300g water, cook for 10 mins at 100C speed 2, then blend for 1 minute on speed 9. Then squeeze through a nut milk bag (when cool enough) until you've got as much moisture out of the coconut as possible. (Use the coconut milk to make the puddings, or in curries.) Spread the coconut out on a dehydrator tray and dry for a few hours until there's no moisture left at all, then grind it up in the Thermomix. If you'd rather the easy option of buying coconut flour, you can get it at health food stores or online. (You can buy it here.) It seems expensive, but you really don't need much to make a cake, so a 500g bag lasts for ages.


Sabtu, 23 Juni 2012

Sticky Pecan Muffins


This morning I managed to get up before everyone else, so I decided to make something a bit special for breakfast. I found this recipe here, and tweaked it to make it healthier and Thermomix friendly. This is what I came up with. It's almost dairy free - there's 1 tablespoon of butter in the caramel topping - but you could use coconut cream instead to make it completely dairy free. I didn't have any coconut cream left, so I just used butter. It only uses 1/2 a cup of flour - I used spelt flour, but I'm sure it would work fine with plain gluten free flour or almond flour as well.

Here's a time-saving tip: when you're making cakes or muffins that have chopped nuts in them, don't bother chopping the nuts first, just add the whole nuts with all the other ingredients and chop and stir all at once on speed 4-5 for a few seconds. If you have a look at the original recipe, you'll notice I cut the steps down from 5 steps to 1 step for the muffin mixture. Yep, I like 1-step recipes. Well, okay, the caramel topping is another step or two, but it's easy as. And really delicious, so don't leave it off!


I'm really happy with the way these muffins turned out using macadamia oil instead of butter - the texture is perfect. For those of you wanting to convert your own muffin recipes for the Thermomix, just remember you have to be really careful not to overmix, or you'll have heavy, dense muffins. Notice that I only mix these for a few seconds, scrape down the bowl, and gently mix for another few seconds - that's it! Don't beat all the air out of them. You could use this basic mixture for all sorts of muffins - blueberry-pecan is next on the list for me I think!

Makes 12 large muffins.

Preheat oven to 180C. Generously butter (or oil) a 12-cup muffin pan (or madeleine tin).

1. Chop pecans on speed 4 for a couple of seconds, just until roughly chopped:
- 70g raw pecans
    Remove to a bowl.

2. Melt in Thermomix at 100C for 2 minutes at speed 1, or until just melted and combined:
- 3 Tbspns Rapadura
- 2 Tbspns honey
- 1 Tbspn butter or coconut cream

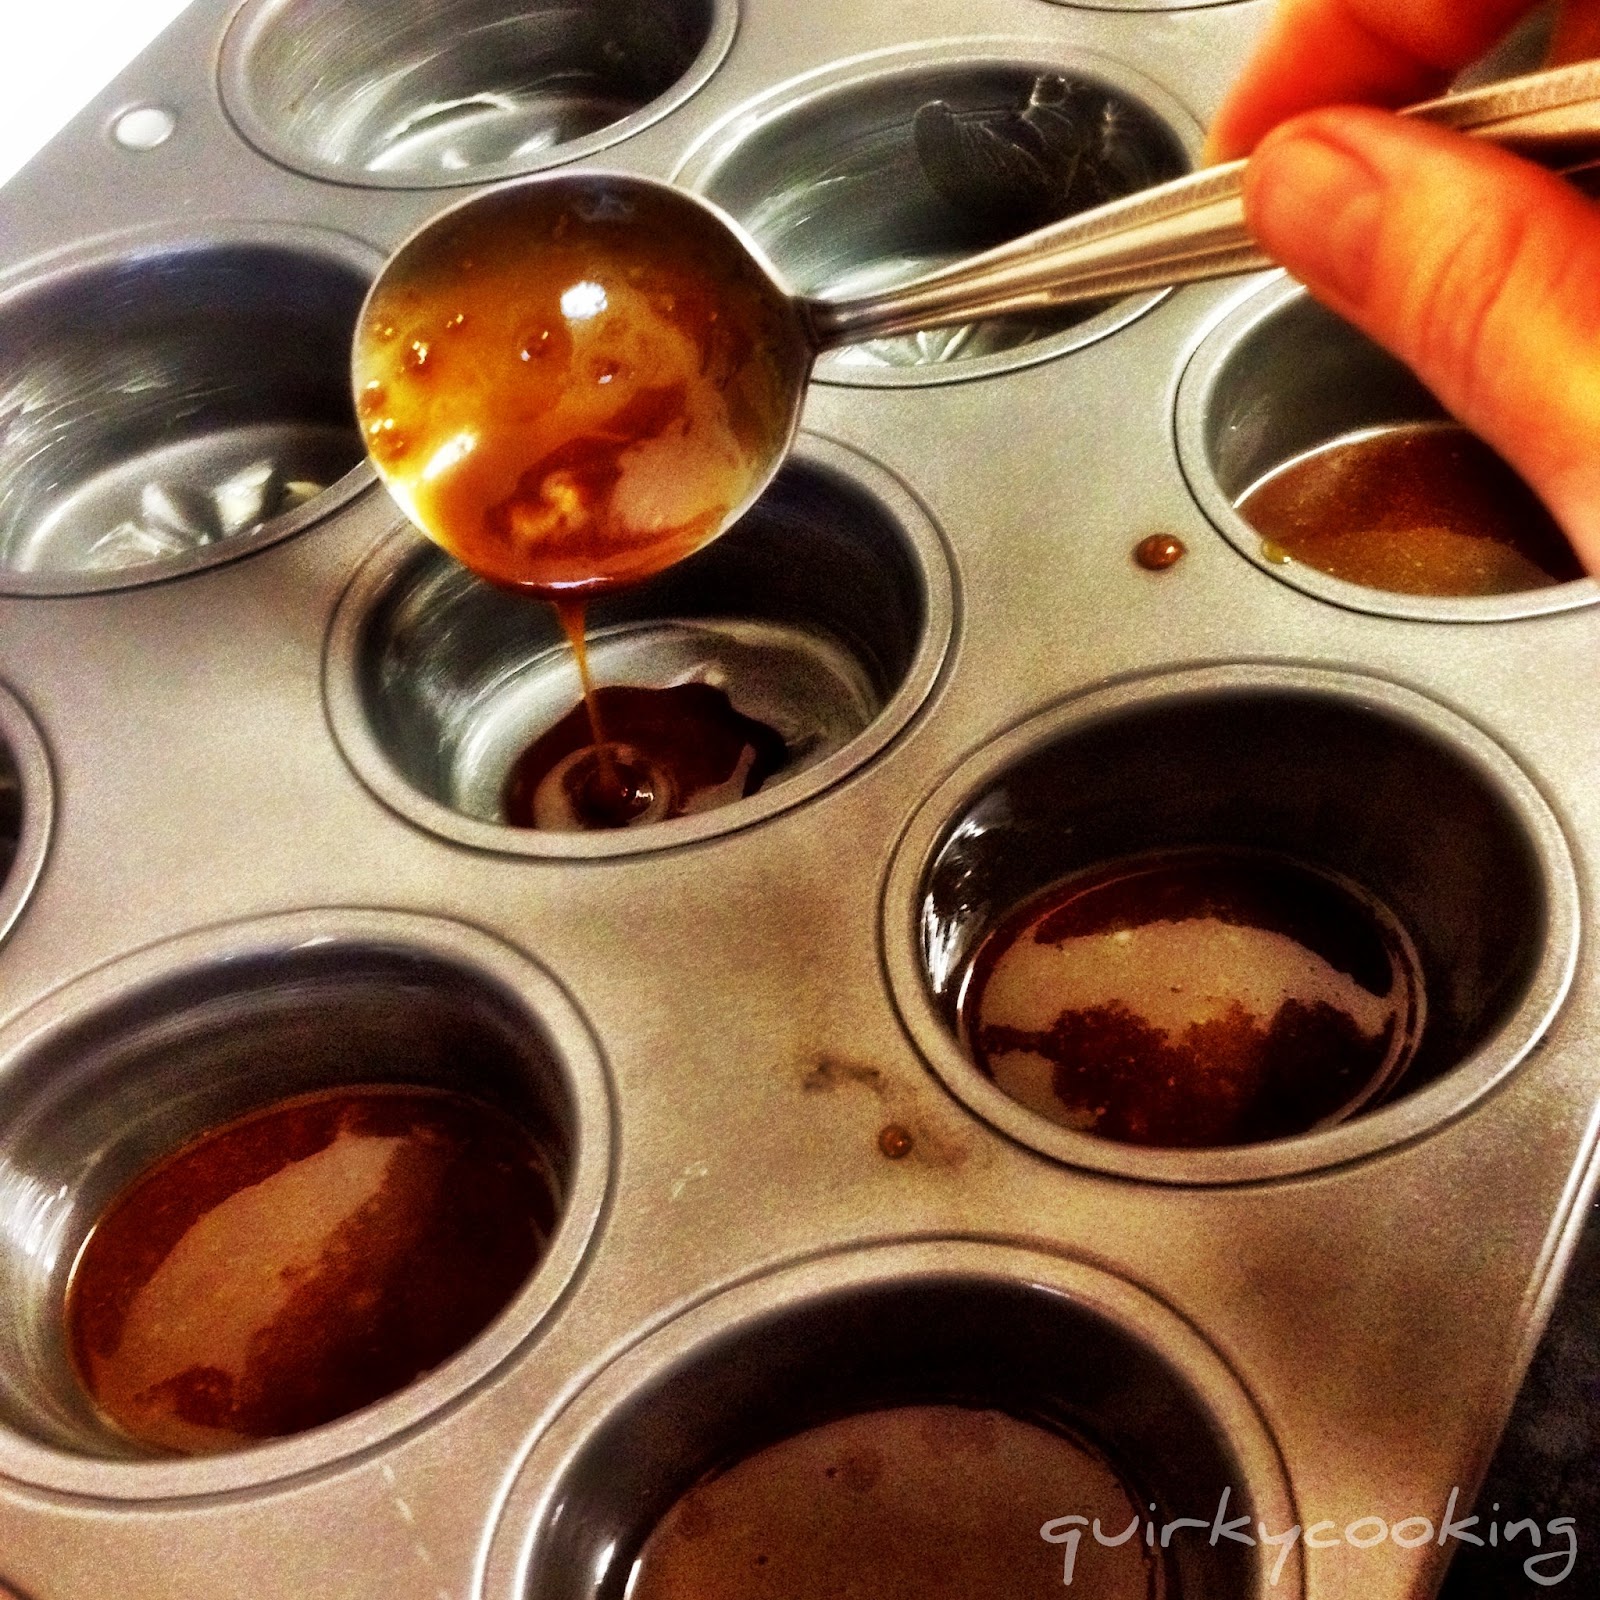
3. Spoon 1 Tablespoon of caramel mixture into each muffin cup.


Add a sprinkling of chopped pecans, and set aside.


No need to wash out Thermomix bowl.

4. Add all remaining ingredients to Thermomix bowl and mix on speed 4 for 6 seconds; scrape down sides of bowl and mix for another 5 seconds on speed 3 to combine.
- 130g raw pecans
- 110g macadamia oil
- 80g Rapadura
- 80g spelt flour (or gluten free or almond flour)
- 3 large eggs (55-60g each)
- 1 tsp vanilla extract
- 1/2 tsp baking powder
- 1/2 tsp sea salt

5. Divide mixture evenly between muffin cups. Bake for about 20 minutes at 180C, or until skewer poked into centre of muffins comes out clean.


Enjoy! I'm off to sneak the last one now that the kids have gone to bed...

Senin, 30 April 2012

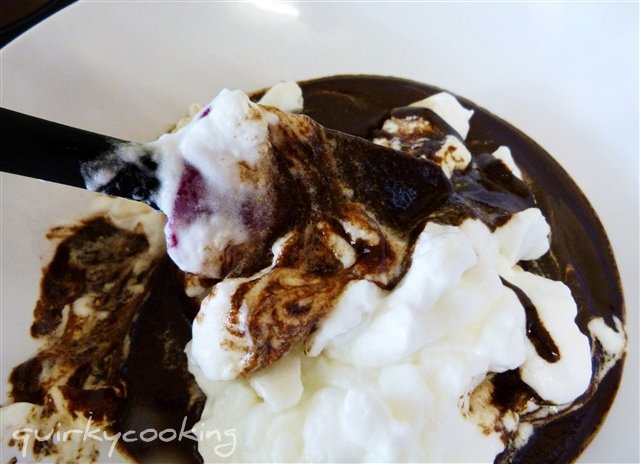
Chocolate Hazelnut Pudding {also known as Nutella Pudding!}


Anyone who loves chocolate and hazelnuts (or Nutella of course) will swoon at this pudding. Words cannot describe it, so I'm not even going to try. Just go make it. Seriously. You won't regret it.

And by the way - it's dairy free and gluten free, and has no junky white sugar or other 'food-like' substances, so it's practically health food! No guilt, okay? :D

[Not the greatest photo - sorry - couldn't wait to post this! Guess I'll just have to make it again tomorrow so I can take a photo by daylight! hee hee...]

Serves 6 - 8 (It's very rich!)


1. First, roast your hazelnuts. I go ahead and roast a whole tray at once, and freeze what I don't need - but just roast the recipe amount if you want to. (I buy my nuts bulk, so I have enough to roast trayfuls at a time.) The amount you need for this recipe is:
- 100g hazelnuts

Roast them for about 15 minutes at 180 degrees C, or until lightly browned. Rub the skins off (as much as possible, don't have to be too fussy) with a tea towel or with your hands. If you're lucky, you can pay one of your kids 50c to do the lot, like I did. ;)


2. Weigh the 100g of roasted hazelnuts into the Thermomix bowl, and grind them up on speed 9 for 10 seconds.

3. Add the chocolate and grind for another 10 seconds on speed 9:
- 70g dark chocolate, broken into pieces (I used 65% cocoa, dark, dairy free, sugar free chocolate - thanks to a very kind friend who sent me some amazing chocolate for a present!)

4. Add remaining ingredients and whiz it up for 20 seconds on speed 8. Scrape down bowl, and cook at 90 degrees for 7 minutes on speed 4:
- 300g coconut cream
- 300g rice-almond milk (or milk of choice)
- 2 eggs
- 50g Rapadura (or sweetener of choice)
- 20g tapioca starch (or cornflour)
- 1 teaspoon vanilla extract
- a very small pinch of Himalayan salt

Pour into little dessert dishes and enjoy either warm or cold.

Jumat, 16 Desember 2011

Rapadura-Maple Syrup Butter Toffee


I love to make homemade sweets for a special treat at Christmas time. There are way too many nasties and refined sweeteners in bought lollies, so it's nice to have some homemade ones to keep the kids happy. Okay, and the adults. :) This toffee recipe has been a favourite at our house for a couple of years now, ever since I found it on a great website called Deliciously Organic! Check out the original recipe here.

Unfortunately, you can't make it in the Thermomix, as you can't cook at temperatures higher than 114 degrees celcius, and to get toffee to the hard crack stage you need to get up to 150 degrees celcius. So, it's back to stirring over a hot stove for this one - but it's worth it! I do make the chocolate (or melt the chocolate) and chop the nuts in the Thermomix though.

If you don't have a candy thermometer, don't worry - neither do I. I've always cooked candies the old-fashioned way, ever since I was a little kid. Mum taught me the method of holding the wooden spoon up to see how the candy drips, and dropping bits in a cup of cool water to see how it sets. Here's an explanation of the cold water testing method, and how to tell what temperature your toffee has reached. For this recipe (or any toffee or lollipop recipe where you want 'crunch'), your syrup needs to reach the hard crack stage (300 degrees F / 150 degrees C). I'll explain a bit more about the 'how to' below.

You can do all sorts of variations with this recipe - the photo above has dark chocolate and sprinkles on some, and toasted pecans and dark chocolate on the other. You can use whatever nuts you like, or leave the nuts out and top with sprinkles instead. I use Hopper sprinkles - they are made from fruit & vege extracts, no artificial colours, flavours or preservatives. They are also gluten free, dairy free, egg free and nut free. For the chocolate, I prefer to make my own (with this recipe), but since I didn't have any cacao butter left I used Lindt 70% cocoa chocolate.


Here's how I make it:

1. First, toast 2 cups of nuts if you want nuts in the toffee. (Whatever nuts you like - almonds, macadamias, pecans, brazil nuts - even pine nuts.) Start with raw, unsalted nuts and toast them in the oven on 180 degrees C for 10-15 minutes, stirring once or twice, then roughly chop in the Thermomix (or leave whole if you like).

2. Then prepare a tray for the toffee - either grease a pizza or biscuit tray with butter, or line it with baking paper.

3. Measure into a large, heavy based saucepan and mix with a wooden spoon over medium heat:
- 1 1/4 cups Rapadura
- 1/3 cup pure maple syrup
- 1/3 water

4. Once it starts to bubble, turn the heat down to low and let it simmer for 3-4 minutes.

4. Stir in the butter:
- 225g (1 cup) butter (place a bowl on the Thermomix & weigh the butter into it - it's easier than measuring it into a cup!)

5. Continue to simmer until mixture reaches 150 degrees celcius (if you have a candy thermometer) - or hard crack stage (if you don't).

Testing to see if toffee is at hard crack stage:

Have a cup of cool water handy. As mixture simmers over low heat, try to only stir it a little now and then. Don't constantly stir it or you'll end up with a grainy, fudge-like texture. You want to keep the sugar from crystallizing on the sides of the pan - if it starts to do that, brush down the sides with a pastry brush (preferably silicon) dipped in water.

You'll notice the mixture starting to get darker and thicker after a few minutes. Give it a gentle stir, then hold the spoon up and let most of the mixture drip off. The last couple of drips will become a string of toffee - if the string thins out to a fly-away hair, it's about ready. (See picture below)

Let the string of toffee drip into the cup of cool water. If it hardens quickly into a brittle thread that snaps when you bend it (or crunches when you bite it) the toffee is ready - take it off the heat immediately! There's a fine line between ready and burnt. (Be careful it's not too hot before you pop it into your mouth to taste it!!)

6. Quickly stir in the salt, baking soda and nuts, making sure there's no soda lumps:
- 1 tsp fine sea salt
- 1/2 tsp baking soda
- 1 cup toasted, roughly chopped nuts (optional)

7. Pour the toffee onto the prepared tray, working quickly before it sets in the pan. Spread it flat with the spoon and leave in a cool place to set.

8. Meanwhile, chop (speed 5) then melt the chocolate in the Thermomix on 50 degrees for 3-4 minutes, speed 3:
- 200g dark chocolate, broken in pieces

9. Spread the melted chocolate over the toffee with a spatula, then sprinkle with the remaining chopped nuts, or with sprinkles. Place toffee in the freezer to set hard.

10. When it's ready, crack the toffee into shards with the point of a sharp knife.

I find this keeps best in the freezer in our hot, humid climate - I leave it in one big piece and crack some off as we want it, or break into smaller pieces and place in ziploc bags.


Make a couple of batches and share it with your friends - it's perfect for Christmas presents! You can make a little paper box, line it with baking paper, add the toffee pieces and pop on the lid. Sweet!

Here's a link to making your own paper gift boxes - I use a large, square sheet of scrapbooking paper for the lid of the box, and another for the bottom of the box. Cut 1 centimetre off two adjacent sides of the second sheet for the bottom of the box, so the lid will fit over. Use the offcuts to make a curly decoration for the lid, stuck on with double sided tape.

Minggu, 27 November 2011

Waffle Iron Brownies


Waffle Iron Brownies (gluten free version)
with Dairy Free Chocolate Sauce (recipe below)

 
This is just a quick post to share a recipe that's an old favourite in our chocolate-loving home... Waffle Iron Brownies! I can't remember where I first came across this recipe, but I've converted it to a healthier version, and I make the batter in my Thermomix.

Now and then we have these for breakfast for a special treat - or for afternoon tea when we feel like cake and there's nothing baked. These are very quick to make, so if you have a sudden influx of hungry children on the holidays, remember this recipe. Our kids love to break the waffles up into little hearts, drizzle them with cashew cream or maple syrup - or sometimes chocolate sauce for a special treat - and run off with one in each hand. Or maybe two in each hand if they can get away with it!

I make these with either spelt flour or gluten free flour. I use this gluten free flour mix here when making them gluten free. They turn out a little less crunchy, but still delicious.


Waffle Iron Brownies

1. Melt and mix at 100 degrees, 2 minutes, speed 3:
- 110g butter or coconut oil
- 30g organic cocoa (or raw cacao powder)

2. Add and mix on speed 5 for 10 seconds:
- 100g Rapadura
- 40g water
- 2 eggs

3. Add and mix on speed 4-5 for 10 seconds, depending on how finely chopped you like the nuts:
- 50g pecan nuts (optional)
- 170g unbleached white spelt flour (or gluten free flour)
- 1 tsp baking powder
- 1/4 tsp fine sea salt

4. Heat waffle iron, oil if necessary, and drop a couple of big blobs of batter onto hot iron, so that when it spreads out it will cover the surface of the iron. Close quickly and allow to cook until browned.

5. Serve with cashew cream or pure maple syrup. Or for a special treat, some homemade chocolate sauce and cashew cream!

Quick, dairy-free chocolate sauce:

Cook in Thermomix - 2 mins, 60 degrees, speed 2:
- 30g coconut oil or butter
- 80g-120g dark chocolate chips or dark chocolate broken in pieces (depending on how thick and chocolatey you like it!)
- 30g rice malt syrup (or honey)
- 30g rice-almond milk (or other milk)
- 1 tsp vanilla extract
Use more or less chocolate depending on how thick you like your sauce. Once it's cold, it will set to a chocolate spread consistency, and you can eat the leftovers on toast like nutella.

Jumat, 18 November 2011

Double Whammy Chocolate Cake


When my big sister was about seventeen, she used to buy 'Australian Gourmet Traveller' magazines. She loved to cook (yep, it runs in the family), and one of her favourite recipes was a flourless chocolate fudge cake. We loved that cake. I used to watch her make it, whipping up the egg whites, folding them into the rich chocolate batter, carefully placing it in the oven where it would rise, form a crispy crust, then the crust would crack and slightly crumble to reveal a dark, fudgy interior. She'd dust it with cocoa and we'd savour each bite. For some reason I never thought to ask her for the recipe until a couple of months ago when she came for a visit. Unfortunately, the recipe was long gone. But when she went home she sent me a few versions that are similar. One of them had a buttery, chocolate concoction on top that sounded amazing - but of course it had lots of sugar and dairy in the recipe. So I decided to come up with my own version, and after many trials and errors (which were happily eaten by my family and friends), here it is, the long-awaited... [drum roll...] Double Whammy Chocolate Cake recipe!

This is a very rich, decadent cake that has two layers - a flourless chocolate cake for the base, and a chocolate mousse-ish layer on top. A delicious 'double whammy' of chocolate. The method for each layer is very similar (and the ingredients are mostly the same) - but the base is baked, and the top is thickened with agar agar. Because of all the eggs (eight altogether!), dark chocolate and Rapadura, it's not something you'd make every day - but it's perfect for special occasions. It's similar to a chocolate cheesecake, except it's dairy free, gluten free, grain free and nut free... which is why I'm so excited about it!

The two layers

I love flourless cakes made with ground almonds or hazelnuts, but a lot of people can't have nuts. And if you can't have gluten or dairy either, eating cake becomes a very rare pastime. Which I think is very sad. So if you are one of those people, I hope this recipe makes you very happy. (And I'm pretty sure that even if you can have gluten, dairy and nuts, this cake will still make you very happy!) Enjoy.


You really only need a thin sliver of this cake - it's very rich!


Double Whammy Chocolate Cake

Preheat oven to 150 degrees Celcius.
Line a springform cake tin with baking paper and set aside.

1. Grind Rapadura on speed 9 for 30 seconds in a very dry bowl:
- 200g Rapadura
    Tip into a small bowl and set aside.


2. Break chocolate in pieces, weigh into Thermomix bowl and grind on speed 8 for 10 seconds:
- 240g dark, dairy free chocolate (eg. homemade chocolate or 70% cocoa Lindt chocolate)
    Tip into another small bowl and set aside.

3. Weigh into Thermomix bowl and cook at 50 degrees for 3 minutes, speed 3:
- 120g of the ground chocolate
- 120g coconut oil (cold pressed)
    Allow mixture to cool to 37 degrees.

4. Add Rapadura, cocoa and stevia to the chocolate mixture and begin mixing on speed 5. While mixing, separate 4 eggs, adding yolks to mixture through the hole in the lid as you go. Turn speed off once you get to 5 minutes.
- 100g of the ground Rapadura
- 1 Tblspn organic cocoa (or cacao) powder
- 4 egg yolks


Green stevia powder

Scrape the chocolate mixture into a large mixing bowl, set it aside, and wash out the Thermomix bowl really well. (Or if you have a second bowl, leave the chocolate bowl unwashed to use for the chocolate topping, and use the second bowl for the egg whites.)

5. Insert the butterfly into the dry, clean bowl, and whisk the egg whites and cream of tartar on speed 4 for 4 minutes, until stiff:
- 4 egg whites
- a pinch of cream of tartar


6. Fold the egg whites gently into the chocolate mixture in the mixing bowl, using a spatula, until just combined.


7. Pour batter into lined cake tin and bake for approximately 1 hour at 150 degrees C, or until a knife inserted in centre of cake comes out clean.

8. Set cake aside to cool while you make the topping. Start off with the same method as you used with the cake - melt together the remaining chocolate and coconut oil at 50 degrees for 3 minutes on speed 3. (Use the first bowl that had chocolate mixture in it, if you have two - no need to wash out.)
- 120g ground chocolate
- 120g coconut oil (cold pressed)
    Allow mixture to cool to 37 degrees.

9. Add remaining Rapadura, cocoa and stevia to the chocolate mixture and begin mixing on speed 5. While mixing, separate 4 eggs, adding yolks to mixture through the hole in the lid as you go. Turn speed off once you get to 5 minutes.
- 100g ground Rapadura
- 1 Tblspn organic cocoa (or cacao) powder
- 1/4 tsp green stevia powder
- 4 egg yolks

10. Sprinkle agar agar over water in a measuring cup/jug and mix in until it dissolves. Add to the chocolate mixture and mix on speed 5 for a few seconds until well mixed.
- 2 heaped teaspoons agar agar
- 1/3 cup room temp water


Agar agar powder

The chocolate mixture will become thick and creamy, kind of like a pudding consistency - like this:


11. Scrape the chocolate mixture into a large mixing bowl, set it aside, and wash out the Thermomix bowl really well. (Or if you have a second bowl, use the one you already used for egg whites again for the next batch. No need to wash out unless you got some chocolate mixture in it.)

12. Insert the butterfly into the Thermomix bowl and whisk the egg whites and cream of tartar on speed 4 for 4 minutes, until stiff:
- 4 egg whites
- a pinch of cream of tartar

13. Fold the egg whites gently into the chocolate mixture in the mixing bowl, using a spatula, until combined. Pour topping mixture onto the cake in the springform tin. It doesn't seem to matter if the cake's not completely cool, as the topping is quite thick and will set anyway.


14. Cover the cake and set it carefully in the fridge to set overnight. Or if you're impatient, place it in the freezer for a couple of hours, then the fridge. It should set so that the topping is firm and can be sliced without losing it's shape.

This cake will keep for up to a week in the fridge, so it's great to make ahead if you're taking it to a party. Or you could just make it for yourself and eat a little tiny slice every day for days on end... ;) Just freeze the individually wrapped slices and they'll last for ages. And they taste great straight from the freezer too - like an ice cream cake!

Sigh. Mine's all gone now, and I've finished testing this recipe. I need to think of another excuse to make it now...


Tips & Variations:

* It's very handy to have two Thermomix bowls when making this recipe! You can have one bowl for the egg whites, one for the chocolate mixture, and it's a lot quicker and easier. But if you only have one bowl, that's okay - this cake is still worth the little bit of extra work.

* Room temperature egg whites whip up the best, so leave the eggs out of the fridge for a while before you make this.

* I buy my coconut oil in bulk either through my co-op or on the internet. It's a lot cheaper that way. If you'd rather, you can use butter instead of the coconut oil.

* The green stevia is added to cut down on the amount of Rapadura used. If you want to you can increase the Rapadura to 250g and leave out the stevia. Or you could cut the Rapadura down further and use more stevia - eg. 80g Rapadura + 1/2 tsp stevia for the base, same for top. If you can't find green stevia, you can order it online here - it tastes better than the white stevia powder or stevia liquid, and is just the dehydrated leaves, ground up.