Tampilkan postingan dengan label dairy free. Tampilkan semua postingan

Minggu, 16 Februari 2014

Dairy Free, Egg Free Aioli


This recipe has been a long while in the making. Over the last few months I've experimented a lot, determined to come up with a dairy free, egg free aioli that isn't runny. Sometimes I've had six or seven different batches lurking in my fridge at once... good thing I buy my macadamia oil in bulk*! 
I didn't give up because I wanted so badly to have this recipe in my book. Sadly, it just wasn't ready in time, so I've decided to post it here so all that hard work (and many litres of macadamia oil) doesn't go to waste. :)

This is not a traditional 'olive oil and garlic' aioli (which is of course dairy and egg free), but the flavour is more like an aioli than a mayonnaise so I call it aioli. I love it with fish, or on baked potatoes, or you can even add herbs and use it as a dip with crudites (see variation below). You can, of course, also use it instead of mayonnaise on sandwiches and wraps, or in a potato or chicken salad. 

I have tried making this with rice milk but it doesn't thicken like cashew milk does, so I stuck with cashew milk. If I come up with a nut free version I'll let you know! 

So here it is... I hope you like it. :)


Dairy Free, Egg Free Aioli
Makes 300g - lasts for 2-3 weeks in the fridge

Ingredients

100g raw cashews
500g water
2-3 garlic cloves
¼ tsp fine sea salt
150g macadamia oil
3 tsp lemon juice, freshly squeezed

Method

Place cashews into mixing bowl and mill for 8 sec/speed 9.

Add water and blend 1 min/speed 9. Pour into a separate container and wash and dry mixing bowl.

Place garlic into mixing bowl and chop 3 sec/speed 7. Scrape down sides of bowl with spatula.

Add salt and 150g of the cashew milk, and insert butterfly. Cook 5 mins/100C/speed 4. Scrape down lid and sides of bowl with spatula. (Place remaining cashew milk in fridge.)

Weigh macadamia oil into a small jug with a pouring spout.

With butterfly rotating on speed 4 and MC in place, drizzle oil very slowly onto lid, starting with just a few drops at a time, and progressing to a very thin stream. Take your time! With butterfly still rotating on speed 4, drizzle in lemon juice. This process should take approximately 6-7 mins.

Remove aioli carefully to small jug or jar, without mixing it with spatula so that it stays light and airy. Cover and store in fridge.

That's it! Very easy, just make sure you take your time while drizzling in the oil, as that will make all the difference.

Herb & garlic variation:

When chopping the garlic, add a few green shoots from spring onions, or some chives, and a sprig or two of parsley.

Notes:

- You will have cashew milk left over - store in fridge to use in cuppas or cooking. Makes great cappucinos!

- If you do try another kind of milk in the aioli, it needs to thicken in the cooking stage before the oil is added, or the aioli will be runny. I've found that soaked cashew milk doesn't work so well as it's thinner, so stick with this method.

- If you're wondering where I buy my macadamia oil in bulk (because I know I'll get that question!), I buy Pressed Purity (extra virgin cold pressed) in a 10 Lt container through my co-op, from Fitness Products

Rabu, 05 Februari 2014

Chocolate-Cherry-Berry Dessert Pizzas


Last Saturday my niece came to visit from down south, so we got the kids' friends over for a pizza party to celebrate. There were at least 20 teenagers, plus a few other younger kids, and we all had a lot of fun!


To make the food side of things simpler, I got them to all bring pizza toppings to share. They chopped up the toppings while I made enough spelt pizza dough for about 20 pizzas (easy peasy in the Thermomix!), and then they all made their own pizzas. (In between soccer games, board games, remote control aeroplane flying, chatting, laughing, singing, and everything else!) So much more fun than buying pizzas, not to mention cheaper, healthier and yummier. Oh, and in case you're wondering, we used two ovens - mine and mum's - she just lives two doors down. :)


I also made mango sorbets with magic chocolate topping (see 'Day 7') for afternoon tea, which they loved, and no one complained about the lack of softdrink or junkfood, so they must be getting used to my strange ways! :D

After dinner I had a bit of a brainwave, and whipped up these dessert pizzas with the leftover pizza dough. I topped them with my homemade Chocolate Hazelnut Spread, some cherries and blueberries, zabliagone (a kind of egg yolk custard, no milk, a bit like sabayon), and flaked almonds. Delish!!

I used spelt bases for the kids, but if you're gluten free, don't despair. Use my recipe for Gluten Free Pizza Bases, adding 1 Tbspn of rapadura or coconut sugar to the batter. Blend it well so that the seeds are blended in. You could also use an almond meal pizza base recipe if you want a grain free, yeast free option. Try this one, leaving out the rosemary and garlic; swap the olive oil for macadamia oil, and add 2 tsp coconut sugar per base. See suggestions in recipe for a nut free version.


These pizzas are best served hot, so if you don't want to invite 20 hungry teenagers over for a party and your family won't eat three in one go, try this:

- Make the dough and divide into three portions; place remaining dough in bags and refrigerate or freeze dough for another day. (Dough can stay in fridge for up to a week.) 

- The chocolate spread will last in the fridge for a couple of weeks no problem, as will the cherries if left in the juice in the jar. The blueberries can be frozen. 

- Make zabliagone with 2 egg yolks, 1 tsp maple syrup and 1/2 tsp vanilla, for 10 mins cooking time total. 


Chocolate-Cherry-Berry Dessert Pizzas
Dairy free, with gluten and grain free options, and nut free option

(Makes 3 large pizzas)


Ingredients

Bases:
500g unbleached, plain spelt flour
2 tsp instant yeast
1 1/2 tsp fine sea salt
1 Tbspn Rapadura or coconut sugar
50g macadamia oil (or olive oil for nut free), plus extra for shaping dough
260g water

(or see gf options above)

Toppings:
1 batch of Chocolate Hazelnut Spread (or nut free chocolate spread/ganache, from this recipe)
  (freshly made - or use your own version of 'Nutella' or ganache)
1 800g jar of Morello cherries, drained
1 125g punnet fresh blueberries, rinsed
zabliagone (see below)
80g flaked almonds (or flaked coconut for nut free)

Zabliagone:
3 egg yolks
2 tsp pure maple syrup
1 1/2 tsp vanilla or almond extract

Method

Line 3 large pizza trays with baking paper, and set aside.

Place all base ingredients into mixing bowl and mix 6 sec/speed 6.

Knead on interval setting for 1 1/2 mins, then wrap dough loosely in Thermomat (or silicon bread mat, or place in oiled bowl and cover) and let it rest for 20 mins while you prepare the toppings.

Preheat oven to 200C, with pizza stones on racks if you have them.

After dough is risen, divide into three portions and press out into circles using a little more oil, and place on trays.

Divide chocolate hazelnut spread between the three pizzas and spread evenly over bases.

Scatter the cherries and blueberries over the pizzas, and set aside to rise while you make the zabliagone.

Zabliagone: Place egg yolks and maple syrup into mixing bowl, insert butterfly, and mix 6 mins/50C/speed 4. Add vanilla or almond extract and mix another 6 mins/50C/speed 4.

Drizzle pizzas with zabliagone and sprinkle over the flaked almonds.

Bake for approx 18-20 mins in hot oven on pizza stones (if you have them), until the zabliagone is lightly browned and the bases are cooked through.

Best served hot, while the base is crisp.

(Leftovers can be stored in the fridge in an airtight container, but they will get a bit soggy and the zabliagone will melt into the chocolate - although my kids don't complain! They still taste good.)


Kamis, 30 Januari 2014

Paprika Chicken with Creamy Paprika Sauce (an easy all-in-one Thermomix dinner)


Last night I got home late after a busy day and didn't have dinner organised, so it was 'Thermomix to the rescue' once again! I had a quick think, and this is what I came up with. Nothing fancy, just an easy and tasty dinner with basic ingredients, that took all of 25 minutes to make. Sometimes that's just what we need when we can't be bothered, right? (It is really yummy though, and the chicken breasts are amazingly tender and juicy when steamed!)

This fed our family of six and there were plenty of leftovers, which is always a bonus since everyone generally wants dinner for breakfast at our house. :)

This recipe is gluten free, and egg free, and if you omit the butter is also dairy free. The sauce is blended with cashews to make it creamy, but if you can't have nuts, see the nut free variation below. I've added some tips for those of you without a Thermomix, so you don't miss out.


Paprika Chicken with Creamy Paprika Sauce
(Serves 6-8)

Ingredients:

Rice
900g water
380g basmati rice

Veges (these are just suggestions, use what you have)
3 carrots, peeled and sliced thinly
200g green beans, topped and tailed
1-2 zucchini, thinly sliced
150g frozen corn

Chicken
600-700g chicken breast fillets, sliced in 2cm thick pieces
smoked paprika powder (approx 1 tsp)
herb salt (eg. Herbamare)
garlic powder (approx 1/2 tsp)
1 Tbsp butter or ghee (optional)

Sauce
60g raw cashews
60g water
2 tsp chicken or vegetable stock paste (my chicken stock paste recipe here)
1 tsp smoked paprika powder


Method:

Pour water into mixing bowl.

Weigh rice into steaming basket and rinse well, then place basket inside mixing bowl.

Place chicken pieces onto Varoma tray and sprinkle with paprika, herb salt and garlic powder, and dot with butter or ghee if using.

Place Varoma into position with lid on.

Turn speed dial to speed 5 for a few seconds to wash the water through the rice. (That's my little trick to make sure the top of the rice cooks well and you don't end up with crunchy bits.)

Begin cooking for 20 mins/Varoma/speed 2 while you cut up the veges, adding them to the dish as you go. (It takes about 10 minutes for the steam to really start filling the Varoma, so it's easy enough to get the veges cut up in that time.)

At the end of the cooking time, check that the chicken is cooked; add a couple more minutes if not.


Remove chicken, vegetables and rice to Thermoservers or serving dishes. (Or if you're having an 
"I don't feel like doing heaps of dishes" night, just leave them in the Varoma and basket and set aside.)

Add all the sauce ingredients to the little bit of liquid left in the bowl. (There should only be about 3cm of water left as the rice has absorbed most of it.)

Blend 1 min/speed 9. Scrape down lid and sides of bowl with spatula and blend again if needed, until smooth. Season to taste.

Serve the rice onto plates, top with veges and chicken, and drizzle with sauce.

Easy peasy! :)

Variations:

Nut free version: I haven't tried this yet, but I think it would be simple to leave out the cashews and add a can of Ayam coconut cream instead, with the 2-3 tsp vege stock paste and 1 tsp paprika powder. Warm it up a bit, 1 min/90C/speed 4. Season to taste.

Non Thermomix version:  Pour 100ml boiling water over the raw cashews and allow to soak (covered) while the meal cooks. Cook the rice in a rice cooker or on the stovetop. Cook the chicken and vegetables in two layers in a steamer, or in a large frypan with a lid, over med-low heat, until done. Blend the soaked cashews with soaking water and remaining sauce ingredients in a powerful blender until smooth and creamy. Season to taste. (Massel stock powder can be used instead of stock paste.)


Senin, 23 Desember 2013

Christmas Breakfast Casserole


I often feel a bit overloaded with all the sweet stuff at Christmas, and the kids tend to dig into their Christmas stockings first thing and start in on the homemade sweets, so a savoury breakfast/brunch on Christmas day makes a lot of sense to me. (I prefer a savoury breakfast any day, actually.)

This year, we're having our traditional Christmas dinner of roast turkey and all the trimmings on Christmas Eve. Christmas day we're having a lazy breakfast after the kids open their presents, then getting together for dinner with friends on Christmas night. So this is the breakfast I'm making for Christmas day - a 'prepare ahead' brunch casserole. Oh, and mum is bringing Monkey Bread too, so that should keep everyone happy. :)


This casserole might not look like much (it was hard to photograph!) but the kids love it - it's very tasty. The bottom layer is homemade hashbrowns, made with a mixture of potato and orange sweet potato. Then there's a layer of egg, then a spicy American style turkey or beef mince layer, and egg and zucchini on top with a sprinkle of herbs and savoury yeast flakes. You can use grated parmesan instead of savoury yeast flakes if you don't need it to be dairy free.

You can prepare this the day before if you like, and bake it on Christmas morning while the family is opening presents. Easy.

P.S. This is obviously also just a great midweek dinner with a salad!

Christmas Brunch Casserole 
(Gluten Free, Grain Free, Dairy Free, Nut Free)


Serves 6

Preheat oven to 180°C.

1kg potatoes, roughly chopped (I use a mixture of potatoes and orange sweet potatoes)
1 brown onion, halved
2 garlic cloves
3 Tbsp ghee or coconut oil
2 tsp herb salt
Freshly ground black pepper
500g turkey or beef mince
1/8 tsp sage, ground
1/4 tsp cayenne pepper
1/2 tsp oregano
2 Tbsp tamari
2 Tbsp tomato sauce
10 eggs
tsp garlic powder
1 tsp onion powder
1 zucchini, quartered
2 tsp savoury yeast flakes

1. Place potatoes, onion, garlic, 1 tsp of herb salt and some freshly ground pepper into mixing bowl and chop 30 sec/speed 4.
 
2. Melt ghee or oil in a large frypan and add potato mixture. Stir and fry until lightly browned and cooked through, approx. 10 mins. Spread over base of a 34 x 22 cm rectangular baking dish and set aside.

3. Meanwhile, place mince, sage, cayenne, 1/4 tsp oregano, tamari and tomato sauce into mixing bowl and mix 10 sec/reverse/speed 3. Cook 4 mins/Varoma/reverse/speed soft with MC off (until barely cooked). Remove to a bowl and set aside.

4. Place eggs, 1 tsp herb salt, garlic powder and onion powder and some freshly ground black pepper into mixing bowl. Mix 5 sec/speed 4, then drizzle half the mixture over the potatoes.

5. Sprinkle mince over the egg layer. 

6. Add zucchini to remaining egg mixture in mixing bowl and chop 3 sec/speed 5. Spread over mince layer and sprinkle with 1/4 tsp oregano and yeast flakes.

6. Cover with foil and bake in preheated 30 mins, then remove foil and bake a further 30 mins, or until set and browned.

OR

To Prepare Ahead:

Cover casserole with foil and place in fridge overnight. In the morning, place in preheated 180°C oven and cook 45 mins, then remove foil and cook 30 mins or until set and browned.

Minggu, 10 November 2013

An Update, a Creamy Pine Lime Green Smoothie Recipe, and a Glass Straws Giveaway!


Hi guys! What have you all been up to? I've been too busy for blogging much lately, but I thought I'd better pop in and update you all on what's happening around here! And because I miss you :)

So let's see, what's been happening...

Well last weekend I cooked for The Organic Experience grassroots food tour, which was a blast as always. If you ever get a chance to go on this tour, I highly recommend it - you will learn HEAPS about sustainable farming, why it's important to buy local produce, healthy homegrown living, back to basics cooking, and creating a strong, vibrant community where you live. I wish I could go on every tour, they're amazing! Emma Lodge does a great job of organising them. The photo above is where I cooked lunch, at a quaint little community hall out amongst the green fields not far from home...


Sjoerd of Real Food Network was the tour guide this time, and did a great job

It was really lovely to meet Sarah (aka the Clever Cook) on the tour - her and her husband flew up from Brisbane to come along! So see? It must be worth it! ;) (Btw, check out her blog if you love healthy food with an emphasis on low carb, gluten free options - lots of yummy ideas.)


Me and Sarah (and yes, I was pretty tired by then!)


For those of you who have wondered how the Ford Territory Titanium test driving is going (I've had lots of questions): YES I love it, I'd buy one in a flash! I've been driving it for the last 6 weeks thanks to Voices of 2013 and Ford (thanks Ford, can I please keep it??) and it's just a beautiful car to drive. As you can see, it fits heaps in the back with the two back seats down. I've had all sorts of cargo in it, from cooking gear for my classes and demos, to luggage (and Thermomix of course) when we went away for a week (all six of us), the kids and their soccer balls and jackets and boots and bags, the vege box from our co-op...


Yes, tomorrow will be a sad day, as I have to give the Ford back. :( One last goodbye photo... 


Sigh.

In other news, I started a Quirky Cooking Chat Group! Have you joined yet? We have such a great community on Facebook, and I think that collectively you guys know the answers to just about everything there is to know. So, after lots of requests, I decided last night to set up a group where you can post your questions and our quirky community can help answer them... which takes some of the pressure off me, because I can't keep up lately!

There's lots of great discussions happening over there (and already nearly 4000 members in 10 days!) so check it out and request to join if you'd like to. There are a few admins looking after things and I'll pop in when I can (although when I do, they tell me to 'go write that book'!! ha ha)

I have turned off the private messages on my facebook page for now, but if you need to contact me privately you can still email through the email button on my blog. I will of course still be posting on facebook as usual, but the 'chat group' is great for getting a quick answer to your questions, and you can 'search' for topics in the group too, which will be helpful. (Note: If you've sent me a private message already, I can still read and answer them, and will try to when I can, but if possible, repost it in the group, then other readers can pitch in to help.)

So that's my news for now, other than that it's still work work work on the book, and getting ready for the photo shoot which is happening in Perth next month! Yay!! (All a bit exciting!)


And now for a little recipe and a GIVEAWAY! Because I know this is what you were waiting for... right?


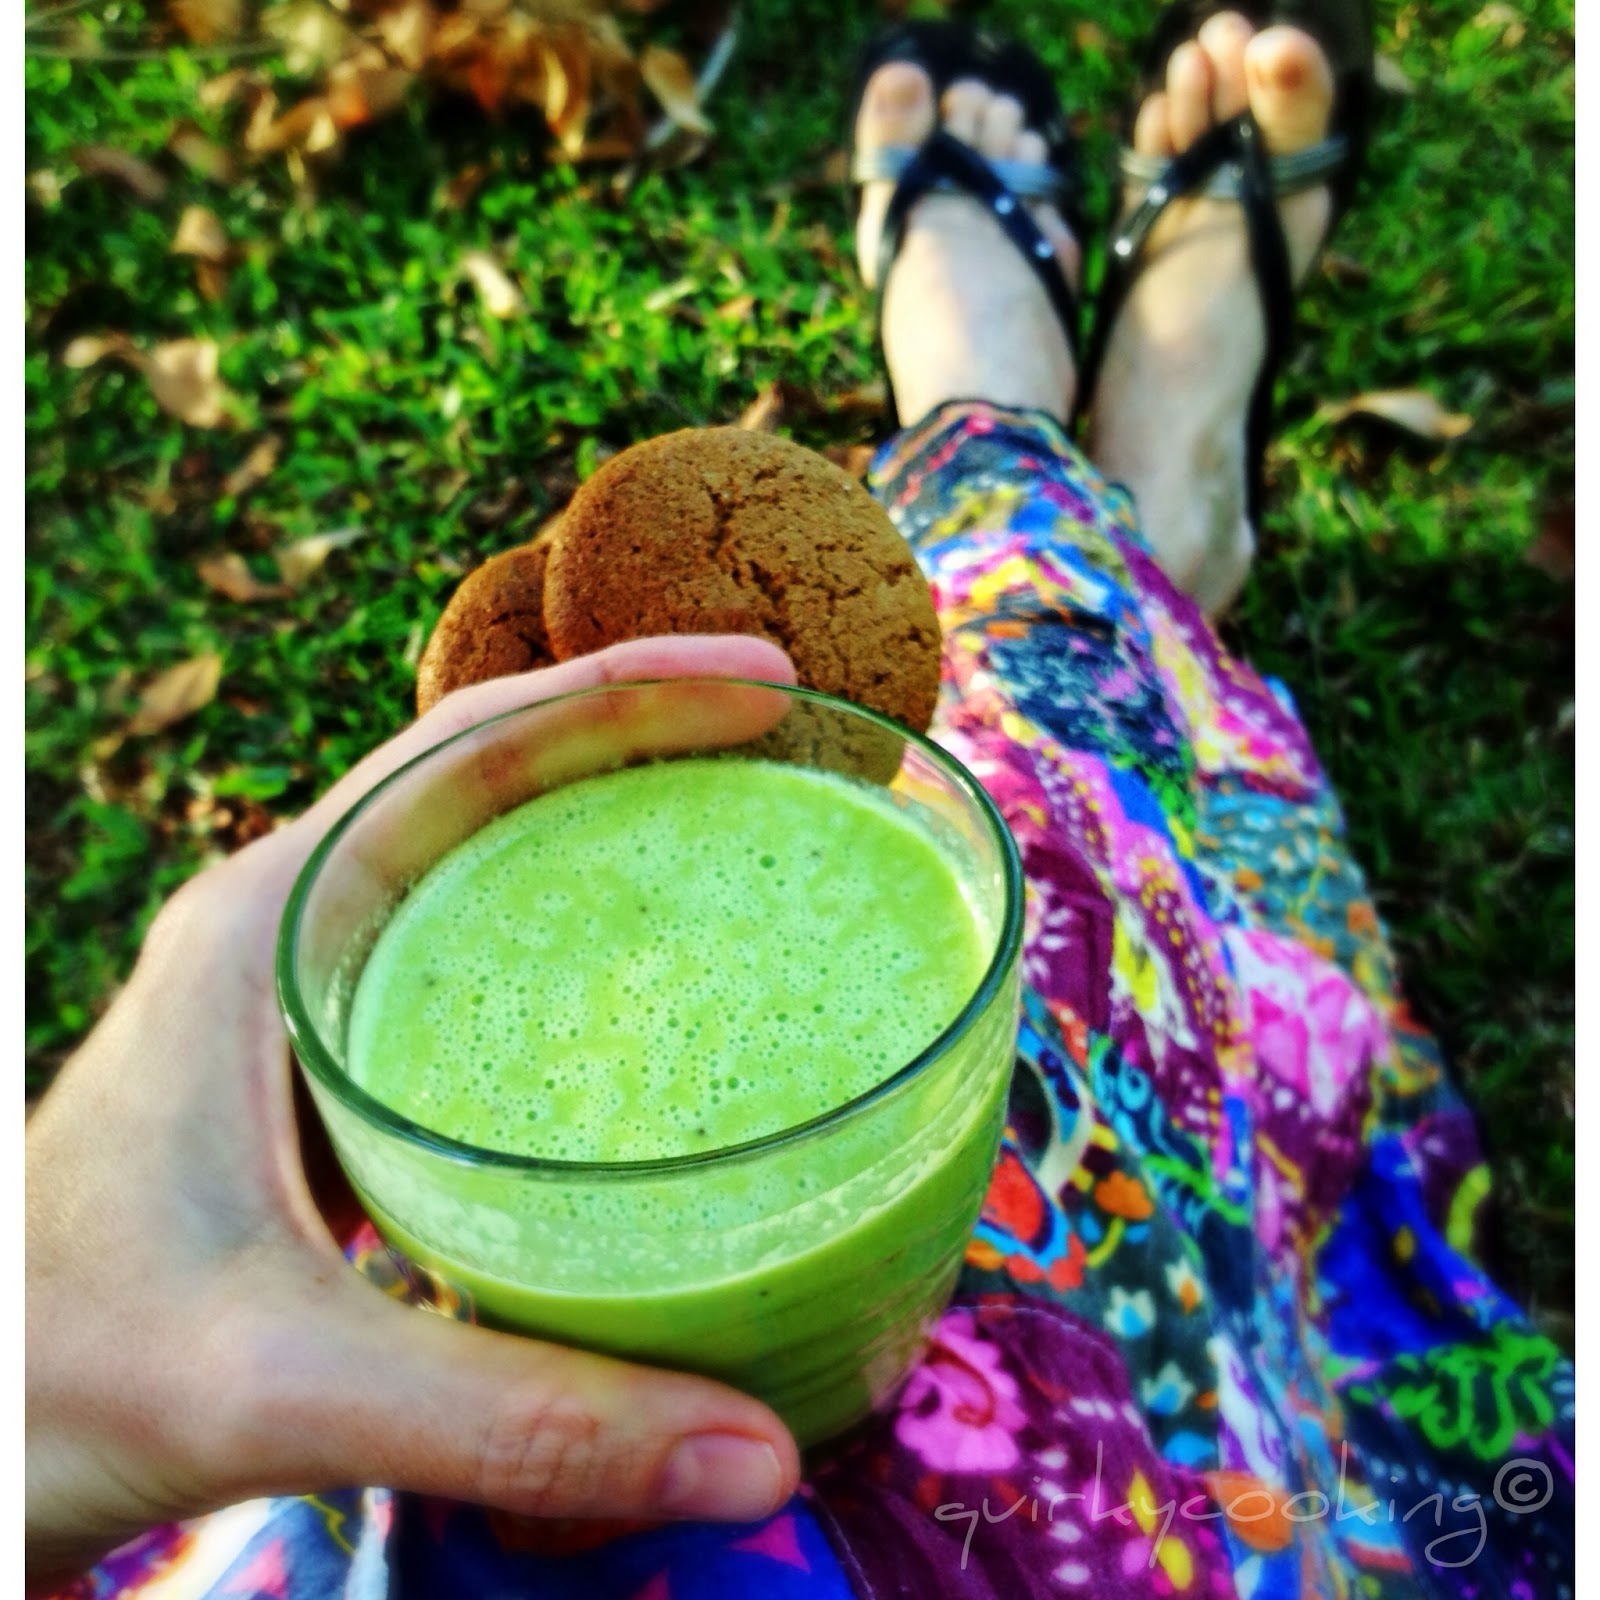
The other day my daughter was feeling sorry for herself because she'd just had her braces adjusted and her mouth was too sore to eat, so I made up this smoothie for her. (Oh, and some gingerbread biscuits.) So so yum. And because I love you guys so much, I'm not only going to give you the recipe, I'm also going to give you the chance to win one of five 'Smoothie Starter Pack' from glassstraws.com.au! (Check out their Facebook page here.) 

image.jpeg

WIN!

1 of 5 'Smoothie Starter Packs' 
Includes: 
1 bent glass straw
1 straight glass straw
1 cleaning brush

To win, all you need to do is comment on this blog post and say why you'd love some glass straws. The winner will be randomly drawn next Sunday evening (17th Nov) at 8.30pm, via Random.org, and announced here and on my Facebook page. (Winners must be Australian residents only.)

Note: If you are reading this on a mobile device, you will need to switch to web version (scroll to bottom of page) to be able to comment.

Winners: Jodie Fitch; Cassie; Deb; Rachel and Helen
Winners have been notified via email.

And here's the recipe...

Creamy Pine Lime Green Smoothie
(Serves 4)

100g activated (or raw) cashews
1 pink lady apple, quartered
1 large naval orange, peeled & halved
1 lime, peeled
200g frozen pineapple, cut in 2cm cubes
60g baby spinach leaves
300-400g Natural Raw C coconut water

Place all the ingredients into your Thermomix or a powerful blender, and blend 2 mins/speed 10.

And if you were wanting the gingerbread bikkie recipe, it's a bit of a spin off of these ones. The new version will be in my book, but these are yummy too.

So that's it from me tonight, I hope you enjoy the smoothie, have a great week.

Jo xx


Minggu, 06 Oktober 2013

Quick & Easy Pancakes - 3 Ways


Someone mentioned to me the other day that they love my Blender Batter Pancakes recipe, but that sometimes they're in too much of a rush to do the whole 'prepare the night before' thing, and they needed a simple pancake recipe for times like that. I agree - I don't always soak the grains the night before, because pancakes are sometimes a spur of the moment thing. Like last night.

We arrived home from our road trip to Mackay in the afternoon, and I managed to scrounge through the fridge and freezer to find mince and veges for a quick dinner. But by 8pm I was hungry again. That's when it dawned on me that while I was away my mum had stocked up the big freezer with half a pig (homegrown by a friend and butchered locally). AND I had just bought a litre of organic pure maple syrup from Sprout in Townsville. Perfect. Pancakes, bacon and maple syrup, coming up! (Yes, I know, soup for breakfast and pancakes for supper... I'm weird like that.)


I used to work at a roadside cafe for a Canadian lady when I was 18, and she found it very strange that I didn't know how to make pancakes just off the top of my head. It made her quite impatient when I'd ask her 'How much flour was that again? How much milk?' So I soon learnt, and nowadays I don't usually measure, just chuck in a bit of this and a bit of that until they look right. But just in case you are like my 18 year old self and need a recipe, I've written out the measurements for you. Feel free to tweak to taste - more milk for thinner pancakes, less milk for thicker. And I've added a few variations, so you can pick between spelt, gluten free and grain free coconut flour pancakes. If you need an egg free or nut free variation, check out the notes below the recipes.

Enjoy!


Quick & Easy Pancakes

250g spelt flour (white and/or wholemeal) or 220g plain gluten free flour
2 tsp baking powder
1/4 tsp fine sea salt
300g rice-almond milk or coconut milk (or alter amount depending on preferred thickness)
30g macadamia oil or soft butter
1 tsp vanilla extract
1 egg (optional - see notes)
coconut oil for cooking pancakes

Place dry ingredients into mixing bowl and blend 5 sec/speed 5.

Add remaining ingredients (except oil for cooking) and blend 10 sec/speed 5.

Heat a heavy based frying pan over medium-high heat and add 1-2 Tbsp coconut oil. Once it melts, pour in 10cm circles of pancake batter, and turn heat down slightly to make sure the pancakes don't burn.

Cook until bubbles are forming and popping in the batter, and edges are becoming crisp. Turn over and cook until lightly browned.

Remove pancakes to a plate, add another 1-2 Tbsp coconut oil, and continue cooking pancakes until batter is finished.

Serve hot with butter (opt) and pure maple syrup, or sprinkled with Rapadura or coconut sugar and freshly squeezed lemon juice. Leftover pancakes can be stored in an airtight container for up to 2 days and served with jam as pikelet, or reheated under the grill.

This batter also works well for waffles.

Notes:

To make these egg free you can use egg replacer, or chia eggs (1 Tbsp chia seeds + 3 Tbsp water), or half a mashed banana, or just add a little extra milk.

For nut free, use olive oil, coconut oil or butter, and coconut milk instead of rice almond milk.


Coconut Flour Pancakes

5 eggs
170g almond milk or coconut milk
70g coconut flour
30g macadamia oil
1/2 tsp vanilla extract
1/8 tsp fine sea salt
2 tsp baking powder

Place all the ingredients into the mixing bowl and blend 10 sec/speed 6. Scrape down sides of bowl and reblend briefly on speed 3 if needed.

Cook as above.

Notes:

To make almond milk, just mill 100g raw almonds 10 sec/speed 9, add 500g water and blend 
1 min/speed 9. No need to strain the milk for this recipe.

Coconut flour really needs the eggs to work, although maybe banana would work instead. 
I haven't tried that yet - let me know if you do!

For nut free, use soft butter or coconut oil instead of the macadamia oil, and coconut milk instead of almond milk.

Selasa, 10 September 2013

Coconut Vanilla Sorbet


Spring is here, and the weather is finally beginning to warm up, yippee! At least, it is here, up in the mountains in Far North Queensland. 

For the last couple of months I've been putting off testing ice cream recipes for my book, as it's just been too cold. But today was absolutely gorgeous, and the sunshine encouraged me to get started. I decided to begin with a coconut sorbet, and it turned out so delicious I just couldn't wait to share it. (Don't worry, I have way too many recipes to fit in my book anyway, so I can afford to pop one on the blog instead.) :)


Photo taken this evening on our street ~ Spring is here!

I got the idea for this recipe a few weeks ago, when I saw a coconut sorbet in the freezer section of the grocery store. The ingredients were: coconut water (60%), cane sugar, coconut cream and flavour, desiccated coconut, dextrose, natural stabilizers (xanthan, guar gum, carrageen, maltodextrine). I figured I could make my own with less ingredients, no highly processed sugar, no flavours, and no carrageen. For less money. So that was my challenge... I hope you'll let me know what you think of the outcome! I haven't actually tasted the one from the grocery store so I have no idea if mine is the same sort of flavour, but I love this one and am very happy knowing it's healthier and costs less.

This sorbet actually took me right back to my childhood, when mum would make ice cream for us from fresh snow. Have you ever eaten 'snow ice cream'? When I was 4-5, we were travelling around the USA in a camper van for a year. When it snowed we would go outside and scoop up the clean snow, take it back into our warm camper van, and Mum would mix in some sugar and vanilla. We thought it was the most amazing treat ever. It's funny, I haven't thought about snow ice cream for years, but with my first mouthful of this sorbet, that's all I could think of! So I popped some into a bowl and dashed down to mum's house to give her a taste, and mum and dad agreed - just like snow ice cream. Great memories.

I hope you enjoy it as much as we did. 


Coconut Vanilla Sorbet
(dairy, egg, nut, gluten, and cane sugar free)

Makes just under a litre.

800ml unsweetened coconut water (eg. Natural Raw C coconut water)
100g thick coconut cream, preservative free (eg. Ayam)
60-80g pure organic maple syrup
1/2 - 1 tsp pure vanilla extract or vanilla bean paste (to taste)
dessicated coconut to serve (preservative free, available at health food shops) OR fresh coconut, grated

Freeze the coconut water in ice cube trays until frozen solid.

Place 400g of the coconut water ice cubes into the Thermomix mixing bowl, and blend
5 sec/speed 9, or until it becomes 'snow'.

Add remaining 400g frozen coconut water and blend 10 sec/speed 9, until 'snow'.

Add coconut cream (the thickest part from top of tin), maple syrup and vanilla, and blend 
1 min/speed 9, using the spatula to help it along. Remove lid and scrape down sides, reblending until sorbet is smooth and creamy, approx. 30 sec/speed 9.

Serve immediately, sprinkled with a little dessicated coconut.

Note: If you need to freeze some for later, freeze in ice cube trays and reblend when ready to serve.

Variations:

If you have fresh coconuts on hand, freeze the coconut water, and grate up the flesh to make coconut cream (see this recipe for instructions), saving a little of the freshly grated coconut to sprinkle over the finished sorbet. Delicious! (And dirt cheap!) 

Sweetener can be reduced to taste, or changed to a 1/4 tsp green stevia powder for a sugar free version.


Jumat, 23 Agustus 2013

Gooey Flourless Fudge Brownies {with Video}


Okay, I'll keep this short and sweet.

You guys want brownies. Grain free, dairy free, nut free brownies. At least I'm pretty sure you do, because when I posted the above photo on my Facebook page it got 181 shares, 1014 likes, and 229 comments!

So here it is. Your weekend treat. Enjoy :D

[Note: This is a Thermomix recipe - see end of page for tips for making this without a Thermomix.]


Gooey Flourless Fudge Brownies

- 200g dark, dairy free chocolate (I use either Green & Black's 70% cocoa chocolate which 'may contain traces of dairy', or Loving Earth dark chocolate which is completely dairy free)
- 130g raw Medjool dates, pitted
- 180g organic cold-pressed coconut oil
- 30g coconut flour
- 4 eggs
- 1/2 tsp vanilla extract
- 1/4 tsp sea salt

Preheat oven to 190C. Line a 22cm square baking dish with baking paper. I use 'If You Care' baking paper, which is non-toxic.

Place the chocolate (broken into pieces) into the mixing bowl and mill for 10 sec/speed 9.

Add the dates to the bowl and chop 15 sec/speed 10.

Add the coconut oil and cook 5 mins/60C/speed 2.

Add remaining ingredients and mix 20 sec/speed 8. Scrape down lid and sides of bowl and mix another 10 sec/speed 6.

Scrape mixture into a lined, square baking dishBake in preheated 190C oven for 18-20 mins. Be careful not to overcook or they won't be gooey! Just until a skewer inserted in the centre comes out clean.

Cool, cut into small squares, and refrigerate until cold.

Of course, you probably won't be able to wait, but they really do taste so much more AMAZING when they're cold and gooey and fudgey! Trust me.

Can be dusted with some raw cacao powder, or if you want to be really decadent, top with this dairy free ganache, or some dairy free dulce de leche!

PS It might be best to 'share the love' and invite a friend over for a cuppa and brownies... these are RICH, so don't eat them all yourself! Lol!!

Have a great weekend xx


This one was quite popular with the taste testers!!


* Note: If you don't have a Thermomix, you'll need to finely chop the chocolate and dates (in a food processor if you have one) and melt together over a double boiler with the coconut oil, whisking until smooth. Then stir in the remaining ingredients with a wooden spoon. 

Sabtu, 06 Juli 2013

Weekly Highlights


This week has been super busy, and although some of you may think I'm Super Woman and keep up with everything effortlessly, I'm not, and I don't. In fact, today I feel a bit like my little nephew after a hard day of being Super Man...

(Isn't he just too cute?)

Yep. That's me right there.

This week has been: school holidays and lots of kids coming and going; an exciting project I'm working on (which I'll tell you about soon); lots of cooking (mostly for the exciting project); wrapping up loose ends with my job (I'm scaling down there - can't do everything!); sight seeing tours with a visitor from overseas; a birthday party with a bunch of noisy boys (plus a few girls who don't like to miss out on nerf wars and messy fun, ie. my 16 yr old and her friends); plus everything else. Result: exhausted 'super woman' with saggy muscles. Lol.

So here's a quick update, with the highlights from our discussions on the Quirky Cooking Facebook page...


I bumbled my way through the boys' birthday BBQ on Thursday. I'm not great at organising amazing kids' parties. I'd rather just supply some food and let them entertain themselves by running around outside, so a BBQ at the lake seemed like the easiest option. Sadly, the weather turned bad so we arrived at the lake, took one look at the wet and windy BBQ 'shelter', then turned around and drove back to town. Thankfully my lovely friend Giselle was happy for a party of 14 boys (plus a few girls) to descend upon her home and run around crazy in her yard, so a fun time was had by all despite the rain.


Of course, being a country kids' birthday party, it included things like an 'epic' nerf war (I borrowed that word from Mr I, who seems to say it a lot), bushwalking to a waterfall, throwing rocks into a volcanic crater, and eating sausages and fried onions in bread with plenty of tomato sauce. No lollies at this party, or party games or party bags - but I'm pretty sure they all had a good time. :)


I managed to get a birthday cake made before dashing out the door in the morning - another Zebra cake (Mr I's request), but with a few changes to make it healthier and yummier. The kids loved it. It's a bit messier than my last one as I was in a hurry, but I really don't think the kids noticed.


It's funny how we mums sometimes think that if we don't do everything 'just right' the world will fall apart. I'm always reminding myself that there are more important things to worry about in life than whether a cake is beautifully decorated, or a party is perfectly organised. Sure, if you can do it and enjoy it, that's great! But getting stressed out over things like that just spoils the fun. So we had a slap dash, informal party, and a fun day was had by all. 


Here's what's been happening on my Quirky Cooking Facebook page this past week... 


FOOD


Pear recipes: This 'Whole Poached Pear Cake' was being tested and tweaked this week in my kitchen. I'm working on a dairy free, grain free version, and although it's not quite there yet, it still tasted delicious! What are you favourite pear recipes? Try some of these out.

Flourless Chocolate Espresso Cake: the lovely girls from Confetti Mag shared my cake recipe on their blog - check out the recipe here, and make sure you subscribe to their beautiful online magazine!

I'm also working on a recipe for a gluten free, dairy free shortcrust pastry... lots of pies being cooked here lately! (No one's complaining.) No recipe yet, all part of the 'project'.


Weird breakfasts: I explain why I eat weird things for breakfast, like chicken soup and fried rice, here.

How to make soft eggs, poached in the shell: too easy, very quick, and delicious! Photo and recipe here.

Don't have time for a 'proper' breakfast? My quick protein smoothie recipe.

A very interesting version of my Creamy Chicken & Brown Rice Soup: You know that soup that everyone's making? Well, you may not want to make it like this. Then again, maybe you will, just for fun!! :D

15 foods that can be regrown from scraps: great tips from Mrs Happy Homemaker

Favourite thermomix chicken recipes: Got chicken? Try these!

Trout recipes: some tips and recipes for cooking trout here.

Homemade two minute noodle seasoning mix: healthier versions you can make yourself!

Healthier biscuits to replace Tiny Teddies: some great ideas here for little homemade bikkies for kids, without the nasties.

10 reasons to make your own bone broth: check out this article by Alexx Stuart - I call bone broth 'liquid gold'. 

How to dry ripe olives: tips for drying and perserving olives here.

How to make dairy free dulce de leche with honey to sweeten: a reader's tip!

Homemade fruit chutney: readers' favourite recipes here.

Chilli jam recipes: find some recipes and links here.

Fig jam recipes: made with dried figs - ideas here.

Pickles: I also made pickled cucumber slices this week, so if you're wanting to try them yourself, the recipe is here - first half of recipe is in the comment on the photo, second half of recipe in the last comment on the photo. (These are not sweet pickles, they're the salty, vinegarry type.)


HEALTH

Homemade face masks: no need to spend big bucks on fancy schmancy facial treatments! Try these homemade face mask recipes!

10 reasons you should be using coconut oil: here's why I love coconut oil...

Why sugar makes us sleepy and protein wakes us up: ...and this is why I eat protein at breakfast time!

A reader's experience: how a mum got her daughter have more energy by giving her a protein breakfast before school! Her story here.

Sucrase Isomaltase Deficiency: a disorder that affects a persons ability to breakdown sucrose (fruit/table sugar) and maltose (grain sugar). Donna asked for some recipe ideas, in particular snacks & lunch box treats, for her 5 year old with SID - here's the answers and ideas that were shared.


AND OTHER STUFF

French Rules for Feeding Children: the French are known for having children who will eat all sorts of things - fussy eaters are just about unheard of! Here's some tips for developing great little eaters.

Nut milk bags: what do you use to strain your nut milk? Reader's tips and favourite brands.

How do you store recipes you find online? Here's readers' favourite ways to keep track of recipes they want to make.


Have a great week everyone!


Miss C and Shadow have the right idea...

Jumat, 21 Juni 2013

Dairy Free Condensed Milk & Dulce de Leche


The other day I asked on my Facebook page, "What's something you reeeeaaallly wish you had an allergy-friendly recipe for (and what's the ingredient/s that is stopping you make the original recipe)?" Well. I got lots of comments. Like about 180 of them. And one that was mentioned a few times was dairy free condensed milk, so I thought it was about time I had a go at it.

There are a few dairy free condensed milk recipes online - I had a quick look for Thermomix versions and found this one over at The Thermomix Diaries, which linked back to this one on the Thermomix Recipe Community. Of course, I had to have a play with the recipe to reduce the sugar (too much for me!), change it to a sweetener I prefer, and start with a creamier (dairy free) base instead of milk. And this is what I came up with... So delicious!! 

I've made it a few times now, each time a little different, so here's two different versions - one is just a basic dairy free condensed milk made with bought coconut cream, and the other is a dairy free dulce de leche (caramel) made from homemade coconut cream, inspired by this recipe over at the UK Thermomix FB page. I'm thinking you could use the dulce de leche recipe and just cook it for less time to make a 'from scratch' version of the condensed milk - that will be my next experiment! (Thought I'd better just hurry up and get this posted!!) 

By the way, great news - not once has it boiled over, or even gotten close. I know that's the dreaded danger when you make condensed milk or dulce de leche with cow's milk. (I remember the horror stories my friend Bel told me about the sticky mess all over her countertop and under her Thermomix! Eek!) Cow's milk has a tendency to do this when boiled, but I have never had a problem with dairy free milks and creams. (Hopefully no one proves me wrong!) 


Dairy Free Condensed Milk

Place ingredients in the Thermomix bowl and cook at Varoma temperature for 45 minutes on speed 4, with the rice basket on the lid (instead of the MC) to let the steam out.

- 1000g organic coconut cream (I used 18+% fat Spiral brand)
- 200g pure organic maple syrup

Leave to cool for a bit in the bowl, blend gently again on speed 3-4 for a few seconds (as it sometimes separates a little), then carefully scrape into a glass jar. This recipe will make about 400g, so it can be used to replace a tin of condensed milk in recipes.

[Note: When it's cold in the fridge you may notice little bits of coconut cream flecked through it that have kind of solidified - don't stress, if you whiz it up they disappear. And for most recipes, it wouldn't matter anyway as it will be cooked or blended with other ingredients.]

Okay, and now for the amazing Dairy Free Dulce de Leche!


Dairy Free Dulce de Leche

First make the coconut cream. Because it's going to be cooked anyway, just make raw coconut cream, it's quicker. 

[Note: If you're thinking of making this raw coconut cream to go in your fridge to be used for other things, just be aware that it will separate quite drastically - when you cook it, it stays 'together'. If it's going to be added to a recipe straight away it doesn't matter, but if you like it in your coffee (like I do), cooked is best. (Recipe for cooked coconut cream is here.)]

1. Grind up the coconut for 20 seconds on speed 9.
- 300g organic dessicated or shredded coconut 
(you can buy preservative free coconut from the health food shop)

2. Add water and blend for 1 minute on speed 9.
- 1000g (1 Litre) water

3. Strain coconut milk through a nut milk bag into a bowl, squeezing it out really well to get as much cream as you can. 

[Set the cream aside and tip the coconut pulp back into the Thermomix. Add another 300g water, blend once more for a minute on speed 9, re-strain into a separate bowl, and you have milk for another recipe. Freeze the coconut pulp, and when you have enough you can dehydrate it then grind it up to make coconut flour.]

4. Measure the coconut cream back into the Thermomix bowl. Add other ingredients and cook at Varoma temperature for 55 minutes, speed 4, with the rice basket set on top of the lid (instead of the MC) to let the steam out.
1000g (1 litre) of coconut cream
- 200g organic pure maple syrup
- 1/4 tsp bicarbonate of soda (baking soda)
- 1/2 tsp vanilla extract (not essence)

That's it! Too easy. I was jumping around the kitchen in excitement when I opened the lid of the Thermomix after making this! And if you don't believe me, just ask my taste testers - they all agreed that it was totally amazing and exciting and were very happy they'd happened to stop by for a visit at just the right time!! ;)

This recipe results in about a little over a cup of dulce de leche. Sorry I can't be more definite than that - after eight people sampled it I realised I'd forgotten to weigh out the amount! Ah well, must make it again... :D


My taste testers... and the verdict was YUM!!
(You really should try dulce de leche on warm, freshly baked spelt bread rolls - mmmm!!)

Variations: 
- Try fresh grated coconut (brown skin removed) instead of dessicated coconut for the coconut cream.
- Try a different sweetener - honey, yacon syrup, rice malt syrup, rapadura, coconut sugar... different sweeteners will result in different colours, but they should all work fine. Adjust amount to taste.
- If you can't have coconut, you could use other dairy free milks, but make sure they're thick and creamy enough that you'll get a nice thick result, or just cook for longer if needed.