Tampilkan postingan dengan label cakes. Tampilkan semua postingan

Jumat, 23 Agustus 2013

Gooey Flourless Fudge Brownies {with Video}


Okay, I'll keep this short and sweet.

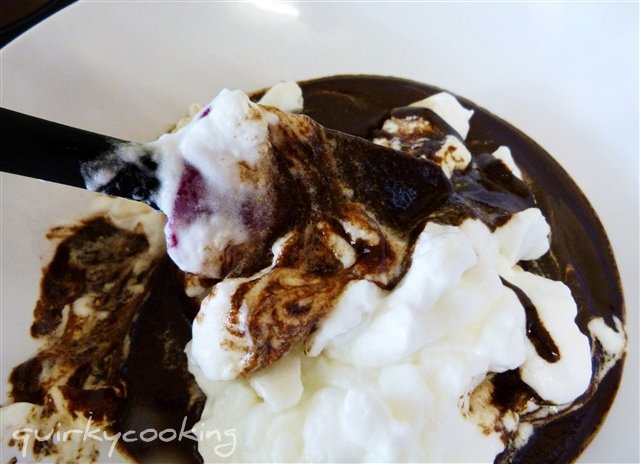
You guys want brownies. Grain free, dairy free, nut free brownies. At least I'm pretty sure you do, because when I posted the above photo on my Facebook page it got 181 shares, 1014 likes, and 229 comments!

So here it is. Your weekend treat. Enjoy :D

[Note: This is a Thermomix recipe - see end of page for tips for making this without a Thermomix.]


Gooey Flourless Fudge Brownies

- 200g dark, dairy free chocolate (I use either Green & Black's 70% cocoa chocolate which 'may contain traces of dairy', or Loving Earth dark chocolate which is completely dairy free)
- 130g raw Medjool dates, pitted
- 180g organic cold-pressed coconut oil
- 30g coconut flour
- 4 eggs
- 1/2 tsp vanilla extract
- 1/4 tsp sea salt

Preheat oven to 190C. Line a 22cm square baking dish with baking paper. I use 'If You Care' baking paper, which is non-toxic.

Place the chocolate (broken into pieces) into the mixing bowl and mill for 10 sec/speed 9.

Add the dates to the bowl and chop 15 sec/speed 10.

Add the coconut oil and cook 5 mins/60C/speed 2.

Add remaining ingredients and mix 20 sec/speed 8. Scrape down lid and sides of bowl and mix another 10 sec/speed 6.

Scrape mixture into a lined, square baking dishBake in preheated 190C oven for 18-20 mins. Be careful not to overcook or they won't be gooey! Just until a skewer inserted in the centre comes out clean.

Cool, cut into small squares, and refrigerate until cold.

Of course, you probably won't be able to wait, but they really do taste so much more AMAZING when they're cold and gooey and fudgey! Trust me.

Can be dusted with some raw cacao powder, or if you want to be really decadent, top with this dairy free ganache, or some dairy free dulce de leche!

PS It might be best to 'share the love' and invite a friend over for a cuppa and brownies... these are RICH, so don't eat them all yourself! Lol!!

Have a great weekend xx


This one was quite popular with the taste testers!!


* Note: If you don't have a Thermomix, you'll need to finely chop the chocolate and dates (in a food processor if you have one) and melt together over a double boiler with the coconut oil, whisking until smooth. Then stir in the remaining ingredients with a wooden spoon. 

Kamis, 30 Mei 2013

Mr I's "FAR Too Easy" Chocolate Cake


This afternoon was cold, wet and dreary, and Mr I (my 11 year old) was getting bored. I told him to go do something creative.

     "Like what, mum?"
"Build something out of lego."
     "Nah."
"Paint a picture, or do a drawing."
    "Nah."
"Start a new project... build something."
     "Nah."
"Bake a cake."
     "YEAH!!!!!!! What can I make? I'll make my chocolate cake! Do we have all the ingredients? YEAH!!!" (running for the kitchen...)

Mr I loves to cook. Especially chocolate cake. (Now I wonder where he got that from??) He tells me he needs to learn to cook so he can cook for his wife one day. I think that's a pretty good idea, and I know she'll thank me for encouraging that idea one day, so he pretty much has free rein in my little kitchen. And he loves our Thermie. He is slightly messy though. I must admit, I get rather nervous when he rings me from home while I'm out at a demo, and asks where a certain ingredient is... he always hangs up before I can say, 'Clean up your mess!!!' Sigh.

Another thing Mr I loves to do is tweak recipes. (Again, I wonder where he got that from??) He loves to make his own quirky version of the Too Easy Chocolate Cake from the Thermomix Everyday Cookbook, tweaked to suit our way of eating. He doesn't need my help with it, just dashes off and does it all himself. He says the hardest bit is tipping the cake batter into the pan whilst scraping out the Thermomix bowl with the spatula - he's still kind of short and has to hold the bowl up high, and he says it hurts his arms. But he manages it, and I leave him to it.


Far Too Easy Chocolate Cake with Cashew Cream

I'm actually amazed this cake even works when Mr I makes it! He changes it all over the place, whacks all of the ingredients into the Thermomix at once, puts the timer on for 30 seconds, whizzes it up, and goes off to bounce his ball while it mixes... I'm much more 'delicate' with cakes, only adding the baking powder at the end, and not mixing too long so I don't 'beat the fluff out of it'. But this one has never failed. Even though he checks it about twenty times in the oven, banging the oven door shut each time, poking it endlessly with toothpicks... Poor cake. It's very forgiving.

By the way, he calls it the 'FAR Too Easy Chocolate Cake', because with his version you don't have the extra step of melting butter first, you just use oil and toss it in with everything else. Awesome.

Here's a video of Mr I making his cake, just to prove how easy it is... Be prepared for some kid stuff, like spatula licking and mess making!!


Far Too Easy Chocolate Cake

Preheat oven to 180C.
(Mr I usually forgets to do this until he's pretty much finished mixing. It still never fails.)

Weigh all the ingredients into the Thermomix bowl and mix on speed 5 for 30 seconds.
- 120g macadamia oil (or other light flavoured oil)
- 2 eggs
- 100g coconut or almond milk
- 1 tsp vanilla extract
- 100-120g Rapadura (or coconut sugar)
- 130g unbleached white spelt flour (or plain gluten free flour or almond flour)
- 2 tsps baking powder
- 25g raw cacao powder (or 30g cocoa)

Pour mixture into a lined (or greased) 20cm round cake tin. Bake in 180 degree oven for about 40-50 minutes (depending on whether you remember to preheat the oven or not!), or until a toothpick/skewer inserted in centre of cake comes out clean.

Serve warm with cashew cream or coconut cream, sprinkled with a little cinnamon. Preferably with hot chocolate with cinnamon and a blob of coconut cream. (Well that's how Mr I likes it anyway!) :)


Don't you love my gorgeous jars? They are Anna Gare Blackboard Spice Jars. Cute huh.


If you'd like to see some more of Mr I's amazing recipes, just let me know. But don't ask for his Caramel Custard with Licorice Allsorts recipe, because it wasn't at all nice. Just saying.


He thought it was pretty funny though.

(Oh, and blame Grandma for the licorice allsorts - I don't buy those vile things!)

:)

Rabu, 13 Februari 2013

Chocolate Fudge Hearts with Raspberry Swirl Topping


It's Valentine's Day tomorrow, and although I'm not into the whole commercialised idea of spending heaps of money on flowers and chocolates and fuzzy teddy bears, I do like to cook something special for the family. (Okay, I admit it. If someone bought me flowers and chocolates I wouldn't say no, as long as it was good chocolate. And fuzzy teddy bears are pretty cute too.)

Anyway, this year I came up with this recipe for dense, fudgey chocolate heart cakes, and just for fun I decorated them with a dairy free chocolate ganache spread, coconut cream, and raspberry coulis. (There's a little video clip below showing how I did the raspberry swirl heart at the bottom of this post.) Of course, we already ate them all because I had to get this blog post done before Valentine's Day. And then I didn't get time to do it til now... oops! So by the time you read this it may be too late to make these for Valentine's Day, but hey, if you love someone you shouldn't need to wait for a certain date on a calendar to show it... so just go make these anyway!


P.S. These cakes are gluten free, grain free, and dairy free. If you can't have nuts you can use flour instead. If you can't have eggs you can probably substitute for those too, I just haven't had a chance to try it.


Chocolate Fudge Hearts

I make these in little heart shaped flan tins - you could use heart shaped muffin tins too, or just make them in regular muffin tins and decorate with a raspberry swirl heart on top. Or you could use a regular cake tin, but you'll need to cook it for a little longer.

Recipe inspired by Tash's Rich Chocolate Cake 

Preheat oven to 190C.

1. Grind chocolate in Thermomix bowl for 10 seconds on speed 9.
- 200g roughly chopped dark chocolate (I use a good quality, dairy free, naturally sweetened 65-70% cocoa chocolate like Valrhona or Rapunzel chocolate)

2. Add dates and chop for 10 seconds on speed 9.
- 150g pitted dates

3. Add coconut oil and melt at 60C for 5 minutes on speed 2.
- 180g coconut oil (or butter or ghee)

4. Add walnuts, salt and eggs and mix on speed 8 for 10 seconds.
- 70g walnuts (or you can use 50g of gluten free or regular plain flour if you can't have nuts)
- 1/4 tsp fine Himalayan or sea salt
- 3 large eggs*

5. Pour mixture into tins (greased with coconut oil or butter) and bake at 190C for approx. 20 minutes for small cakes or muffins, to 30 minutes for a cake. Skewer inserted into centre of cake should come out clean.

Allow cakes to cool, then ice with chocolate ganache spread.

* I didn't have time to try these cakes with an egg replacement, but apple sauce or chia gel are both great replacements. If you use apple sauce, cut down on the amount of dates. Not sure of amounts - will test when I can!


Chocolate Ganache Spread

This is a recipe I developed as a dairy free, nut free substitute for Nutella, and I found it also works perfectly for a chocolate sauce when hot. You can pour it over a cake like ganache and it will set all firm and glossy in the fridge. Or spread it on toast when it's cold. It's a kind of multi-purpose ganache-spread-topping... for now and then of course. :)

1. Break up chocolate and grind in Thermomix for 10 seconds on sp 9.
- 100g dark dairy free chocolate
    Scrape down bowl.

2. Weigh remaining ingredients into Thermomix bowl and cook for 2 minutes at 60C speed 2.
- 30g coconut oil (or ghee or butter)
- 30g rice malt syrup (or honey)
- 200g thick coconut cream (or less if you like your chocolate darker)

- 1 tsp vanilla extract

3. Place in the fridge to cool a little, then when it's slightly less runny, spread over cake/s and place cakes in fridge to set.*


If there's any ganache spread left, pour it into jar and keep in the fridge for up to 2 weeks. (Tastes lovely swirled with sunflower seed butter or nut butter on toast or crepes, and topped with slices of banana!)

* Note: I found it was easiest to make the raspberry-coconut cream swirl hearts on top of the cakes if the chocolate ganache was set and firm. The first batch I made while the chocolate was still warm and runny, and although it looked pretty, it was difficult to keep in a heart shape as it tended to run off the edges. (See photo below) So it's up to you - if you want a more freeform swirly heart, go ahead and do it while the chocolate is warm, then put it straight into the freezer to set.


Raspberry Swirl Topping

These  cakes are best served within an hour, once the heart swirls are made, as the raspberry coulis eventually will sink into the cream if it's in the fridge for too long. So make the cakes with the chocolate topping on them and keep them in the fridge until you're ready to finish them off. They can stay in the fridge for days, and actually taste best cold from the fridge.

For the Raspberry Swirl Topping, all you need is:
- tin of smooth coconut cream (do not shake it up!)
- a batch of Raspberry Coulis.

To make the Raspberry Coulis:


Cook raspberries and Rapadura (or preferred sweetener) in Thermomix for 4 minutes at 90C on speed 4. Strain through a fine seive to remove seeds. Set aside to cool.
- 200g raspberries
- 40g Rapadura (or preferred sweetener - see this list sugar alternatives)

Don't shake up the tin of coconut cream! When you open the tin, scoop the thicker cream off the top into a small dish. Whisk cream with a fork until it's nice and smooth.

Using a teaspoon, blob some cream onto the top of the chocolate covered heart cake in the shape of a heart, rounding edges with a butter knife to neaten.

Drizzle on a few small blobs of raspberry coulis.

Using a toothpick, swirl the cream and the coulis together - don't 'over-swirl' or it will all run together. Less is more.

Here's a little video clip showing how I make the topping. (Okay, you can't actually see the 'swirling' process, but hopefully you get the idea!)

Happy Valentine's Day!

Jo xx


Rabu, 06 Februari 2013

Banana Raspberry Muffins


Do you know what's so special about these muffins? (Besides the fact that they look and taste awesome?) You can make them with whatever bits and pieces of grains and seeds and nuts and flours you have lurking in your fridge, freezer and cupboard, and they will be a.m.a.z.i.n.g.

Really.

Here's the secret... Soaking!

Yes, if you soak your grains, seeds, nuts, etc, overnight in water with a little bit of something acidic (like apple cider vinegar, lemon juice, whey or yoghurt), you will be amazed at the difference in the texture. The soaking softens the grains/seeds/nuts so that you don't have that dry, gritty texture that can often be the outcome in gluten free baking. And it helps to break down the anti-nutrients that cause irritation to the gut, and helps to release the beneficial nutrients. Basically, it makes them much easier to digest, AND yummier!

[Note: If you're worried about using the soaking water, don't be. You don't need to throw out the water that the grains have been soaked in, as the soaking actually causes the phytase to increase and break down the phytates. The phytates aren't just leaching out into the water and staying there, they are being broken down. The only reason you would throw out the water and rinse the grains is if the water tasted sour or bitter.]

Okay, so don't think I'm telling you this because I've got this soaking thing all under control. I'm the world's worst 'last minute' cook - I get a sudden inspiration and have to make it right away! Which means....ummm... unsoaked. But when you can, it is best to think ahead - prepare, soak, ferment, sprout... all that good stuff. :)

A good way to plan ahead is to think about breakfast tomorrow at dinner time tonight. If you'd like to have muffins, pancakes, waffles or crepes for breakfast, either grind the grains up and then soak overnight with the liquids from the recipe, or in some cases (like these muffins), soak the grains & nuts whole. To use whole grains/nuts it needs to be a recipe that has quite a lot of liquid - a batter, not a dough. When you blend it, it needs to be able to create a 'vortex' in the Thermomix - if it doesn't, it's too thick for this method.

I have posted a few of these 'blender batter' recipes before, but I've been going through a lot of my older recipes and tweaking them to reduce the sugars. So here's one of my latest versions of the Blender Batter Muffins, with a lot less sweetening, and my latest combo of grains, seeds and nuts.

By the way, if you don't have a Thermomix, you can try this method in a really powerful blender that crushes ice. But please don't burn out the motor and blame it on me. Unless you just really want a Thermomix, so you're purposely breaking all your appliances so your partner will give in and let you buy one. ;) Otherwise, you could just buy the pre-ground flours and mix them in a mixer with the liquids, then soak overnight, and continue with recipe. Your call.


Makes approx. 2 dozen regular sized muffins

1. First of all, prepare the grains, seeds & nuts for soaking. This needs to be done at least 12 hours (or up to 24 hours) ahead. Weigh them into a glass bowl or dish, then weigh in the liquids. (Set the empty dish on the top of the Thermomix, zero scales, and weigh in the grains, water, etc.) Cover, and set aside for the night.
- 290g whole grains and seeds, your choice *(see note)
- 40g raw almonds (or sunflower seeds/pepitas for nut free version)
- 200g water
- 1 tsp apple cider vinegar (or whey/yoghurt/lemon juice)

(Note: For the muffins in the photo above, I used a couple of handfuls of buckwheat kernels, some millet, a little bit of quinoa, some brown rice and a couple of Tbspns mesquite flour. There's so many different gluten free grains and seeds that you can use - amaranth, teff and sorghum are great too - whatever you have, just so long as it all adds up to 290g. Although if you use a lot of buckwheat you'll need more water as it soaks up the moisture. And don't use coconut flour because it works differently and the ratio of flour to water would be totally out.)

2. When you're ready to make the muffins, tip the soaked grains, seeds & nuts into the Thermomix bowl (with the soaking water) and add oil, syrup, cream, bananas and eggs; then blend on speed 9 for 2 minutes.
- 20g macadamia oil (or other light flavoured oil)
- 60g pure maple syrup (or honey)
- 30g coconut cream (or milk of choice)
- 2 large bananas
- 2 large eggs

3. Scrape down sides of bowl and make sure mixture is smooth. If not, reblend for another minute. Once smooth, add the baking powder, soda and salt, and just barely mix in on speed 5 for 5 seconds.
- 2 tsps baking powder
- 3/4 tsp baking soda
- 1/2 tsp fine sea salt

4. Pour mixture into muffin cups, filling to 3/4 full. Top with a few raspberries, and bake in 190C oven for 20-25 minutes, or until skewer inserted in muffin comes out clean.

Variation: For Banana Spice Muffins, add 1 tsp cinnamon & 1/2 tsp nutmeg to batter, leave the berries off, and sprinkle muffins with cinnamon and Rapadura or coconut sugar before baking. Can also add a couple of handfuls of pecans or walnuts to batter with the baking powder & soda.

Senin, 17 Desember 2012

Quick Maple Pecan Cinnamon Scrolls

* This recipe includes support for Paprika * 


Cinnamon scrolls are a favourite breakfast at Christmas time in our family. Usually I'll make a batch of yeast dough scrolls and freeze or refrigerate them unbaked, then thaw and bake them on Christmas morning. I'll be explaining more about that in the next post. But if you're wanting a quick, yeast-free version, this is a great one to try. It'll only take you about an hour from start to finish. A word of warning, though - this recipe is a little bit naughty! LOTS of butter and rapadura... But it is Christmas - that's my excuse! ;-)

For a dairy free version, you could try ghee if you can have it; or use macadamia oil in the dough, and coconut cream on the rolled out dough instead of melted butter. It won't be quite as caramelly and sticky, but still good.

Okay, keeping this short as I've been trying to get this posted for two days, and I'd better hurry up before there's a riot on Facebook!!

Oh, and speaking of my Facebook page, there are now over 10,000 of you following!! WOW! So thank you to all who follow and contribute to the discussions - I learn so much and really enjoy hearing from you all. ❤


Quick Cinnamon Scrolls
*This recipe has Paprika support*

Preheat oven to 220C. Grease a 24 cm springform tin with butter and set aside. (Or you can use ghee or coconut oil, or baking paper.)

1. Prepare filling - mix together first five ingredients on speed 5 for 5 seconds - then set aside.
- 100g Rapadura
- 100g pecans or walnuts
- 2 tsp cinnamon
- pinch of sea salt
- 1 Tbspn butter

2. Mix dry ingredients on speed 8 for 6 seconds to 'sift'.
- 450g plain, unbleached spelt flour (not wholemeal)
- 1 tsp baking powder
- 1/2 tsp baking soda
- 1/2 tsp sea salt

3. Add wet ingredients and mix on speed 6 for 6 seconds, then on interval speed for 20 seconds. (Don't forget to lock the lid, or interval speed won't work!)
- 200g almond or rice-almond milk
- 1 tsp apple cider vinegar or lemon juice (helps with rising)
- 80g soft butter
- 80g pure maple syrup

4. Sprinkle silicon dough mat (or counter top) with a light dusting of flour, and turn dough out of bowl. Give it a quick, gentle knead to form a ball, then press out gently with your hands to form a rectangle about 1 1/2 cms thick.

5. Melt butter. Spread 2 tbspns over dough and sprinkle with filling, leaving a 1 cm border around the edges.
- 4 Tbspns melted butter (Note: Reserve 2 tbspns for topping. Can be melted in tmx at 100C for 30 seconds or so, speed 1.)
- prepared filling

6. Roll up the dough into a log shape, lift carefully, and place on a cutting board. (If the dough is too sticky, roll it up in the bread mat and place in the fridge or freezer to chill until firmer and easier to handle.)

7. Cut the rolled up dough into scrolls with a large serrated knife, making the slices 2-3 cms thick. Place them in the prepared springform tin, bunched up together, cut side up. Drizzle with remaining 2 tbspns melted butter.
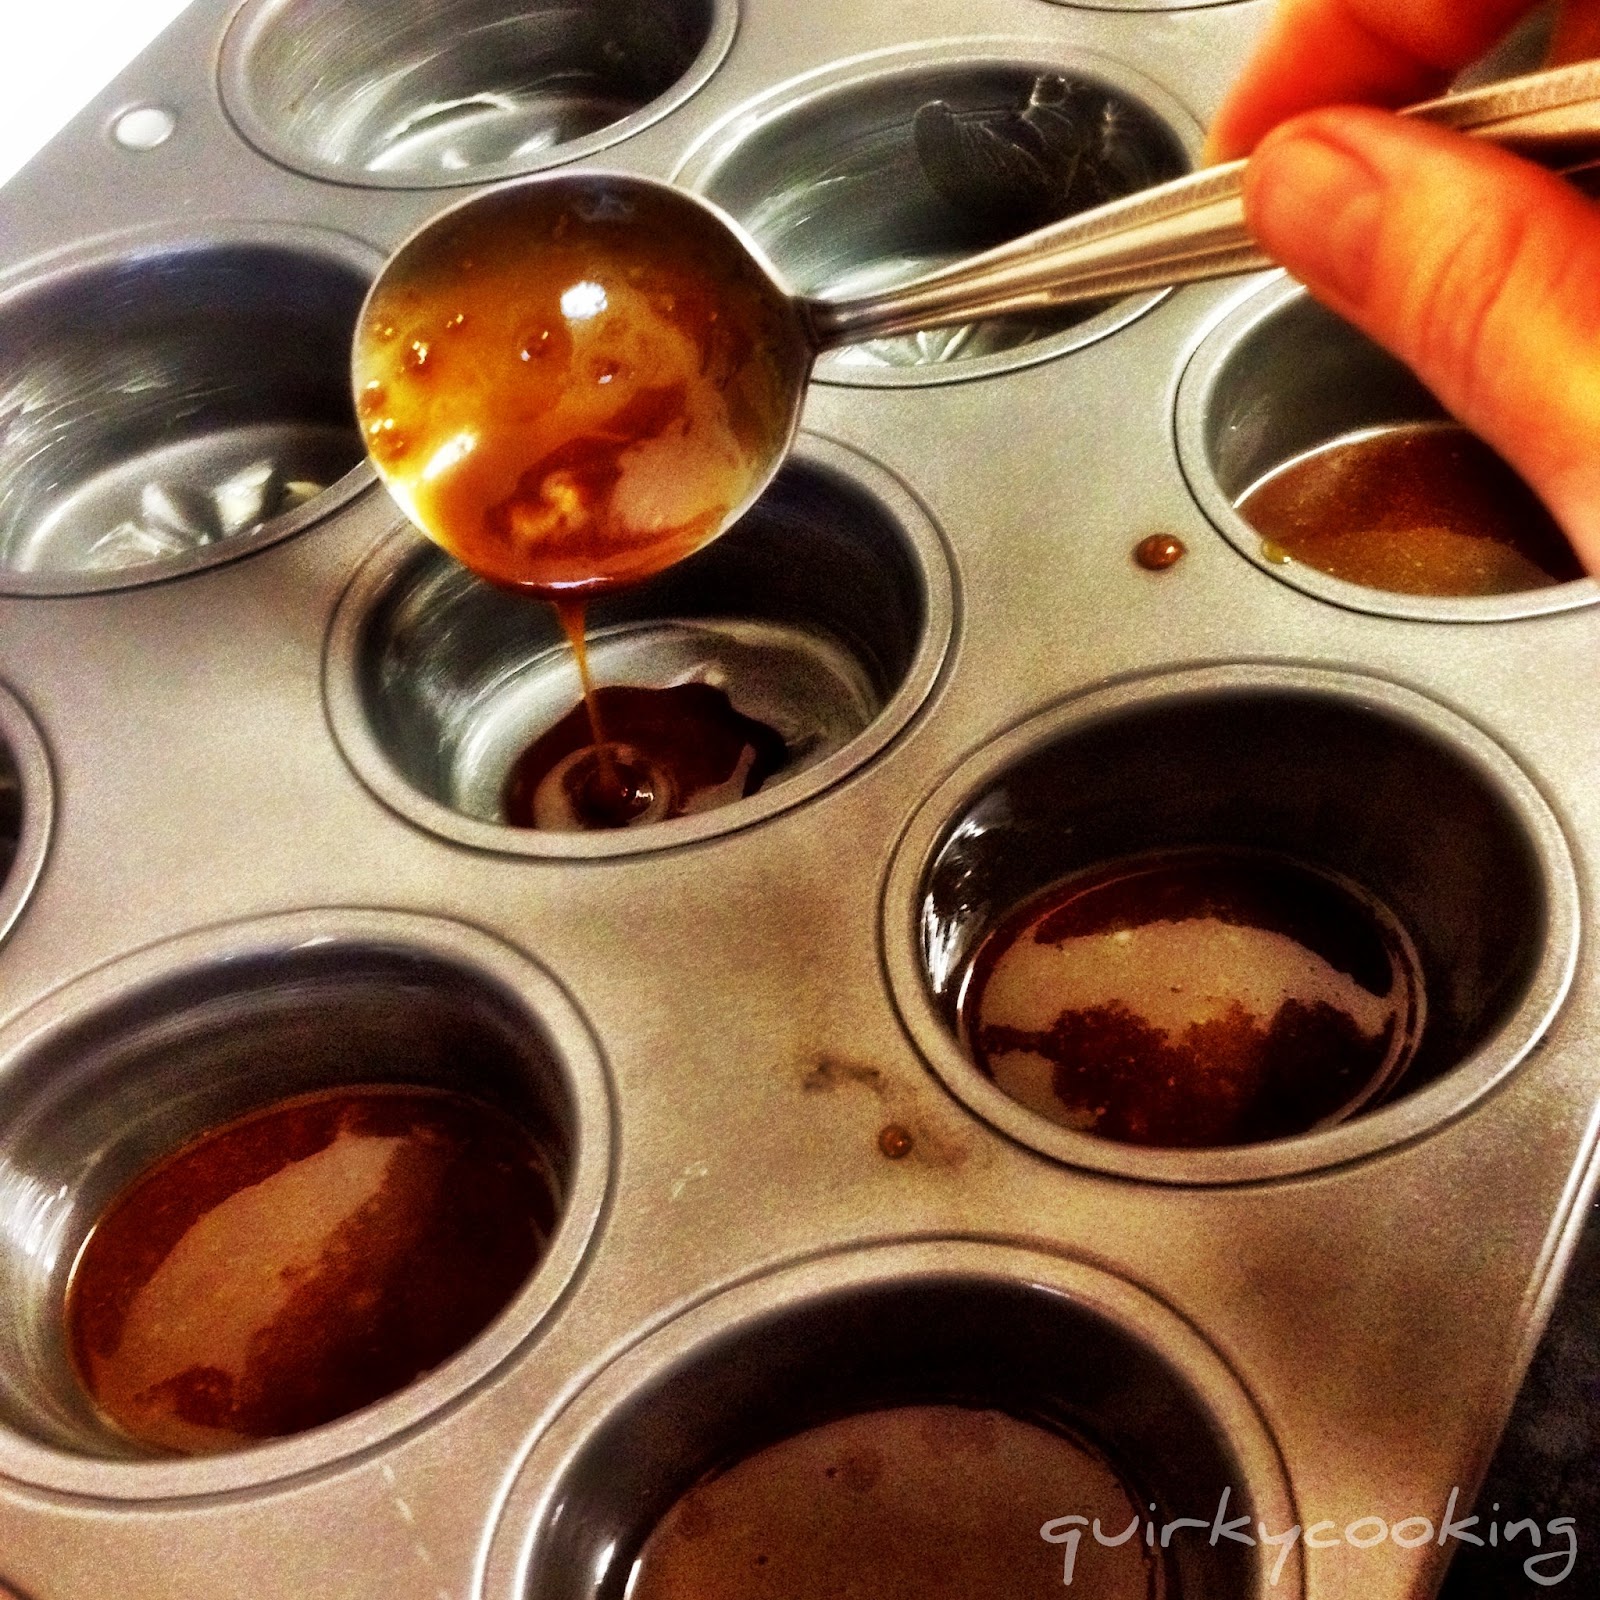
8. Place in hot oven and cook for 20-25 minutes, until golden brown.

9. While scrolls are cooking, make the maple glaze. Place ingredients in Thermomix bowl and cook at 100C for 2 minutes, speed 1.
- 50g pure maple syrup (or Rapadura)
- 50g coconut cream (or regular cream)
- 1/2 tsp vanilla extract

10. When scrolls are cooked, drizzle over the glaze. Serve warm.

Keep in an airtight container for a couple of days. Best eaten on day of baking. (That shouldn't be a problem. Ha ha!!)


This recipe inspired by my mum and sister's recipes, this one from Bakingdom,
and my own version, all rolled into one. :)

Kamis, 04 Oktober 2012

Steamed Chocolate Raspberry Mudcakes with Raspberry Coconut Cream


Here's a deliciously simple recipe you can whip up at short notice... I made it tonight on the spur of the moment, and thought I'd better share! (Especially since there's going to be a riot on my Facebook page if I don't!!) You can make them either with gluten free flour, or spelt flour. They are dairy free and vegan and nut free, so that should keep quite a few of you happy! :D

The mudcake recipe is one I posted ages ago, with a recipe for orange sabayon. It's here: Steamed Chocolate Mudcakes with Orange Sabayon.


For this raspberry version, just sprinkle some raspberries in the bottom of your silicon cupcake molds, pour the chocolate batter over (only to just over half way), and steam for 20 minutes at Varoma temp, speed 2.

While cakes are cooking, freeze a tin of coconut cream, unopened, without shaking it up. This is just so the thick cream rises to the top and gets firm - it doesn't need to be frozen. You'll also want to pick out enough whole raspberries for on top of the cakes, and set them aside.

When cakes are done, let them cool while you make the raspberry cream.

Raspberry Coconut Cream

Weigh into the Thermomix bowl and mix on speed 5 for 10 seconds:
- 80g of frozen raspberries

Add:
30g pure maple syrup
- 1/2 a teaspoon of vanilla bean paste (or vanilla extract)
- 150g thick coconut cream (scooped off the top of the tin of cream)

Mix on speed 5 until just combined. It's nice to have it a bit swirly, not just completely pink.

Top the cooled cakes with raspberry coconut cream, a raspberry, and some grated dark chocolate. (I used a 65% cocoa chocolate which is dairy free.)

Recipe makes 14-16 cakes.

 
If you love these little teacup and saucer silicon molds, you can buy them here!

Jumat, 03 Agustus 2012

One Bowl Thermomix Carrot Cake! {gluten free, dairy free}

  
Do you make carrot cake 'from scratch', the old fashioned way? Do you end up with a big mess? Carrot peels in the sink, bits of grated carrot sticking to the grater and scattered over the counter, a chopping board covered in bits of walnuts and pineapple, a bowl for the wet ingredients, goop from the eggs on the counter, a whisk, a bowl for the dry ingredients, a floury sieve, a wooden spoon... then once you've tidied all that up, you've got to make the cream cheese icing! Messy. And lots of dishes to wash. So you probably don't make it very often, right? I know I didn't when I had to make it that way!


Maybe you're thinking, 'Nope! I make mine in the Thermomix, or a food processor!' Getting closer... but how many steps does your recipe take? I'm amazed at all the extraneous steps in so many recipes. Cut 'em out! Who wants recipes with lots of steps, anyway? Not me. I've streamlined my carrot cake recipe to two main steps. Plus stirring in some raisins if you like. (Okay, and one more step for the icing.) First the wet ingredients go in, along with the quartered carrots and chunks of fresh pineapple - grated, chopped and mixed all at once. Then I add the dry ingredients, including the nuts, and chop and mix those for a few seconds. Then stir through some raisins. That's it. Pour it in the tin, pop it in the oven, and let the Thermomix bowl wash itself. ;-) You can even skip peeling the carrots and just give them a scrub if you like. Too easy.


By the way, this recipe makes great carrot cake cupcakes, too! I'm afraid I ate four of them today. And a slice of cake. Oops. Good thing they're healthy! :D


I've made a quick coconut cream topping for these. If you'd rather you could make a vanilla cashew cream.

For a nut free version, just replace the walnuts with shredded coconut.

This recipe makes two cakes, or a cake and 12 cupcakes.
Or about 24 cupcakes. :-)


1. Preheat oven to 165C. (Cakes made with honey need to cook at a lower temp, for longer, otherwise they'll be burnt on the outside and gooey on the inside; so don't be tempted to turn the oven higher.) Grease and flour a bundt tin or ring tin, and 12 muffin cups, or two ring tins or 24 muffin cups... you get the idea. If you're going to use cake tins, make sure they're not regular ones or the middle won't cook well - if you don't have a ring tin or a bundt tin, just grease and flour a small glass, and place it upside down in the middle of a round cake tin, and use that.


2. Weigh carrots, pineapple and wet ingredients into the Thermomix bowl, and mix on speed 5 for 15 seconds:
- 400g carrots, quartered
- 300g chunks of fresh pineapple (you can use tinned pieces, but add them with the dry ingredients so they don't get too chopped up)
- 4 large eggs
- 80g macadamia oil (or other light flavoured oil)
- 1 tsp vanilla bean paste (or good quality vanilla extract)
- 180g honey* (preferrably raw, unheated)


3. Add dry ingredients and mix on speed 5 for 5 seconds:
- 380g plain gluten free flour (you can make your own mix if you'd rather, see this recipe)
- 1 tsp cinnamon
- 2 tsp bicarb soda (baking soda)
- 3/4 tsp sea salt
- 150g walnuts (unchopped)

* Note: for a nut free cake, leave walnuts out and add a couple of handfuls of shredded coconut with the sultanas instead.


4. Optional: stir in raisins/sultanas on speed 3 for 5 seconds:
- 80g raisins or sultanas

5. Cook for approximately 30-40 minutes for cupcakes, and an hour and a half for cakes, depending on your oven. Check by poking a skewer into the centre - it should come out nearly clean when the cakes are done. If the cake is getting too brown on top, just cover it with foil and keep baking til done. Don't cut it straight away while hot - it will be very moist inside. Let them cool, even in the fridge, before icing and eating, and the texture will be better.

* Note about honey: I buy raw, unheated honey in 2 litre bottles from local beekeepers - it's cheaper than buying honey in little containers from the grocery store, it doesn't have added glucose (which a lot of so called 'pure' honey has), it's unheated so there's more goodness in it, and it supports locals!


Coconut Cream Topping

For the topping, you'll need a cold tin of coconut cream - I keep a tin in my fridge for times like this. When it gets cold, the cream rises to the top and thickens, just like thick dairy cream.


In the Thermomix bowl, stir together the topping ingredients on speed 3 until just combined:
- 200g thick coconut cream (organic)
- 2 tsps fresh lemon juice (to make it tangy - optional)
- 1 tsp vanilla bean paste (or good quality vanilla extract)
- 60g raw honey (or to taste)

Pour into a dish and refrigerate to thicken again.

When the cakes are cool, top with coconut cream and sprinkle with some extra chopped walnuts or shredded coconut.

Store finished cakes in the fridge.


Minggu, 01 Juli 2012

Almond, Lemon & Coconut Steamed Puddings {grain free, dairy free}


Today I decided to experiment with a grain free recipe for the steamed lemon and coconut puddings we make at the Thermomix Varoma demos. My daughter absolutely loves those puddings, but she reacts to gluten (and I think grains), and isn't supposed to have all that sugar. There is a grain free version of the puddings on the Varoma recipe cards, but I find that recipe a bit heavy - I wanted them to be lighter, and also dairy free and more naturally sweetened. I was really happy with the result of my experimenting! Anyway, I think I'd better not chit chat too much here and just hurry up and post the recipe... seems like there's a few people on Facebook who want it NOW!! Lol :D So here it is...

1. Peel the lemon zest into the Thermomix bowl with a potato peeler:
- zest of one lemon
    (Make sure your bowl is nice and dry.)

2. Add and blend for 10 seconds on speed 10:
- 100g blanched almonds*
- 40g coconut flour** (not dessicated coconut ground up, it's too oily)
- 40g Rapadura
- 1/2 tsp green stevia powder (or white stevia if that's all you have)

3. Add and mix for another 6 seconds on speed 5:
- 100g macadamia oil
- 2 yolks + 2 eggs (save the whites for fruity dream or sorbet)
- 180g coconut milk**
- 2 tsp baking powder
  Scrape down bowl and reblend for another 5 seconds on speed 5. Don't overmix.

4. Pour batter into silicon cupcake cups (or greased ramekins) and place in two layers in the Varoma trays. (No need to grease silicon cupcake cups.) Rinse out the Thermomix bowl and fill to just above the blades with water (just cool tap water), and place on base with lid on. Place the Varoma on top and cook the puddings for 20 minutes at Varoma temp, speed 2.


(Tip: When you lift the lid off the Varoma at the end of the cooking time,
tilt it back so the steam escapes away from you, and the condensation
on the lid drips down into the vent on the side of the Varoma dish,
and not onto the puddings! Soggy puddings are not so nice.)

5. Set the puddings aside. Tip the water out of the bowl and place back on the base.

6. Weigh into bowl and cook for 2 minutes at 100C, speed 2:
- 50g Rapadura
- 50g pure maple syrup
- 50g fresh lemon juice (approx. 1 lemon)
  Meanwhile, turn puddings out of silicon cupcake cups (or ramekins) onto plates. They come out easiest while warm.

7. Drizzle puddings with a little syrup, top with a raspberry (or some fruity dream), and serve.


* To blanch your own almonds, weigh raw almonds into a bowl, pour boiling water over and leave for about 10 minutes, then the skins will pop off when you 'pinch' them between your fingers. Spread on a tea towel to dry out before grinding.

** If you want to make your own coconut flour, you need to first grind up 100g of dried shredded (or dessicated) coconut, add 300g water, cook for 10 mins at 100C speed 2, then blend for 1 minute on speed 9. Then squeeze through a nut milk bag (when cool enough) until you've got as much moisture out of the coconut as possible. (Use the coconut milk to make the puddings, or in curries.) Spread the coconut out on a dehydrator tray and dry for a few hours until there's no moisture left at all, then grind it up in the Thermomix. If you'd rather the easy option of buying coconut flour, you can get it at health food stores or online. (You can buy it here.) It seems expensive, but you really don't need much to make a cake, so a 500g bag lasts for ages.


Sabtu, 23 Juni 2012

Sticky Pecan Muffins


This morning I managed to get up before everyone else, so I decided to make something a bit special for breakfast. I found this recipe here, and tweaked it to make it healthier and Thermomix friendly. This is what I came up with. It's almost dairy free - there's 1 tablespoon of butter in the caramel topping - but you could use coconut cream instead to make it completely dairy free. I didn't have any coconut cream left, so I just used butter. It only uses 1/2 a cup of flour - I used spelt flour, but I'm sure it would work fine with plain gluten free flour or almond flour as well.

Here's a time-saving tip: when you're making cakes or muffins that have chopped nuts in them, don't bother chopping the nuts first, just add the whole nuts with all the other ingredients and chop and stir all at once on speed 4-5 for a few seconds. If you have a look at the original recipe, you'll notice I cut the steps down from 5 steps to 1 step for the muffin mixture. Yep, I like 1-step recipes. Well, okay, the caramel topping is another step or two, but it's easy as. And really delicious, so don't leave it off!


I'm really happy with the way these muffins turned out using macadamia oil instead of butter - the texture is perfect. For those of you wanting to convert your own muffin recipes for the Thermomix, just remember you have to be really careful not to overmix, or you'll have heavy, dense muffins. Notice that I only mix these for a few seconds, scrape down the bowl, and gently mix for another few seconds - that's it! Don't beat all the air out of them. You could use this basic mixture for all sorts of muffins - blueberry-pecan is next on the list for me I think!

Makes 12 large muffins.

Preheat oven to 180C. Generously butter (or oil) a 12-cup muffin pan (or madeleine tin).

1. Chop pecans on speed 4 for a couple of seconds, just until roughly chopped:
- 70g raw pecans
    Remove to a bowl.

2. Melt in Thermomix at 100C for 2 minutes at speed 1, or until just melted and combined:
- 3 Tbspns Rapadura
- 2 Tbspns honey
- 1 Tbspn butter or coconut cream

3. Spoon 1 Tablespoon of caramel mixture into each muffin cup.


Add a sprinkling of chopped pecans, and set aside.


No need to wash out Thermomix bowl.

4. Add all remaining ingredients to Thermomix bowl and mix on speed 4 for 6 seconds; scrape down sides of bowl and mix for another 5 seconds on speed 3 to combine.
- 130g raw pecans
- 110g macadamia oil
- 80g Rapadura
- 80g spelt flour (or gluten free or almond flour)
- 3 large eggs (55-60g each)
- 1 tsp vanilla extract
- 1/2 tsp baking powder
- 1/2 tsp sea salt

5. Divide mixture evenly between muffin cups. Bake for about 20 minutes at 180C, or until skewer poked into centre of muffins comes out clean.


Enjoy! I'm off to sneak the last one now that the kids have gone to bed...

Jumat, 18 November 2011

Double Whammy Chocolate Cake


When my big sister was about seventeen, she used to buy 'Australian Gourmet Traveller' magazines. She loved to cook (yep, it runs in the family), and one of her favourite recipes was a flourless chocolate fudge cake. We loved that cake. I used to watch her make it, whipping up the egg whites, folding them into the rich chocolate batter, carefully placing it in the oven where it would rise, form a crispy crust, then the crust would crack and slightly crumble to reveal a dark, fudgy interior. She'd dust it with cocoa and we'd savour each bite. For some reason I never thought to ask her for the recipe until a couple of months ago when she came for a visit. Unfortunately, the recipe was long gone. But when she went home she sent me a few versions that are similar. One of them had a buttery, chocolate concoction on top that sounded amazing - but of course it had lots of sugar and dairy in the recipe. So I decided to come up with my own version, and after many trials and errors (which were happily eaten by my family and friends), here it is, the long-awaited... [drum roll...] Double Whammy Chocolate Cake recipe!

This is a very rich, decadent cake that has two layers - a flourless chocolate cake for the base, and a chocolate mousse-ish layer on top. A delicious 'double whammy' of chocolate. The method for each layer is very similar (and the ingredients are mostly the same) - but the base is baked, and the top is thickened with agar agar. Because of all the eggs (eight altogether!), dark chocolate and Rapadura, it's not something you'd make every day - but it's perfect for special occasions. It's similar to a chocolate cheesecake, except it's dairy free, gluten free, grain free and nut free... which is why I'm so excited about it!

The two layers

I love flourless cakes made with ground almonds or hazelnuts, but a lot of people can't have nuts. And if you can't have gluten or dairy either, eating cake becomes a very rare pastime. Which I think is very sad. So if you are one of those people, I hope this recipe makes you very happy. (And I'm pretty sure that even if you can have gluten, dairy and nuts, this cake will still make you very happy!) Enjoy.


You really only need a thin sliver of this cake - it's very rich!


Double Whammy Chocolate Cake

Preheat oven to 150 degrees Celcius.
Line a springform cake tin with baking paper and set aside.

1. Grind Rapadura on speed 9 for 30 seconds in a very dry bowl:
- 200g Rapadura
    Tip into a small bowl and set aside.


2. Break chocolate in pieces, weigh into Thermomix bowl and grind on speed 8 for 10 seconds:
- 240g dark, dairy free chocolate (eg. homemade chocolate or 70% cocoa Lindt chocolate)
    Tip into another small bowl and set aside.

3. Weigh into Thermomix bowl and cook at 50 degrees for 3 minutes, speed 3:
- 120g of the ground chocolate
- 120g coconut oil (cold pressed)
    Allow mixture to cool to 37 degrees.

4. Add Rapadura, cocoa and stevia to the chocolate mixture and begin mixing on speed 5. While mixing, separate 4 eggs, adding yolks to mixture through the hole in the lid as you go. Turn speed off once you get to 5 minutes.
- 100g of the ground Rapadura
- 1 Tblspn organic cocoa (or cacao) powder
- 4 egg yolks


Green stevia powder

Scrape the chocolate mixture into a large mixing bowl, set it aside, and wash out the Thermomix bowl really well. (Or if you have a second bowl, leave the chocolate bowl unwashed to use for the chocolate topping, and use the second bowl for the egg whites.)

5. Insert the butterfly into the dry, clean bowl, and whisk the egg whites and cream of tartar on speed 4 for 4 minutes, until stiff:
- 4 egg whites
- a pinch of cream of tartar


6. Fold the egg whites gently into the chocolate mixture in the mixing bowl, using a spatula, until just combined.


7. Pour batter into lined cake tin and bake for approximately 1 hour at 150 degrees C, or until a knife inserted in centre of cake comes out clean.

8. Set cake aside to cool while you make the topping. Start off with the same method as you used with the cake - melt together the remaining chocolate and coconut oil at 50 degrees for 3 minutes on speed 3. (Use the first bowl that had chocolate mixture in it, if you have two - no need to wash out.)
- 120g ground chocolate
- 120g coconut oil (cold pressed)
    Allow mixture to cool to 37 degrees.

9. Add remaining Rapadura, cocoa and stevia to the chocolate mixture and begin mixing on speed 5. While mixing, separate 4 eggs, adding yolks to mixture through the hole in the lid as you go. Turn speed off once you get to 5 minutes.
- 100g ground Rapadura
- 1 Tblspn organic cocoa (or cacao) powder
- 1/4 tsp green stevia powder
- 4 egg yolks

10. Sprinkle agar agar over water in a measuring cup/jug and mix in until it dissolves. Add to the chocolate mixture and mix on speed 5 for a few seconds until well mixed.
- 2 heaped teaspoons agar agar
- 1/3 cup room temp water


Agar agar powder

The chocolate mixture will become thick and creamy, kind of like a pudding consistency - like this:


11. Scrape the chocolate mixture into a large mixing bowl, set it aside, and wash out the Thermomix bowl really well. (Or if you have a second bowl, use the one you already used for egg whites again for the next batch. No need to wash out unless you got some chocolate mixture in it.)

12. Insert the butterfly into the Thermomix bowl and whisk the egg whites and cream of tartar on speed 4 for 4 minutes, until stiff:
- 4 egg whites
- a pinch of cream of tartar

13. Fold the egg whites gently into the chocolate mixture in the mixing bowl, using a spatula, until combined. Pour topping mixture onto the cake in the springform tin. It doesn't seem to matter if the cake's not completely cool, as the topping is quite thick and will set anyway.


14. Cover the cake and set it carefully in the fridge to set overnight. Or if you're impatient, place it in the freezer for a couple of hours, then the fridge. It should set so that the topping is firm and can be sliced without losing it's shape.

This cake will keep for up to a week in the fridge, so it's great to make ahead if you're taking it to a party. Or you could just make it for yourself and eat a little tiny slice every day for days on end... ;) Just freeze the individually wrapped slices and they'll last for ages. And they taste great straight from the freezer too - like an ice cream cake!

Sigh. Mine's all gone now, and I've finished testing this recipe. I need to think of another excuse to make it now...


Tips & Variations:

* It's very handy to have two Thermomix bowls when making this recipe! You can have one bowl for the egg whites, one for the chocolate mixture, and it's a lot quicker and easier. But if you only have one bowl, that's okay - this cake is still worth the little bit of extra work.

* Room temperature egg whites whip up the best, so leave the eggs out of the fridge for a while before you make this.

* I buy my coconut oil in bulk either through my co-op or on the internet. It's a lot cheaper that way. If you'd rather, you can use butter instead of the coconut oil.

* The green stevia is added to cut down on the amount of Rapadura used. If you want to you can increase the Rapadura to 250g and leave out the stevia. Or you could cut the Rapadura down further and use more stevia - eg. 80g Rapadura + 1/2 tsp stevia for the base, same for top. If you can't find green stevia, you can order it online here - it tastes better than the white stevia powder or stevia liquid, and is just the dehydrated leaves, ground up.