Tampilkan postingan dengan label honey. Tampilkan semua postingan

Jumat, 09 November 2012

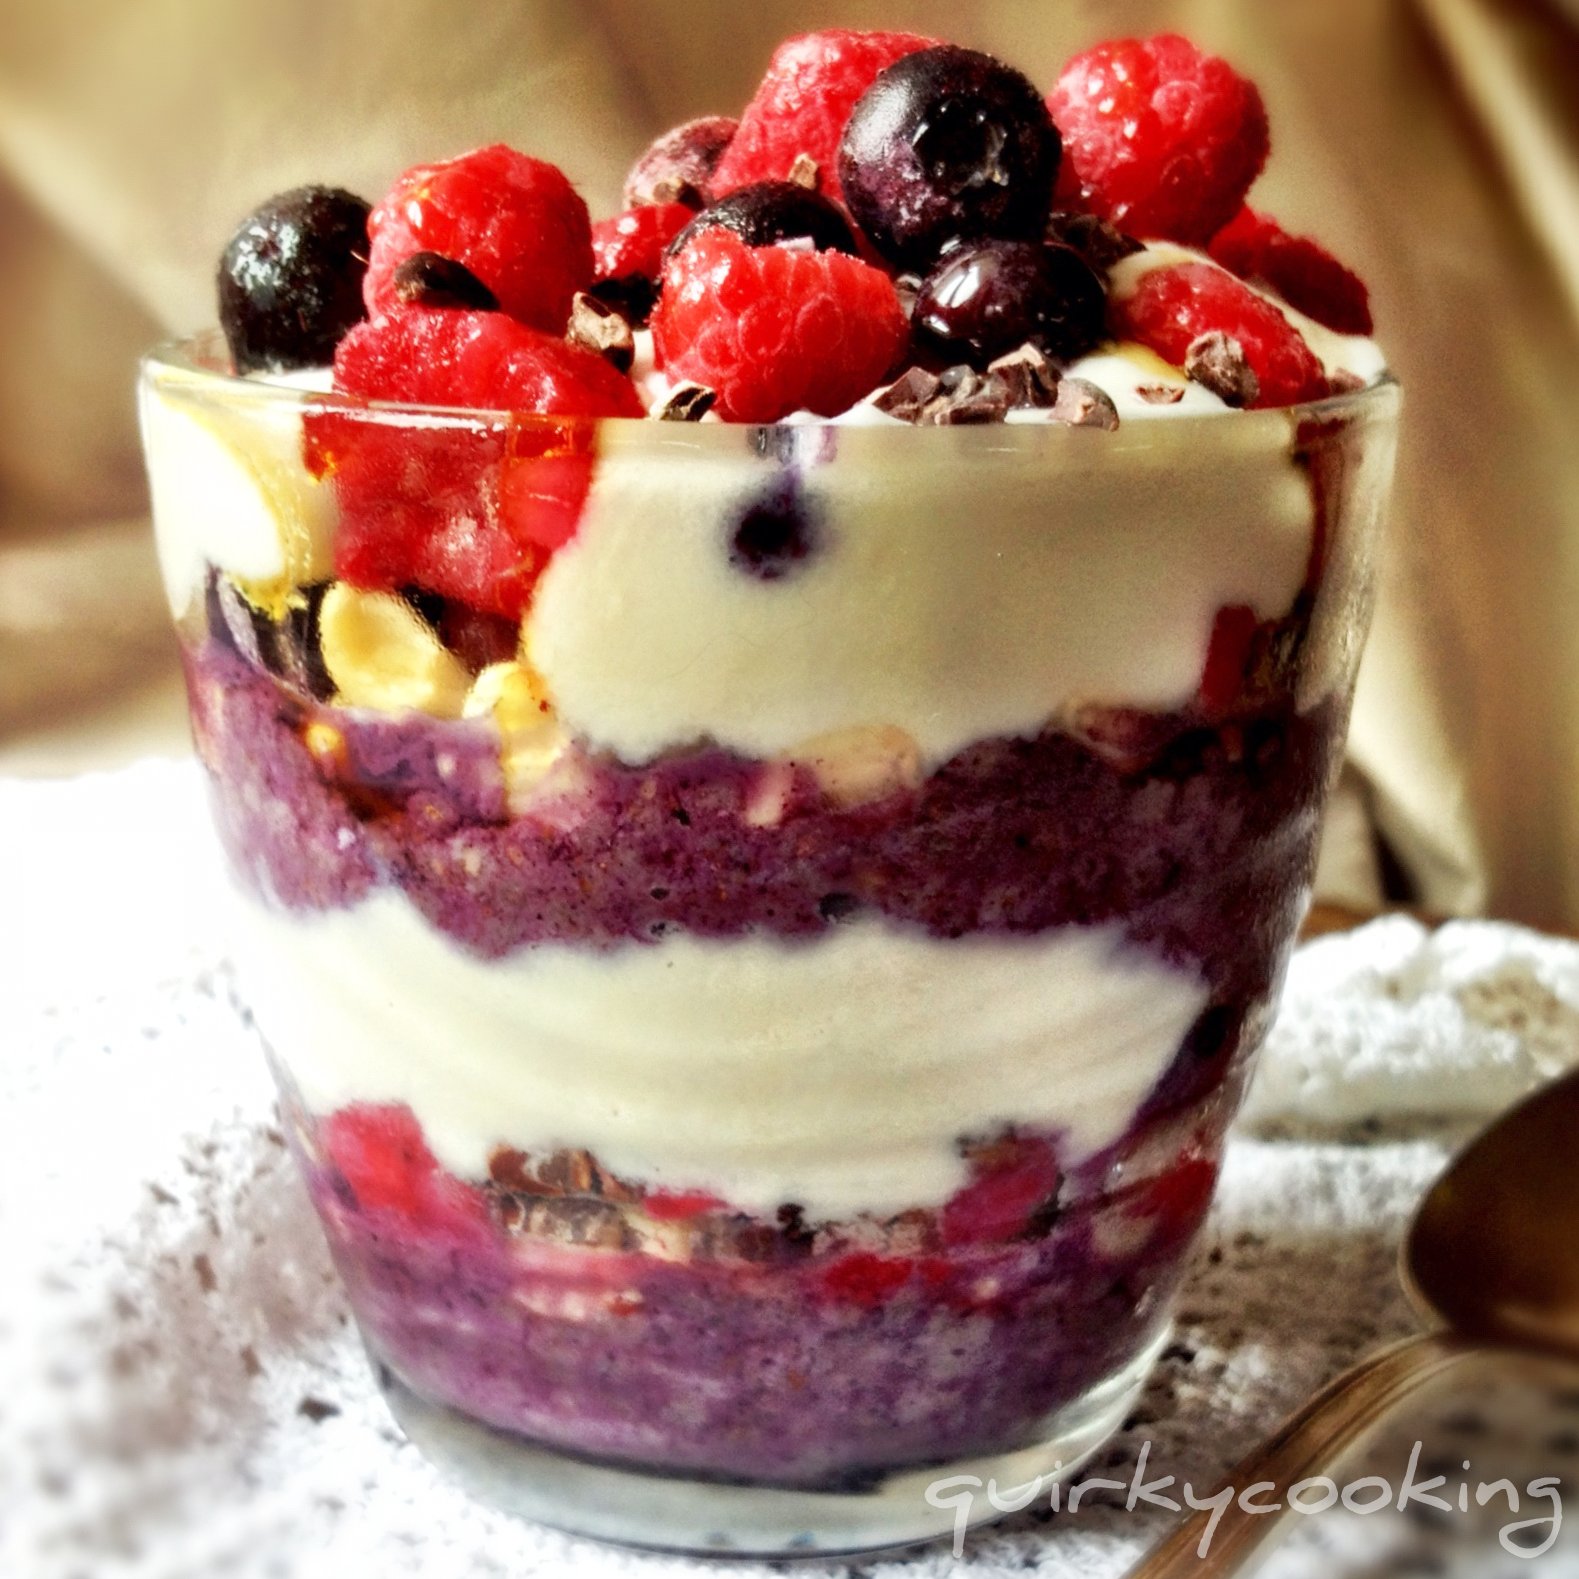
Layered Maqui Chia Pudding


Chia pudding (or porridge) is a staple part of my diet. I eat it for breakfast or morning tea, afternoon tea or supper. Sometimes all four! If I'm rushed, I eat it for lunch too. I'm kind of addicted to it. Here's why:

1. It's delicious. Think berries and cream with a chocolatey-nutty crunch!

2. It's quick and easy. It only takes 5-10 minutes to make my quick version.

3. It makes lots and lasts for a week in the fridge. So I can make up a big batch and have enough for a few days.

4. It's versatile. Every batch I make is slightly different to the last, depending on what I have on hand. (See variations below)

5. It's healthy. Chia has approximately 6 times more calcium than milk, as well as being high in Omega 3 and 6 fatty acids, and other essential minerals. Then there's all the goodness of the Maqui berry powder with it's high level of antioxidants, the coconut cream with it's lauric acid, and the benefits of whatever other superfoods you add, like goji berries and cacao nibs.

6. It's the perfect low GI, natural, 'sweet treat'. It keeps me from getting 'hangry' halfway through the morning or afternoon. {Hangry: 'A state of anger caused by a lack of food.' Know what I mean?} Chia seeds and mesquite powder are both great blood sugar stabilizers. As my mum used to say when she gave us porridge for breakfast, "It'll stick to your ribs!"

7. It travels well. I pop a batch into a jar and take it with me as I dash out the door. I even took some on the aeroplane the other day for my lunch... The guy next to me was looking at me a little strangely as I ate my pudding and drank my green smoothie from a jar, but hey, I'd rather that than the dry white bread sandwich and softdrink he had for lunch!

And if that's not enough, here's Jess the Wellness Warrior's 13 Reasons to Eat Chia Seeds Every Day!


One Layered Maqui Chia Pudding to go...

And just in case that's not enough reasons for you to try chia pudding - it looks pretty! Especially when you layer it.


There's lots of different recipes around for chia puddings and porridges, usually involving at least 40 minutes of soaking time, or soaking overnight. Sarah from 'Homemade, Healthy, Happy' has a delicious one here that I love, but I decided I wanted a quicker version - I'm usually in a last minute rush in the mornings, so 40 minutes seems a bit too long to wait for the soaking time. I find that by warming the pudding gently for a few minutes at 37C, the chia seeds soak up the liquid just as well as when they are soaked, without being 'cooked' and losing their goodness. I also wanted to make one that was kind of fun - which is why I layered it and called it a pudding instead of a porridge. ;-)

I've tried lots of different versions of chia pudding, and pretty much love them all. But this one is how I make it most of the time - with superfood Maqui powder for an antioxidant boost, plus lots of other yummy bits and pieces. My Instagram friends come up with some great combos, and I'm continually being inspired by other people's versions, like these on my Facebook page. To give you some more ideas of possible variations, here's a few others I've seen that look great!

- Coconut Water Chia Porridge (I keep meaning to try this, but I love coconut water so much that I always drink it before the porridge gets made!)

...and if you google 'chia pudding' and 'chia porridge' you'll come up with heaps more! The variations are endless.

{Note: Some people find too much chia can bother their tummy, especially if it's not soaked. If you find my quick version doesn't agree with you, try soaking the chia in the almond milk overnight in the fridge, then continue recipe as below. This is usually only the case for people with gut issues.}


Layered Maqui Chia Pudding 

First make the almond milk (below), or you can use coconut milk or coconut water instead.

1. Weigh almonds into Thermomix bowl and grind on speed 9 for 20 seconds:
- 100g raw almonds

2. Add water and blend on speed 9 for 1 minute:
- 550g filtered water

3. Add following ingredients, and cook at 37C for 5 minutes, speed 1:
- 85g chia seeds
- 1-2 tsp Mesquite powder
- 2 Tbspns Yacon syrup or raw honey
- 1 tsp ground cinnamon (optional)
- pinch of ground nutmeg (optional)
- 1 tsp vanilla bean paste
- a handful of raw cacao nibs
- a handful or two of goji berries and/or sultanas


Maqui berry powder - full of antioxidants!

4. Remove pudding to a dish or large jar to keep in the fridge. (It will be a little runny at first, but I make it like that on purpose because it gets thicker as it sits, and I don't like it too thick.) For each serving, layer the following in a glass or jar in the order given:
- a few Tblspns chia pudding
- a handful of raw cashews or macadamias
- a few blueberries
- a few raspberries
- a couple of blobs of coconut cream
- a drizzle of pure maple syrup

Repeat the layers.


Variations:

- Instead of vanilla bean paste, you can use a whole vanilla bean. Pop it in with the almonds and grind them up, then add water and blend.

- If you don't have Maqui powder or Mesquite powder, that's okay. I like to use them because they add extra goodness and the Maqui makes the chia such a lovely colour, but it will taste fine without. Try stirring in some homemade (sugar free) strawberry jam instead - my friend Emma suggested this, and it's delicious!!

- Try a coconut version: blend up the water and flesh of a young (green) coconut and use that instead of almond milk; leave out the yacon syrup or honey as the coconut water is sweet enough on it's own.

- If you can't have nuts, try coconut flakes instead, or maybe some toasted pepitas.

- Swap the coconut cream for coconut milk yoghurt, and instead of berries try some slices of mango. Drizzle over some passionfruit pulp instead of pure maple syrup.

- Try cherries with cacao nibs and chocolate covered goji berries, topped with coconut flakes. Mmmm....

- Fresh and juicy peaches, nectarines or strawberries are great too, instead of the berries.

- You could use other sweeteners besides Yacon syrup or honey or pure maple syrup - some prefer agave syrup, or coconut nectar, or carob syrup. Even stevia would work in the chia pudding. I would suggest sticking to a liquid sweetener though, as granulated sugars such as Rapadura wouldn't mix in so well.

Let me know what other great variations you come up with!


Now, for those of you who would like to try some Yacon Syrup, Mesquite Powder or Agave Syrup, Loving Earth has kindly given me some to give away. So leave a comment below saying what variation of Chia Pudding you'd like to try, and next Saturday (17th November) I'll pick 3 comments via Random.org and the winners will receive one of the above products to try! One comment each please, and let me know which product you'd prefer to win in your comment, so I can put you in the right prize draw. Woo hoo, thank you Loving Earth!!

{To find out more about all these interesting ingredients I use, click on the links and they will take you to pages with more info.}


Jumat, 03 Agustus 2012

One Bowl Thermomix Carrot Cake! {gluten free, dairy free}

  
Do you make carrot cake 'from scratch', the old fashioned way? Do you end up with a big mess? Carrot peels in the sink, bits of grated carrot sticking to the grater and scattered over the counter, a chopping board covered in bits of walnuts and pineapple, a bowl for the wet ingredients, goop from the eggs on the counter, a whisk, a bowl for the dry ingredients, a floury sieve, a wooden spoon... then once you've tidied all that up, you've got to make the cream cheese icing! Messy. And lots of dishes to wash. So you probably don't make it very often, right? I know I didn't when I had to make it that way!


Maybe you're thinking, 'Nope! I make mine in the Thermomix, or a food processor!' Getting closer... but how many steps does your recipe take? I'm amazed at all the extraneous steps in so many recipes. Cut 'em out! Who wants recipes with lots of steps, anyway? Not me. I've streamlined my carrot cake recipe to two main steps. Plus stirring in some raisins if you like. (Okay, and one more step for the icing.) First the wet ingredients go in, along with the quartered carrots and chunks of fresh pineapple - grated, chopped and mixed all at once. Then I add the dry ingredients, including the nuts, and chop and mix those for a few seconds. Then stir through some raisins. That's it. Pour it in the tin, pop it in the oven, and let the Thermomix bowl wash itself. ;-) You can even skip peeling the carrots and just give them a scrub if you like. Too easy.


By the way, this recipe makes great carrot cake cupcakes, too! I'm afraid I ate four of them today. And a slice of cake. Oops. Good thing they're healthy! :D


I've made a quick coconut cream topping for these. If you'd rather you could make a vanilla cashew cream.

For a nut free version, just replace the walnuts with shredded coconut.

This recipe makes two cakes, or a cake and 12 cupcakes.
Or about 24 cupcakes. :-)


1. Preheat oven to 165C. (Cakes made with honey need to cook at a lower temp, for longer, otherwise they'll be burnt on the outside and gooey on the inside; so don't be tempted to turn the oven higher.) Grease and flour a bundt tin or ring tin, and 12 muffin cups, or two ring tins or 24 muffin cups... you get the idea. If you're going to use cake tins, make sure they're not regular ones or the middle won't cook well - if you don't have a ring tin or a bundt tin, just grease and flour a small glass, and place it upside down in the middle of a round cake tin, and use that.


2. Weigh carrots, pineapple and wet ingredients into the Thermomix bowl, and mix on speed 5 for 15 seconds:
- 400g carrots, quartered
- 300g chunks of fresh pineapple (you can use tinned pieces, but add them with the dry ingredients so they don't get too chopped up)
- 4 large eggs
- 80g macadamia oil (or other light flavoured oil)
- 1 tsp vanilla bean paste (or good quality vanilla extract)
- 180g honey* (preferrably raw, unheated)


3. Add dry ingredients and mix on speed 5 for 5 seconds:
- 380g plain gluten free flour (you can make your own mix if you'd rather, see this recipe)
- 1 tsp cinnamon
- 2 tsp bicarb soda (baking soda)
- 3/4 tsp sea salt
- 150g walnuts (unchopped)

* Note: for a nut free cake, leave walnuts out and add a couple of handfuls of shredded coconut with the sultanas instead.


4. Optional: stir in raisins/sultanas on speed 3 for 5 seconds:
- 80g raisins or sultanas

5. Cook for approximately 30-40 minutes for cupcakes, and an hour and a half for cakes, depending on your oven. Check by poking a skewer into the centre - it should come out nearly clean when the cakes are done. If the cake is getting too brown on top, just cover it with foil and keep baking til done. Don't cut it straight away while hot - it will be very moist inside. Let them cool, even in the fridge, before icing and eating, and the texture will be better.

* Note about honey: I buy raw, unheated honey in 2 litre bottles from local beekeepers - it's cheaper than buying honey in little containers from the grocery store, it doesn't have added glucose (which a lot of so called 'pure' honey has), it's unheated so there's more goodness in it, and it supports locals!


Coconut Cream Topping

For the topping, you'll need a cold tin of coconut cream - I keep a tin in my fridge for times like this. When it gets cold, the cream rises to the top and thickens, just like thick dairy cream.


In the Thermomix bowl, stir together the topping ingredients on speed 3 until just combined:
- 200g thick coconut cream (organic)
- 2 tsps fresh lemon juice (to make it tangy - optional)
- 1 tsp vanilla bean paste (or good quality vanilla extract)
- 60g raw honey (or to taste)

Pour into a dish and refrigerate to thicken again.

When the cakes are cool, top with coconut cream and sprinkle with some extra chopped walnuts or shredded coconut.

Store finished cakes in the fridge.


Rabu, 19 Oktober 2011

Quick Quinoa Granola


I got up this morning to hungry kids and nothing much to eat, so I made a quick batch of quinoa granola with some quinoa flakes I picked up at the supermarket yesterday. It was so easy and delicious, I just had to share it with you all! While it was toasting I made a banana & chia seed custard (no eggs or dairy) to have with it - but I'll save that for the next post.

Making granola is not an exact science. Just throw in handfuls of your favourite ingredients and spices, drizzle over some oil or melted butter plus honey or syrup, sprinkle with salt, mix it up, and toast it. Mine is a little different every time. I just made a small batch this morning, mixing it straight on the baking tray - if you want to make a big batch, mix it in a large mixing bowl and adjust amounts to suit.

So here's a basic recipe for a quick quinoa granola that you can mix up in seconds, toast in minutes, and enjoy before dashing out the door for the day. Tweak to your heart's delight! :)

Preheat oven to 180 degrees. OR you can toast this under the grill for quicker results, but you'll have to watch it closely and stir it every couple of minutes.

Okay, just throw all these ingredients together, either straight onto your baking tray, or in a mixing bowl:


3 big handfuls of quinoa flakes. (If you like you can mix with some rolled oats to save money)

a handful or two of roughly chopped almonds or other nuts, eg. pecans, hazelnuts (chop in Thermomix on speed 5 for a few seconds) If you can't have nuts just add more seeds.

- a couple of handfuls of sultanas (or other dried fruit)

- a handful of sesame & sunflower seeds (or other seeds, like chia)

- a pinch or two of celtic sea salt or himalayan salt (I like to use a flaked or roughly ground salt to get that occasional slightly salty crunch in my granola)

- a big pinch or two of ground cinnamon

- a smaller pinch of ground nutmeg

[Note: Try grinding up your own nutmeg and a cinnamon quill in the Thermomix for more flavour!]

- a good drizzle of melted coconut oil or butter (I don't measure, I just add more as I'm mixing if I think it needs to be 'wetter'. It depends on how crunchy you like it. More oil, crunchier granola.)

- a good drizzle of raw honey or pure maple syrup or agave syrup (again, I don't measure, just drizzle some over)

- a splash of vanilla extract

Now for the fun bit - get your hands in there and mix it up! Use your fingertips to rub the oil and honey/syrup into the dry ingredients, until it's evenly mixed. Spread out evenly on the tray.


Pop it into the hot oven (180 degrees) and cook for about 10 minutes. Remove from oven, stir with a fork, place back in oven and give it another 5 minutes or so.

I don't even bother letting it cool - just dig in! But if you want to cool it first you can - it gets crispier as it cools.


Sprinkle your granola over some fruit and/or yoghurt. If you're dairy free, try this coconut milk yoghurt!

It's also great sprinkled over banana or vanilla custard.

And of course, it's delicious with cold rice-almond milk or cashew milk too.

My favourite time to eat granola is actually supper time... think I'll go have some now! :)

Minggu, 19 Juni 2011

Sweet 'n' Salty Nuts


Sweet 'n' Salty Macadamias

This is one of our family's 'go-to' snacks which my friends think I really should share - they're the easiest, yummiest snack around!

This isn't a Thermomix recipe - it's so simple, it's hardly a recipe at all... All it involves is some nuts, a liquid sweetener, some sea salt, and an oven. Oh, and a baking tray. And it only takes 20 minutes.

Sweet 'n' salty nuts are great for a quick snack on the go. I often take a little bag of them in my handbag when I go out, which helps me control the urge for buying something not-so-healthy to munch on!

I buy my nuts bulk from Trumps in Brisbane - it's a lot cheaper that way. I buy organic raw cashews, insecticide free almonds, hazelnuts, brazil nuts - all sorts. I can also get lovely pecans and macadamia nuts locally, which are probably my favourites. I always have a variety of nuts in my freezer. (And at the moment, in bags on my kitchen floor because I can't fit them in the freezer...) We're a pretty nutty family! :D

There's lots of possible combinations of nuts and sweeteners - here's a few of my favourites, but see what you can come up with!

- Macadamias, rice malt syrup, sea salt

- Cashews, raw honey, sea salt

- Pecans, pure maple syrup, sea salt

- Almonds, raw honey, sea salt

I'm wanting to try yacon syrup too, just haven't gotten any yet, but I've heard it's amazing!

Okay, here's the simple method for making sweet 'n' salty nuts:

Preheat oven to 180 degrees C.

1. Spread the nuts on a baking paper lined pizza tray (or baking tray) so that they're in a single layer, like this:


2. Drizzle with honey or syrup, back and forth - no need to cover them! Just a drizzle, like this:


3. Sprinkle over a couple of good sized pinches of sea salt or pink Himalayan salt. I use Himalayan salt crystals which I grind up in the Thermomix until fine. (There, see, I just couldn't do a recipe without using the Thermomix somewhere!)

4. Pop the nuts into the preheated oven and let them cook for about 10 minutes. Take the tray out and stir the nuts with a fork, turning them in the melted honey/syrup so they're evenly coated. Pop them back in the oven and cook another 10 minutes, or until they're golden and crispy. Don't burn them!


5. Let them cool for a few minutes before eating. Once they're completely cool, store them in an airtight jar on the counter.

P.S. You might want to do a couple of trays at a time - they go quick!

Minggu, 03 April 2011

Princess Sorbet... and Dreamy Dragonberry Delight!


'Princess Sorbet' ~ Dragonfruit & Lime

All princesses deserve 'fairy tale' food ~ 
and what could be more 'fairy tale-ish' than dragonfruit? 


The colour and texture of this fruit are enough to delight any princess, but with your trusty Thermomix you can magically transform it into a jewel-coloured sorbet, or a delightful, dreamy dessert! Your little princess is sure to be enraptured!


Dreamy Dragonberry Delight ~ Dragonfruit & Strawberry

What princess could resist this amazingly dreamy Dragonberry Delight?
(Actually, not even dragon-slaying boys can resist this one, 
even if it IS hot pink!)

Princess Sorbet 
(Dragonfruit & Lime)

1. Place lime zest and Rapadura into Thermomix bowl and grind on speed 9 for 30 seconds:
- zest of 1-2 limes (depending how 'zingy' you want it)
- 90g Rapadura

2. Add lime juice, dragonfruit & first batch of ice and grind on speed 9 for 10 seconds:
- juice of 1 lime
- 200g fresh dragonfruit
- 350g ice

3. Add second batch of ice and egg white, and grind on speed 9 for about 1 minute, using spatula to push ice onto blades:
- 350g ice
- 1 egg white

Dreamy Dragonberry Delight
(Dragonfruit & Strawberry Fruity Dream)

1. Place frozen dragonfruit into Thermomix bowl and grind on speed 9 for 20 seconds, helping it along with spatula:
- 350g frozen dragonfruit (chopped into small pieces)

2. Add strawberries and lemon juice, and grind on speed 9 for 20 seconds, until all the fruit is finely ground:

- 250g frozen strawberries
- juice of half a lemon
[Note: you can use any combination of dragonfruit & strawberries, just so it adds up to 600g]

3. Add honey & egg whites, insert butterfly, and whip on speed 4 for 4 minutes:
- 60g - 80g raw honey
- 2 egg whites


How's that for a snack fit for a princess!

Minggu, 13 Maret 2011

Peaches 'n' Honey Fruity Dream


Want a healthy, instant ice-cream? We call this one 'Peachy Dream'. It's so creamy and delicious - you'd swear it was made out of peaches and cream, but there's no dairy in it at all, it's RAW, and it only has three healthy ingredients... fresh peaches, honey and egg whites! Make sure your peaches are ripe and juicy before you freeze them, and obviously the better the peaches, the better the ice cream :) Enjoy!

1. Peel, chop and freeze a bunch of fresh, ripe peaches. (Well, you don't really have to peel them - it's up to you.) You'll need 600g of chopped peaches for this recipe. (Or you can half it and use just 300g.)

2. Chop up the frozen peaches quickly, so they don't thaw out. Little pieces are best, less than an inch, so that you can grind them up all together.

3. Weigh frozen peaches into Thermomix and grind up on speed 9 for about 20 seconds, using the spatula, until they turn into a thick, frozen paste. Scrape down sides and mix again if necessary.
- 600g frozen peaches

4. Add honey and egg whites and mix in for 5 seconds on speed 6, just to soften the frozen fruit paste:
- 60g raw honey
- 2 fresh egg whites

5. Push the butterfly down onto the blades and whip on speed 4 for 3 - 4 minutes, until the bowl is full to the top. (It fluffs right up to the lid if you whip it for this long.)


6. Serve straight away! And you can freeze any leftovers, it won't freeze hard. Use within a week, or the 'fluffiness' goes away and it becomes a bit icy.

Variation: you can use any frozen fruit for this recipe - mangoes are especially nice, or nectarines! See also Berry Fruity Dream for a berry version, or Dreamy Dragonberry Delight for a bright pink one!

Senin, 22 November 2010

Christmas Jelly Salad


I love this jelly salad as a side dish with Christmas dinner!  You can also serve it as a dessert, if you'd rather - it's kind of halfway between a dessert and a salad.  You can add or subtract fruits as you like - green grapes and strawberries are nice in it too.  Hope you like it :)

1.  Drain pineapple, and pour juice into the Thermomix bowl; set pineapple aside for later:
- 2 x 440g tins of crushed pineapple, unsweetened
     There should be approx. 400g of pineapple juice.

2.  Add berries to the juice in the Thermomix bowl and cook at 100 degrees for 15 mins, reverse, speed 1:
- 450g frozen berries (cranberries/mixed berries/cherries)

3.  Juice an orange and stir gelatine into juice until dissolved:
- 1 orange, juiced
- 2 heaped Tblspns gelatine powder (3 sachets)
(For a vegan version, substitute agar agar powder for gelatine)

4.  Add thickened orange juice and honey to berry mixture in bowl and cook at 100 degrees for 2 minutes, reverse, speed 2:
- orange juice mixture
- 180g raw honey

5.  Pour juice and berries into a large jelly mold (or bowl), leaving about a cupful in the Thermomix bowl.  Add orange to Thermomix and blend until smooth, moving speed dial slowly up to speed 9 for about 20 seconds:
- 1 peeled orange
     Add orange-berry mixture to berries and juice in the jelly mold (or bowl).

6.  Place in Thermomix bowl and chop on speed 4-5 for 5 seconds:
- 2 sticks of celery (no leaves)
- 1 green apple, quartered
- 65g raw walnuts or pecans
    (if you want pretty slices, you could chop by hand)

7.  Add to the berry mixture in the bowl:
- chopped celery, apple & nuts
- reserved crushed pineapple
     Stir together, and cover.

8.  Chill for a few hours or until jelly is set - you can put it in the freezer for a little while if you're in a hurry!

Minggu, 16 Mei 2010

Ginger & Vitamin C Boost Juice

Ginger & Vitamin C are great for fighting colds and flus - try this juice when you need a boost!

Whiz up in Thermomix for 1 1/2 minutes on speed 10:

- 300g fresh pineapple, cut into chunks
- 1 ruby red grapefruit, peeled, deseeded & quartered
- 2 kiwifruit, peeled and halved
- a good chunk of fresh ginger, peeled (about 2 cms)
- 60g raw honey
- 300g ice cubes

Fill glasses two thirds full, top up with soda water, and stir. Enjoy!

Sabtu, 13 Maret 2010

Blender-Batter Muffins

Blueberry Spelt Muffins

This is the base recipe I use for my muffins, adding in berries, or nuts, or choc chips, or spices, or crumble topping, or whatever I feel like.  It's a very versatile and healthy recipe - gluten free (or low gluten, depending which grains you use), dairy free and naturally sweetened. You start with the whole grains (spelt, brown rice, barley, kamut, or a mixture of these...), grind the grains in the Thermomix, mix with the liquids, leave to soak overnight (or at least a few hours), then add the remaining ingredients.  (Check out the variations below for ideas.)  I like to start it at night so we can have muffins for breakfast (...and morning tea - it makes a lot!!).

This recipe is inspired by Sue Gregg's Blender Batter Baking recipes in Sue Gregg's 'Breakfasts' cookbook. (I love Sue's cookbooks - this one has nearly 300 pages of healthy, delicious breakfast recipes!!)  I used to use my homemade rice-almond milk with a teaspoon of apple cider vinegar to substitute for the buttermilk in her recipe, but I decided to cut out a step and make the milk at the same time as I made the muffins... so instead of buttermilk, I add a handful of raw almonds, a teaspoon of apple cider vinegar, and water.  It all gets ground up and soaked with the grains, and works just fine! If you can't have nuts, sunflower seeds work just as well.

Soaking the grains in the liquids overnight improves digestibility and vitamin absorption.  You can either leave the batter to soak overnight in the Thermomix, or remove it to a glass bowl, which is what I prefer to do.

1.  Place half the grain in the Thermomix and grind on speed 9 for 1 minute, or until finely ground. Remove to a bowl and repeat with the remainder of the grain. (This is so you don't overload the blades.)
- 290g whole spelt grain (or kamut, hulled barley, brown rice, quinoa or a mixture of grains)


2.  Add the flour in the bowl back into the Thermomix jug, add in the following ingredients, and blend for 1 minute, speed 8:
- 40g raw almonds (or sunflower seeds)
- 160g water
- 1 tsp apple cider vinegar
- 20g macadamia oil (or light olive oil)
- 200g raw honey
(You may have to play around with the amounts of grain if not using spelt - if it seems way too thick and there is no 'vortex' while you're blending, add a little more water.)

3.  Leave batter to soak overnight, or for about 7 hours.

4.  When ready to cook, preheat oven to 175 degrees C (350 F), and grease muffin trays (or you can use ramekins for extra large muffins).

5.  Add eggs to batter and mix for 1 minutes at speed 8:
- 2 eggs

6.  Mix in briefly, for 3 seconds on speed 5:
- 2 tsps baking powder
- 3/4 tsp baking soda
- 1/2 tsp fine sea salt
- 1 tsp cinnamon (optional)

7.  Fill greased muffin trays (or ramekins) almost full with batter.  Sprinkle the top of muffins with Rapadura and cinnamon (optional), and place in oven for about 20 minutes, or until toothpick inserted in centre comes out clean.  Cool for 5 minutes before removing from tins.

Variations:

- NUT FREE: instead of the almonds and water, use 200g rice milk.

- Berry muffins: add berries by sprinkling them on top of batter in tins and pressing in slightly - they will sink in a little while cooking.  You can also sprinkle with Rapadura & cinnamon if you wish.

- Chocolate chip muffins: replace cinnamon with 1 tsp vanilla extract; stir in 1 cup of Rapadura sweetened choc chips with baking powder.  (Berries AND choc chips is nice too!)

- Nut muffins: add chopped nuts with the baking powder, etc, but only mix in briefly.

- Apple muffins: increase the cinnamon to 1 1/2 tsp, add 1/4 tsp nutmeg; add 1 peeled and diced apple to batter with baking powder; sprinkle with cinnamon & Rapadura before baking.

- Banana muffins: add another 20g oil, 1 1/2 very ripe bananas, 1/2 tsp nutmeg and blend, then soak overnight.  Only needs 1 egg.  Optional: add a handful of chopped walnuts/pecans and/or dark choc chips with baking powder.

- Orange date muffins: replace cinnamon with 1 tsp vanilla extract; fold in 1 peeled, diced orange and a handful diced dates with baking powder.

- Orange nut muffins: peel orange skin into Thermomix, add a little Rapadura and cinnamon, grind speed 9 until finely grated.  Use 170g orange juice instead of almonds, water & vinegar in batter.  Add 1 tsp vanilla extract to batter.  Add a handful of chopped walnuts or pecans and a handful of sultanas with the baking powder.  Can also add a handful of grated carrot.  Before baking, sprinkle with the orange zest, Rapadura & cinnamon.

Jumat, 13 November 2009

Almond Butter Choc Chip Cookies


Everybody loves chocolate chip cookies! But how to make them healthy? I was so excited when I found Rapadura sweetened dark chocolate chips in a local co-op store! This is a recipe I developed that I make now and then for a treat - they're wheat free, dairy free and naturally sweetened, and really yummy - just ask the kids :)

The almond butter adds some protein and calcium, which is a plus. I make the almond butter first, in my Thermomix, then add the other ingredients. You could use any nuts, or pre-made nut butter - macadamia, cashew, peanut - (preferably not the horrible 'hydrogenated' bought peanut butter though), and you could also add some chopped pecans or walnuts if you like - yum! (Note: if you use other nuts, you may need less oil to make the butter - macadamia nuts may not need any oil at all.)

This recipe makes a lot, so you could half it, or just roll some of it up in plastic wrap and keep it in the freezer until you 'need' some cookies. You just have to thaw the dough out for 10 minutes or so, then you can slice it into rounds, place on a baking tray and pop them in the oven. It's great to have some in the freezer when visitors drop by!

(Preheat oven to 175 degrees celcius)

1. First, make your nut butter (or you can use a bought one)...
Grind on speed 9 for 30 seconds, then scrape down sides with spatula:
- 250g almonds

2. Add and mix on speed 9 for 20 seconds:
- 50g macadamia or light olive oil
Scrape down sides of bowl again.

3. Add and mix on speed 6 for 30 seconds:
- 150g Rapadura 
- 180g raw honey (1/2 cup)
- 3 medium eggs
- 230g macadamia, coconut or light olive oil (1 cup)
- 1 tsp vanilla extract

4. Add and mix on speed 6 for 10 seconds (using spatula to help mix):
- 500g plain spelt flour (can be a mixture of wholemeal and white, and may need more or less than 500g - you should be able to roll the dough into balls)
- 1 tsp fine sea salt
- 2 tsp baking soda

5. Turn dough out into a large bowl, add a little more flour if needed. (I do this in a bowl as the Thermomix is a bit too full at this stage, and the heavy dough slows down the blades.) Add choc chips and mix in with spoon:
- 1 cup mini dark choc chips, Rapadura sweetened (or malt sweetened) *


6. Drop dough by spoonfuls onto greased or papered baking trays and bake in oven at 175 degrees celcius for about 10 minutes, or until lightly browned. (Or you can roll dough into balls and flatten with a fork.)

7. Cool on the trays for crispier cookies, or remove to a rack while warm for softer cookies. Or just eat them all while they're warm, and lick the chocolate off your fingers! :D

(If you do cook the whole batch at once, store them in the freezer so they don't go stale.)

* Note about Rapadura sweetened choc chips - I bought these at a co-op store in Cairns (Qld) - they are made by Rapunzel and can be bought online. Another naturally sweetened, allergy free brand is 'Enjoy Life Foods' - these ones are great as they don't contain soy, but are pretty expensive.  I know in the USA you can also get malt sweetened choc chips, but I haven't been able to find them here.

Selasa, 03 November 2009

Apple-Oat Fritters


I made these fritters for breakfast this morning (seeing there was no bread left and I hadn't gotten around to making any buckwheat granola...) - they were very yummy and filling! And the recipe made heaps, so there's plenty for snacking on later. (So if there's only one or two of you, I suggest halving it!) For best results, (and to make the grains easier to digest), start the night before and use the 'pre-soaked version'.

I just used a basic pancake recipe and added grated apple, oats, cinnamon and apple juice concentrate. If you're gluten free you can use gluten free flour and quinoa flakes intead of the oats. Add more or less milk, depending on whether you prefer them thicker or thinner.


Pre-soaked version:
Mix the flour, oats, rice/almond milk and vinegar in the Thermomix and leave to soak overnight. The next morning, add the apples and walnuts and chop speed 5 for 3 seconds, then add remaining ingredients and mix on reverse speed 2 until well mixed.


1. Grate in Thermomix, speed 5 for 3 seconds (or by hand):
- 4 apples, peeled, cored and quartered
- a handful of raw pecans/walnuts (optional)

2. Add rest of ingredients and mix on reverse speed 2 until well mixed (may need to use spatula to help it along):
- 250g spelt flour (mixture of plain & wholemeal; or gluten free flour)
- 100g rolled oats (or quinoa flake for gf)
- 2 tsp baking powder
- 1/2 tsp baking soda
- 1/4 tsp fine sea salt
- 2 tsp cinnamon
- 2 large eggs
- 350g rice/almond milk
- 1 tsp apple cider vinegar
- 2 Tblspns extra virgin olive oil
- 2 Tblspns raw honey
- 2 Tblspns apple juice concentrate (optional - sweeten to taste)

2. Melt a tablespoon of ghee or coconut oil in frying pan and cook fritters over low heat, turning over when starting to bubble. I add a little ghee/oil between each batch, as it makes the outside crispy - yum!


3. Serve plain, or drizzled with a little apple juice concentrate or pure maple syrup.

Selasa, 14 Juli 2009

'Blender Batter' Berry Cake (GF & DF)


You would never guess that this scrumptious cake is made completely from brown rice, would you! It is the most moist and delicious gluten-free cake ever... and it is completely dairy-free and refined-sugar-free too! It is not made with flour, but with the whole, raw grains, ground in the Thermomix, blended with the liquids, then left to soak for a few hours before the other ingredients are added. You could use other grains besides brown rice - see variations at the end of the recipe. I use raw honey for the sweetener, which I buy bulk to save money.

I've adapted this recipe from one in Sue Gregg's "Breakfasts" cookbook  called "Almond Coffee Cake" which is made with her 'Blender Batter Baking' method.

1. Place 200g of rice in Thermomix and blend on speed 9 for 1 minute. Set aside and grind remaining 150g rice on speed 9 for 1 minute. Return first batch to Thermomix bowl. (It's best to grind this amount of rice or grain in two batches so you don't overload the blades.)
- 350g raw brown rice

2. Add the following ingredients and mix on speed 9 for 30 seconds:
- 1 tsp apple cider vinegar
- 50g olive oil
- 280g raw honey

2. Scrape down lid and sides of bowl, and leave batter to soak for a few hours, or overnight, at room temperature. (I prefer to pour it into a glass bowl for soaking.)  If you're in a hurry it can be made without soaking - just add an extra minute of blending once you add the liquids.

3. Oil a large rectangular baking dish. Preheat oven to 170 degrees C (325 degrees F).

4. Add, and reblend for 2 more ninutes on high speed:
- 2 eggs

5. Add to batter, and blend briefly but don't overmix (5 seconds speed 5):
- 1/2 tsp fine sea salt
- 1 tsp baking soda
- 1 tsp baking powder
- 2 tsp cinnamon
- 1/2 tsp ginger

6. Pour batter into baking pan, and sprinkle over the top:
- 1 cup of frozen mixed berries/blueberries

7. Don't rinse out Thermomix/blender; just place into bowl and chop on speed 5 for 3-5 seconds:
- 1 good handful raw almonds

8. Add, and mix on speed 3 for 3 seconds:
- 1 good handful of raw rolled oats (or if gluten free, use 1/4 cup gf flour instead)
- 1 tsp cinnamon
- 2 Tblspns Rapadura
- 2 Tblspns macadamia oil (or other mild tasting oil, or butter)

9. Sprinkle over cake, and place in oven. Cook for about 45 minutes, or until knife or toothpick comes out clean when poked into centre of cake. Enjoy!

Variations:
- Other grains you can use: 1 1/3 cups wheat or 1 1/2 cups spelt/kamut or 1 1/4 cups barley grain.
- Apple cake: Cook 2 cups thinly sliced apples with 1/4 cup water and 1 tsp cinnamon; place on top of batter in pan, then sprinkle topping over (use walnuts or pecans instead of almonds in topping).
- Dried fruit: Soak 1 cup dried apricots or other dried fruit in hot water for 1-2 hrs, until soft; use in place of apple as above.
- Date & walnut cake: Mix together 3/4 cup of diced dates and 3/4 cup chopped walnuts; fold half into batter, and sprinkle rest on top with topping. (Omit almonds in topping.)
- Pineapple cake: Use juice from tin of crushed pineapple instead of rice milk in cake; add crushed pineapple to topping and omit almonds.

Kamis, 14 Mei 2009

Carob Cake with Sugar-Free, Dairy-Free Icing


Hi everyone - I'm finally getting around to posting a recipe! We're actually on holiday at the beach, which is why I've been so slack. This cake can be made with either cocoa or carob (use a little more if cocoa). There's also a couple of suggestions for sweeteners - if you've never heard of Rapadura, see here. I sometimes use butter, sometimes olive oil, sometimes coconut oil - you can substitute it for whatever you usually use. You can make it either with spelt or gluten free flour (or wheat of course, but I don't use wheat).

I use grams for most of my measurements (because the Thermomix has a built in scale, and that's how you cook with it), so I've converted them to ounces as well, but not to cups - sorry!

The icing (frosting) is really yummy, and so healthy! If you can't have soy, maybe you know of another type of carob buttons you could use. I've suggested a recipe for homemade soy-free carob chips here (with comments).

If you'd like some carob 'candy' recipes, my friend Angie has a website with some: there's Carob Candy Squares, Carob Sesame Balls, Carob Fruit Candy (contains milk powder, but you could substitute with soy milk powder), and Carob Clusters. Yum!

Happy baking!


Carob Cake
1. Pre-heat oven to 180 degrees. Grease / line a 20cm square pan or small ring tin.

2. Melt butter/coconut oil (Thermomix: 2 mins, 60 degrees, speed 4):
- 120g (4.25 oz) butter (or oil)

3. Mix together all ingredients (including melted butter/coconut oil) in Thermomix or food processor for 30 seconds (speed 5 in Thermomix, med-high speed in food processor):
- 100g (3.5 oz) rice-almond milk
- 2 eggs
- 1 tsp vanilla extract
- 150g (5.3 oz) spelt flour (or 120g (4.2 oz) gluten-free flour)
- 4 level tsp baking powder
- 30g (1 oz or about 3 heaped Tablespoons) carob powder
- 100g (3.5 oz) raw honey or 120g (4.2 oz) Rapadura or 60g (2 oz) Rapadura + pinch of Stevia powder

4. Pour into cake tin and bake in centre of oven for 25 - 30 mins, or until knife inserted in cake comes out clean.

5. Eat warm, dusted with powdered Rapadura, or cool and top with carob icing.


Carob Icing (Frosting)
(based on one from the Fit for Life Cookbook, Marilyn Diamond)

1. In a saucepan, combine all ingredients and warm over med-low heat while stirring continuously with a wooden spoon (or Thermomix - 2 mins, 60 degrees, speed 2).
- 3 Tablespoons coconut oil or butter
- 1/2 cup carob chips
- 1/4 cup honey (or rice malt syrup)
- 1 tsp vanilla extract

2. Drizzle and spread over cake - it will get firm as it cools.

If you have some left, you can keep it in the fridge and spread it on toast - it's yummy! Try adding crushed hazelnuts for a healthy substitute for Nutella!