Tampilkan postingan dengan label spelt. Tampilkan semua postingan

Rabu, 05 Februari 2014

Chocolate-Cherry-Berry Dessert Pizzas


Last Saturday my niece came to visit from down south, so we got the kids' friends over for a pizza party to celebrate. There were at least 20 teenagers, plus a few other younger kids, and we all had a lot of fun!


To make the food side of things simpler, I got them to all bring pizza toppings to share. They chopped up the toppings while I made enough spelt pizza dough for about 20 pizzas (easy peasy in the Thermomix!), and then they all made their own pizzas. (In between soccer games, board games, remote control aeroplane flying, chatting, laughing, singing, and everything else!) So much more fun than buying pizzas, not to mention cheaper, healthier and yummier. Oh, and in case you're wondering, we used two ovens - mine and mum's - she just lives two doors down. :)


I also made mango sorbets with magic chocolate topping (see 'Day 7') for afternoon tea, which they loved, and no one complained about the lack of softdrink or junkfood, so they must be getting used to my strange ways! :D

After dinner I had a bit of a brainwave, and whipped up these dessert pizzas with the leftover pizza dough. I topped them with my homemade Chocolate Hazelnut Spread, some cherries and blueberries, zabliagone (a kind of egg yolk custard, no milk, a bit like sabayon), and flaked almonds. Delish!!

I used spelt bases for the kids, but if you're gluten free, don't despair. Use my recipe for Gluten Free Pizza Bases, adding 1 Tbspn of rapadura or coconut sugar to the batter. Blend it well so that the seeds are blended in. You could also use an almond meal pizza base recipe if you want a grain free, yeast free option. Try this one, leaving out the rosemary and garlic; swap the olive oil for macadamia oil, and add 2 tsp coconut sugar per base. See suggestions in recipe for a nut free version.


These pizzas are best served hot, so if you don't want to invite 20 hungry teenagers over for a party and your family won't eat three in one go, try this:

- Make the dough and divide into three portions; place remaining dough in bags and refrigerate or freeze dough for another day. (Dough can stay in fridge for up to a week.) 

- The chocolate spread will last in the fridge for a couple of weeks no problem, as will the cherries if left in the juice in the jar. The blueberries can be frozen. 

- Make zabliagone with 2 egg yolks, 1 tsp maple syrup and 1/2 tsp vanilla, for 10 mins cooking time total. 


Chocolate-Cherry-Berry Dessert Pizzas
Dairy free, with gluten and grain free options, and nut free option

(Makes 3 large pizzas)


Ingredients

Bases:
500g unbleached, plain spelt flour
2 tsp instant yeast
1 1/2 tsp fine sea salt
1 Tbspn Rapadura or coconut sugar
50g macadamia oil (or olive oil for nut free), plus extra for shaping dough
260g water

(or see gf options above)

Toppings:
1 batch of Chocolate Hazelnut Spread (or nut free chocolate spread/ganache, from this recipe)
  (freshly made - or use your own version of 'Nutella' or ganache)
1 800g jar of Morello cherries, drained
1 125g punnet fresh blueberries, rinsed
zabliagone (see below)
80g flaked almonds (or flaked coconut for nut free)

Zabliagone:
3 egg yolks
2 tsp pure maple syrup
1 1/2 tsp vanilla or almond extract

Method

Line 3 large pizza trays with baking paper, and set aside.

Place all base ingredients into mixing bowl and mix 6 sec/speed 6.

Knead on interval setting for 1 1/2 mins, then wrap dough loosely in Thermomat (or silicon bread mat, or place in oiled bowl and cover) and let it rest for 20 mins while you prepare the toppings.

Preheat oven to 200C, with pizza stones on racks if you have them.

After dough is risen, divide into three portions and press out into circles using a little more oil, and place on trays.

Divide chocolate hazelnut spread between the three pizzas and spread evenly over bases.

Scatter the cherries and blueberries over the pizzas, and set aside to rise while you make the zabliagone.

Zabliagone: Place egg yolks and maple syrup into mixing bowl, insert butterfly, and mix 6 mins/50C/speed 4. Add vanilla or almond extract and mix another 6 mins/50C/speed 4.

Drizzle pizzas with zabliagone and sprinkle over the flaked almonds.

Bake for approx 18-20 mins in hot oven on pizza stones (if you have them), until the zabliagone is lightly browned and the bases are cooked through.

Best served hot, while the base is crisp.

(Leftovers can be stored in the fridge in an airtight container, but they will get a bit soggy and the zabliagone will melt into the chocolate - although my kids don't complain! They still taste good.)


Minggu, 06 Oktober 2013

Quick & Easy Pancakes - 3 Ways


Someone mentioned to me the other day that they love my Blender Batter Pancakes recipe, but that sometimes they're in too much of a rush to do the whole 'prepare the night before' thing, and they needed a simple pancake recipe for times like that. I agree - I don't always soak the grains the night before, because pancakes are sometimes a spur of the moment thing. Like last night.

We arrived home from our road trip to Mackay in the afternoon, and I managed to scrounge through the fridge and freezer to find mince and veges for a quick dinner. But by 8pm I was hungry again. That's when it dawned on me that while I was away my mum had stocked up the big freezer with half a pig (homegrown by a friend and butchered locally). AND I had just bought a litre of organic pure maple syrup from Sprout in Townsville. Perfect. Pancakes, bacon and maple syrup, coming up! (Yes, I know, soup for breakfast and pancakes for supper... I'm weird like that.)


I used to work at a roadside cafe for a Canadian lady when I was 18, and she found it very strange that I didn't know how to make pancakes just off the top of my head. It made her quite impatient when I'd ask her 'How much flour was that again? How much milk?' So I soon learnt, and nowadays I don't usually measure, just chuck in a bit of this and a bit of that until they look right. But just in case you are like my 18 year old self and need a recipe, I've written out the measurements for you. Feel free to tweak to taste - more milk for thinner pancakes, less milk for thicker. And I've added a few variations, so you can pick between spelt, gluten free and grain free coconut flour pancakes. If you need an egg free or nut free variation, check out the notes below the recipes.

Enjoy!


Quick & Easy Pancakes

250g spelt flour (white and/or wholemeal) or 220g plain gluten free flour
2 tsp baking powder
1/4 tsp fine sea salt
300g rice-almond milk or coconut milk (or alter amount depending on preferred thickness)
30g macadamia oil or soft butter
1 tsp vanilla extract
1 egg (optional - see notes)
coconut oil for cooking pancakes

Place dry ingredients into mixing bowl and blend 5 sec/speed 5.

Add remaining ingredients (except oil for cooking) and blend 10 sec/speed 5.

Heat a heavy based frying pan over medium-high heat and add 1-2 Tbsp coconut oil. Once it melts, pour in 10cm circles of pancake batter, and turn heat down slightly to make sure the pancakes don't burn.

Cook until bubbles are forming and popping in the batter, and edges are becoming crisp. Turn over and cook until lightly browned.

Remove pancakes to a plate, add another 1-2 Tbsp coconut oil, and continue cooking pancakes until batter is finished.

Serve hot with butter (opt) and pure maple syrup, or sprinkled with Rapadura or coconut sugar and freshly squeezed lemon juice. Leftover pancakes can be stored in an airtight container for up to 2 days and served with jam as pikelet, or reheated under the grill.

This batter also works well for waffles.

Notes:

To make these egg free you can use egg replacer, or chia eggs (1 Tbsp chia seeds + 3 Tbsp water), or half a mashed banana, or just add a little extra milk.

For nut free, use olive oil, coconut oil or butter, and coconut milk instead of rice almond milk.


Coconut Flour Pancakes

5 eggs
170g almond milk or coconut milk
70g coconut flour
30g macadamia oil
1/2 tsp vanilla extract
1/8 tsp fine sea salt
2 tsp baking powder

Place all the ingredients into the mixing bowl and blend 10 sec/speed 6. Scrape down sides of bowl and reblend briefly on speed 3 if needed.

Cook as above.

Notes:

To make almond milk, just mill 100g raw almonds 10 sec/speed 9, add 500g water and blend 
1 min/speed 9. No need to strain the milk for this recipe.

Coconut flour really needs the eggs to work, although maybe banana would work instead. 
I haven't tried that yet - let me know if you do!

For nut free, use soft butter or coconut oil instead of the macadamia oil, and coconut milk instead of almond milk.

Kamis, 30 Mei 2013

Mr I's "FAR Too Easy" Chocolate Cake


This afternoon was cold, wet and dreary, and Mr I (my 11 year old) was getting bored. I told him to go do something creative.

     "Like what, mum?"
"Build something out of lego."
     "Nah."
"Paint a picture, or do a drawing."
    "Nah."
"Start a new project... build something."
     "Nah."
"Bake a cake."
     "YEAH!!!!!!! What can I make? I'll make my chocolate cake! Do we have all the ingredients? YEAH!!!" (running for the kitchen...)

Mr I loves to cook. Especially chocolate cake. (Now I wonder where he got that from??) He tells me he needs to learn to cook so he can cook for his wife one day. I think that's a pretty good idea, and I know she'll thank me for encouraging that idea one day, so he pretty much has free rein in my little kitchen. And he loves our Thermie. He is slightly messy though. I must admit, I get rather nervous when he rings me from home while I'm out at a demo, and asks where a certain ingredient is... he always hangs up before I can say, 'Clean up your mess!!!' Sigh.

Another thing Mr I loves to do is tweak recipes. (Again, I wonder where he got that from??) He loves to make his own quirky version of the Too Easy Chocolate Cake from the Thermomix Everyday Cookbook, tweaked to suit our way of eating. He doesn't need my help with it, just dashes off and does it all himself. He says the hardest bit is tipping the cake batter into the pan whilst scraping out the Thermomix bowl with the spatula - he's still kind of short and has to hold the bowl up high, and he says it hurts his arms. But he manages it, and I leave him to it.


Far Too Easy Chocolate Cake with Cashew Cream

I'm actually amazed this cake even works when Mr I makes it! He changes it all over the place, whacks all of the ingredients into the Thermomix at once, puts the timer on for 30 seconds, whizzes it up, and goes off to bounce his ball while it mixes... I'm much more 'delicate' with cakes, only adding the baking powder at the end, and not mixing too long so I don't 'beat the fluff out of it'. But this one has never failed. Even though he checks it about twenty times in the oven, banging the oven door shut each time, poking it endlessly with toothpicks... Poor cake. It's very forgiving.

By the way, he calls it the 'FAR Too Easy Chocolate Cake', because with his version you don't have the extra step of melting butter first, you just use oil and toss it in with everything else. Awesome.

Here's a video of Mr I making his cake, just to prove how easy it is... Be prepared for some kid stuff, like spatula licking and mess making!!


Far Too Easy Chocolate Cake

Preheat oven to 180C.
(Mr I usually forgets to do this until he's pretty much finished mixing. It still never fails.)

Weigh all the ingredients into the Thermomix bowl and mix on speed 5 for 30 seconds.
- 120g macadamia oil (or other light flavoured oil)
- 2 eggs
- 100g coconut or almond milk
- 1 tsp vanilla extract
- 100-120g Rapadura (or coconut sugar)
- 130g unbleached white spelt flour (or plain gluten free flour or almond flour)
- 2 tsps baking powder
- 25g raw cacao powder (or 30g cocoa)

Pour mixture into a lined (or greased) 20cm round cake tin. Bake in 180 degree oven for about 40-50 minutes (depending on whether you remember to preheat the oven or not!), or until a toothpick/skewer inserted in centre of cake comes out clean.

Serve warm with cashew cream or coconut cream, sprinkled with a little cinnamon. Preferably with hot chocolate with cinnamon and a blob of coconut cream. (Well that's how Mr I likes it anyway!) :)


Don't you love my gorgeous jars? They are Anna Gare Blackboard Spice Jars. Cute huh.


If you'd like to see some more of Mr I's amazing recipes, just let me know. But don't ask for his Caramel Custard with Licorice Allsorts recipe, because it wasn't at all nice. Just saying.


He thought it was pretty funny though.

(Oh, and blame Grandma for the licorice allsorts - I don't buy those vile things!)

:)

Minggu, 23 Desember 2012

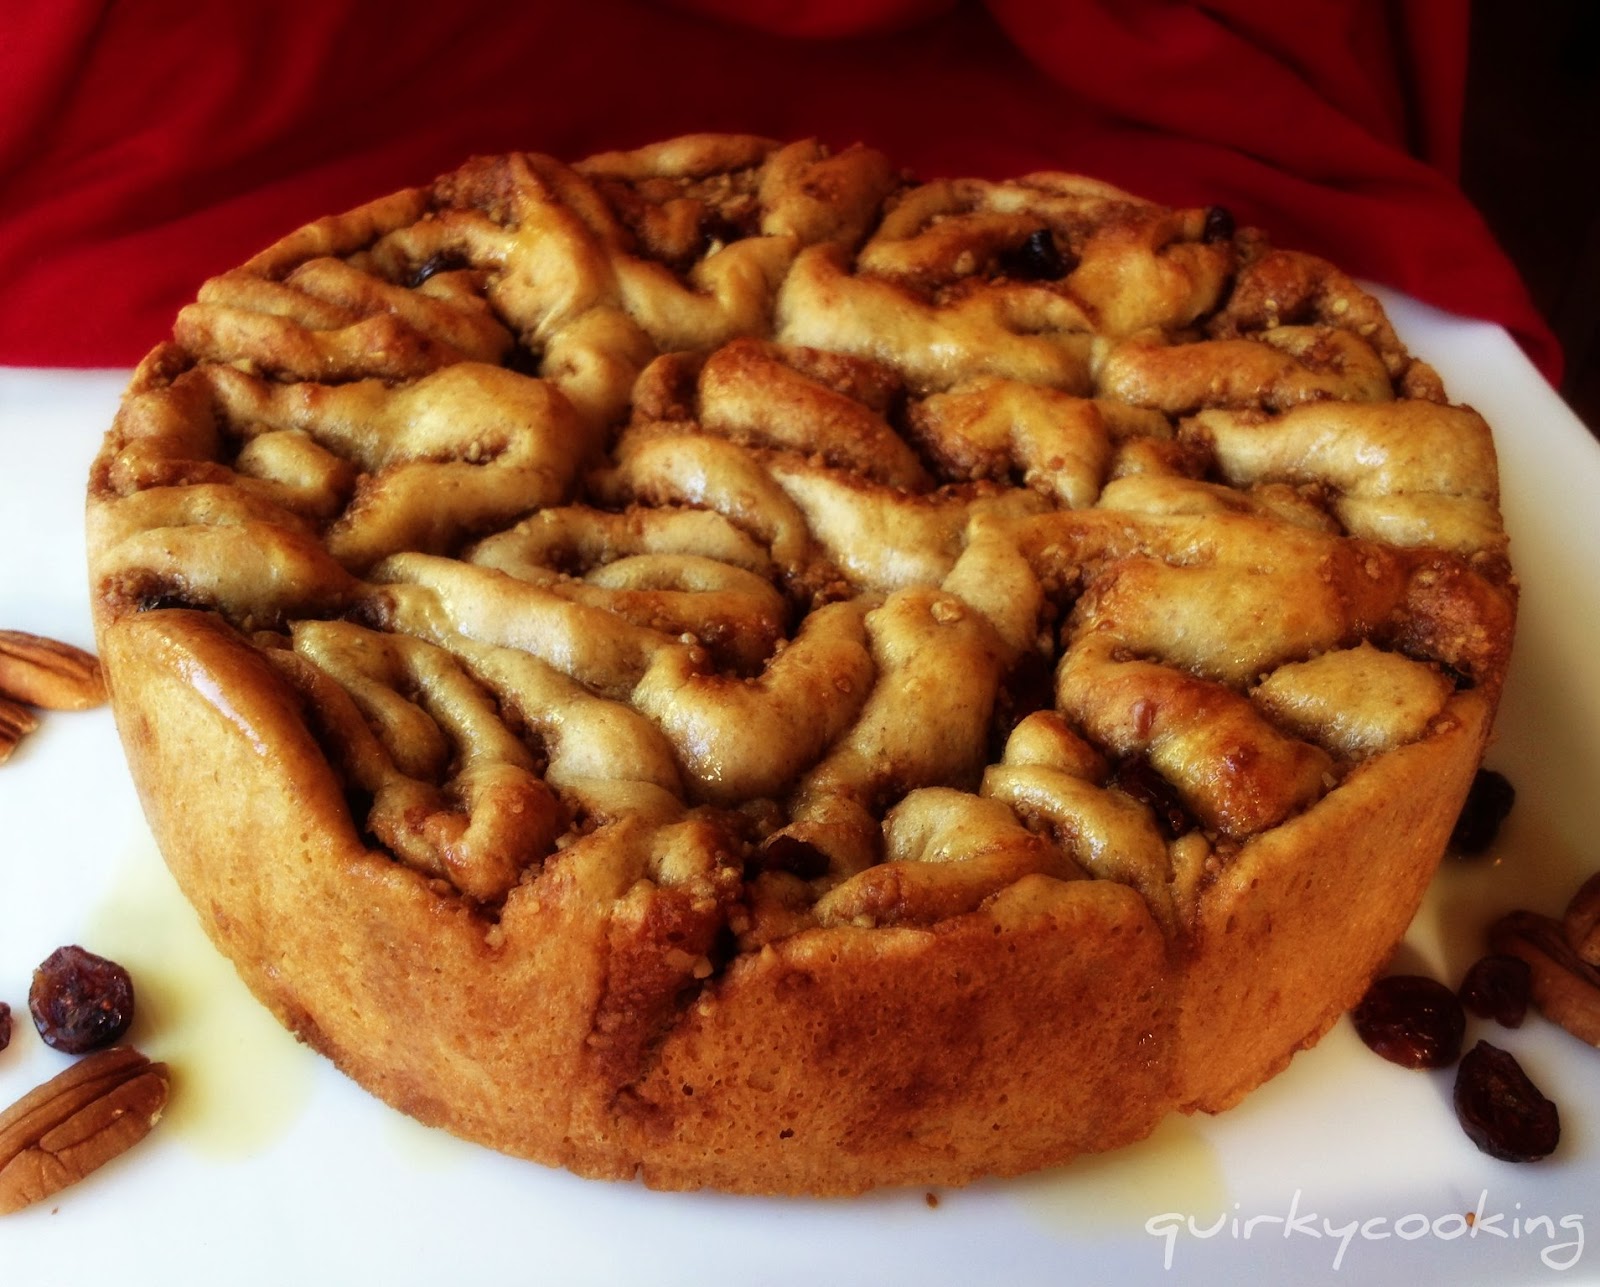
Brioche Cinnamon Scrolls ~ Prepare Ahead


Okay, by popular demand, here's my recipe for dairy free cinnamon scrolls made with brioche dough, that you can prepare ahead and bake another day. We usually have cinnamon scrolls for Christmas breakfast, but we've had so many in the last month while I've been testing my recipes, that I really think we'll give it a miss and have something else this year. I never thought I'd say this, but I'm all cinnamon-scrolled out. But for those of you who aren't, here's the recipe! (Don't worry, by New Year's I'll probably be craving these again... these would be perfect for a lazy New Year's breakfast!) :D

By the way, if you're gluten free and wanting some cinnamon scrolls too, here's a recipe that looks good - I'm hoping to try it out soon, but if you beat me to it, let me know how it goes!


First, make brioche dough. (This is my spelt, dairy free version - if you're not dairy intolerant, you can use the regular recipe in the Thermomix Everyday Cookbook.)

1. Warm milk and rapadura at 37C for 2 minutes, speed 1:
- 300g rice-almond milk (or preferred milk)
- 30g Rapadura

2. Add remaining ingredients and mix for 10 seconds on speed 7, then lock lid and knead on interval speed for 2 minutes.
- 2 tsps instant yeast (1 sachet)
- 1 tsp salt
- 80g macadamia oil (or butter)
- 650g white spelt flour
- 1 egg

3. Wrap dough in a silicon bread mat (or place in oiled bowl and cover), and rise in a warm spot until doubled. Meanwhile, prepare filling.

4. Filling: Mix ingredients on speed 5 for 5 seconds, then set aside:
- 120g Rapadura
- 120g pecans or walnuts
- 2 tsp cinnamon
- pinch of sea salt
- 2 Tbspns coconut cream (or ghee or butter)

5. When dough is risen, roll it out on silicon bread mat to make a large rectangle, about 1 cm thick. Spread with soft butter or coconut cream. Sprinkle with all the filling, and dried cranberries or other berries.
- 2 Tbspns coconut cream (or soft butter)
- filling
- a couple of handfuls of dried, naturally sweetened cranberries (or fresh blueberries)
(I love these cranberries from
Honest to Goodness - they're sweetened with apple juice concentrate, and are very plump and delicious!)

6. Roll dough up into a log, lift carefully onto a cutting board, and cut slices about 3cms thick with a serrated knife. (If dough is too sticky, chill until firmer and easier to work with.) Lay slices in two greased or lined springform tins, bunched up together to fit them all in. (You can also cook these in cake tins, or even just on pizza trays. I find an enclosed tin works best though, so they don't spread out too much. They will dry out if they're too thin.)

7. If cooking straight away, drizzle with butter or coconut cream, then leave to rise until nearly doubled. Preheat oven to 200C while scrolls are rising. Bake for about 30 minutes, or until golden brown.
- 2 Tbspns coconut cream (or melted butter)

Drizzle with glaze while warm:

8. Glaze: Place ingredients in Thermomix bowl and cook at 100C for 2 minutes, speed 1:
- 50g pure maple syrup (or Rapadura)
- 50g coconut cream (or regular cream)
- 1/2 tsp vanilla extract


Preparing ahead to bake later:

- Quickest prepare ahead method: Don't drizzle with cream or butter, just cover the tin with plastic bags and place in the coldest part of the fridge overnight. The next morning, remove bags, drizzle with the melted butter or coconut cream, place in cold oven and turn it on to 200C. The bread will finish rising as the oven warms up, and will be baked in about half an hour. Drizzle with glaze and serve.

- Freeze ahead method: as above, but half rise then freeze. When ready to bake, allow to thaw in a warm spot (I place in cold oven with a pan of boiling water underneath) for about 1 1/2 to 2 hours (less if you are making scrolls in small tins). Set the timer so you don't forget they're there! They should be risen and thawed out before you turn on the oven. Drizzle with butter/cream, cook at 200C for about 30 mins or until golden brown. Top with glaze and serve.

Tip: You can make this a few days ahead, freeze, thaw in the fridge Christmas Eve, then finish thawing Christmas morning in a warm spot, then bake - that cuts down on thawing time for frozen scrolls.


Senin, 17 Desember 2012

Quick Maple Pecan Cinnamon Scrolls

* This recipe includes support for Paprika * 


Cinnamon scrolls are a favourite breakfast at Christmas time in our family. Usually I'll make a batch of yeast dough scrolls and freeze or refrigerate them unbaked, then thaw and bake them on Christmas morning. I'll be explaining more about that in the next post. But if you're wanting a quick, yeast-free version, this is a great one to try. It'll only take you about an hour from start to finish. A word of warning, though - this recipe is a little bit naughty! LOTS of butter and rapadura... But it is Christmas - that's my excuse! ;-)

For a dairy free version, you could try ghee if you can have it; or use macadamia oil in the dough, and coconut cream on the rolled out dough instead of melted butter. It won't be quite as caramelly and sticky, but still good.

Okay, keeping this short as I've been trying to get this posted for two days, and I'd better hurry up before there's a riot on Facebook!!

Oh, and speaking of my Facebook page, there are now over 10,000 of you following!! WOW! So thank you to all who follow and contribute to the discussions - I learn so much and really enjoy hearing from you all. ❤


Quick Cinnamon Scrolls
*This recipe has Paprika support*

Preheat oven to 220C. Grease a 24 cm springform tin with butter and set aside. (Or you can use ghee or coconut oil, or baking paper.)

1. Prepare filling - mix together first five ingredients on speed 5 for 5 seconds - then set aside.
- 100g Rapadura
- 100g pecans or walnuts
- 2 tsp cinnamon
- pinch of sea salt
- 1 Tbspn butter

2. Mix dry ingredients on speed 8 for 6 seconds to 'sift'.
- 450g plain, unbleached spelt flour (not wholemeal)
- 1 tsp baking powder
- 1/2 tsp baking soda
- 1/2 tsp sea salt

3. Add wet ingredients and mix on speed 6 for 6 seconds, then on interval speed for 20 seconds. (Don't forget to lock the lid, or interval speed won't work!)
- 200g almond or rice-almond milk
- 1 tsp apple cider vinegar or lemon juice (helps with rising)
- 80g soft butter
- 80g pure maple syrup

4. Sprinkle silicon dough mat (or counter top) with a light dusting of flour, and turn dough out of bowl. Give it a quick, gentle knead to form a ball, then press out gently with your hands to form a rectangle about 1 1/2 cms thick.

5. Melt butter. Spread 2 tbspns over dough and sprinkle with filling, leaving a 1 cm border around the edges.
- 4 Tbspns melted butter (Note: Reserve 2 tbspns for topping. Can be melted in tmx at 100C for 30 seconds or so, speed 1.)
- prepared filling

6. Roll up the dough into a log shape, lift carefully, and place on a cutting board. (If the dough is too sticky, roll it up in the bread mat and place in the fridge or freezer to chill until firmer and easier to handle.)

7. Cut the rolled up dough into scrolls with a large serrated knife, making the slices 2-3 cms thick. Place them in the prepared springform tin, bunched up together, cut side up. Drizzle with remaining 2 tbspns melted butter.

8. Place in hot oven and cook for 20-25 minutes, until golden brown.

9. While scrolls are cooking, make the maple glaze. Place ingredients in Thermomix bowl and cook at 100C for 2 minutes, speed 1.
- 50g pure maple syrup (or Rapadura)
- 50g coconut cream (or regular cream)
- 1/2 tsp vanilla extract

10. When scrolls are cooked, drizzle over the glaze. Serve warm.

Keep in an airtight container for a couple of days. Best eaten on day of baking. (That shouldn't be a problem. Ha ha!!)


This recipe inspired by my mum and sister's recipes, this one from Bakingdom,
and my own version, all rolled into one. :)

Sabtu, 23 Juni 2012

Sticky Pecan Muffins


This morning I managed to get up before everyone else, so I decided to make something a bit special for breakfast. I found this recipe here, and tweaked it to make it healthier and Thermomix friendly. This is what I came up with. It's almost dairy free - there's 1 tablespoon of butter in the caramel topping - but you could use coconut cream instead to make it completely dairy free. I didn't have any coconut cream left, so I just used butter. It only uses 1/2 a cup of flour - I used spelt flour, but I'm sure it would work fine with plain gluten free flour or almond flour as well.

Here's a time-saving tip: when you're making cakes or muffins that have chopped nuts in them, don't bother chopping the nuts first, just add the whole nuts with all the other ingredients and chop and stir all at once on speed 4-5 for a few seconds. If you have a look at the original recipe, you'll notice I cut the steps down from 5 steps to 1 step for the muffin mixture. Yep, I like 1-step recipes. Well, okay, the caramel topping is another step or two, but it's easy as. And really delicious, so don't leave it off!


I'm really happy with the way these muffins turned out using macadamia oil instead of butter - the texture is perfect. For those of you wanting to convert your own muffin recipes for the Thermomix, just remember you have to be really careful not to overmix, or you'll have heavy, dense muffins. Notice that I only mix these for a few seconds, scrape down the bowl, and gently mix for another few seconds - that's it! Don't beat all the air out of them. You could use this basic mixture for all sorts of muffins - blueberry-pecan is next on the list for me I think!

Makes 12 large muffins.

Preheat oven to 180C. Generously butter (or oil) a 12-cup muffin pan (or madeleine tin).

1. Chop pecans on speed 4 for a couple of seconds, just until roughly chopped:
- 70g raw pecans
    Remove to a bowl.

2. Melt in Thermomix at 100C for 2 minutes at speed 1, or until just melted and combined:
- 3 Tbspns Rapadura
- 2 Tbspns honey
- 1 Tbspn butter or coconut cream

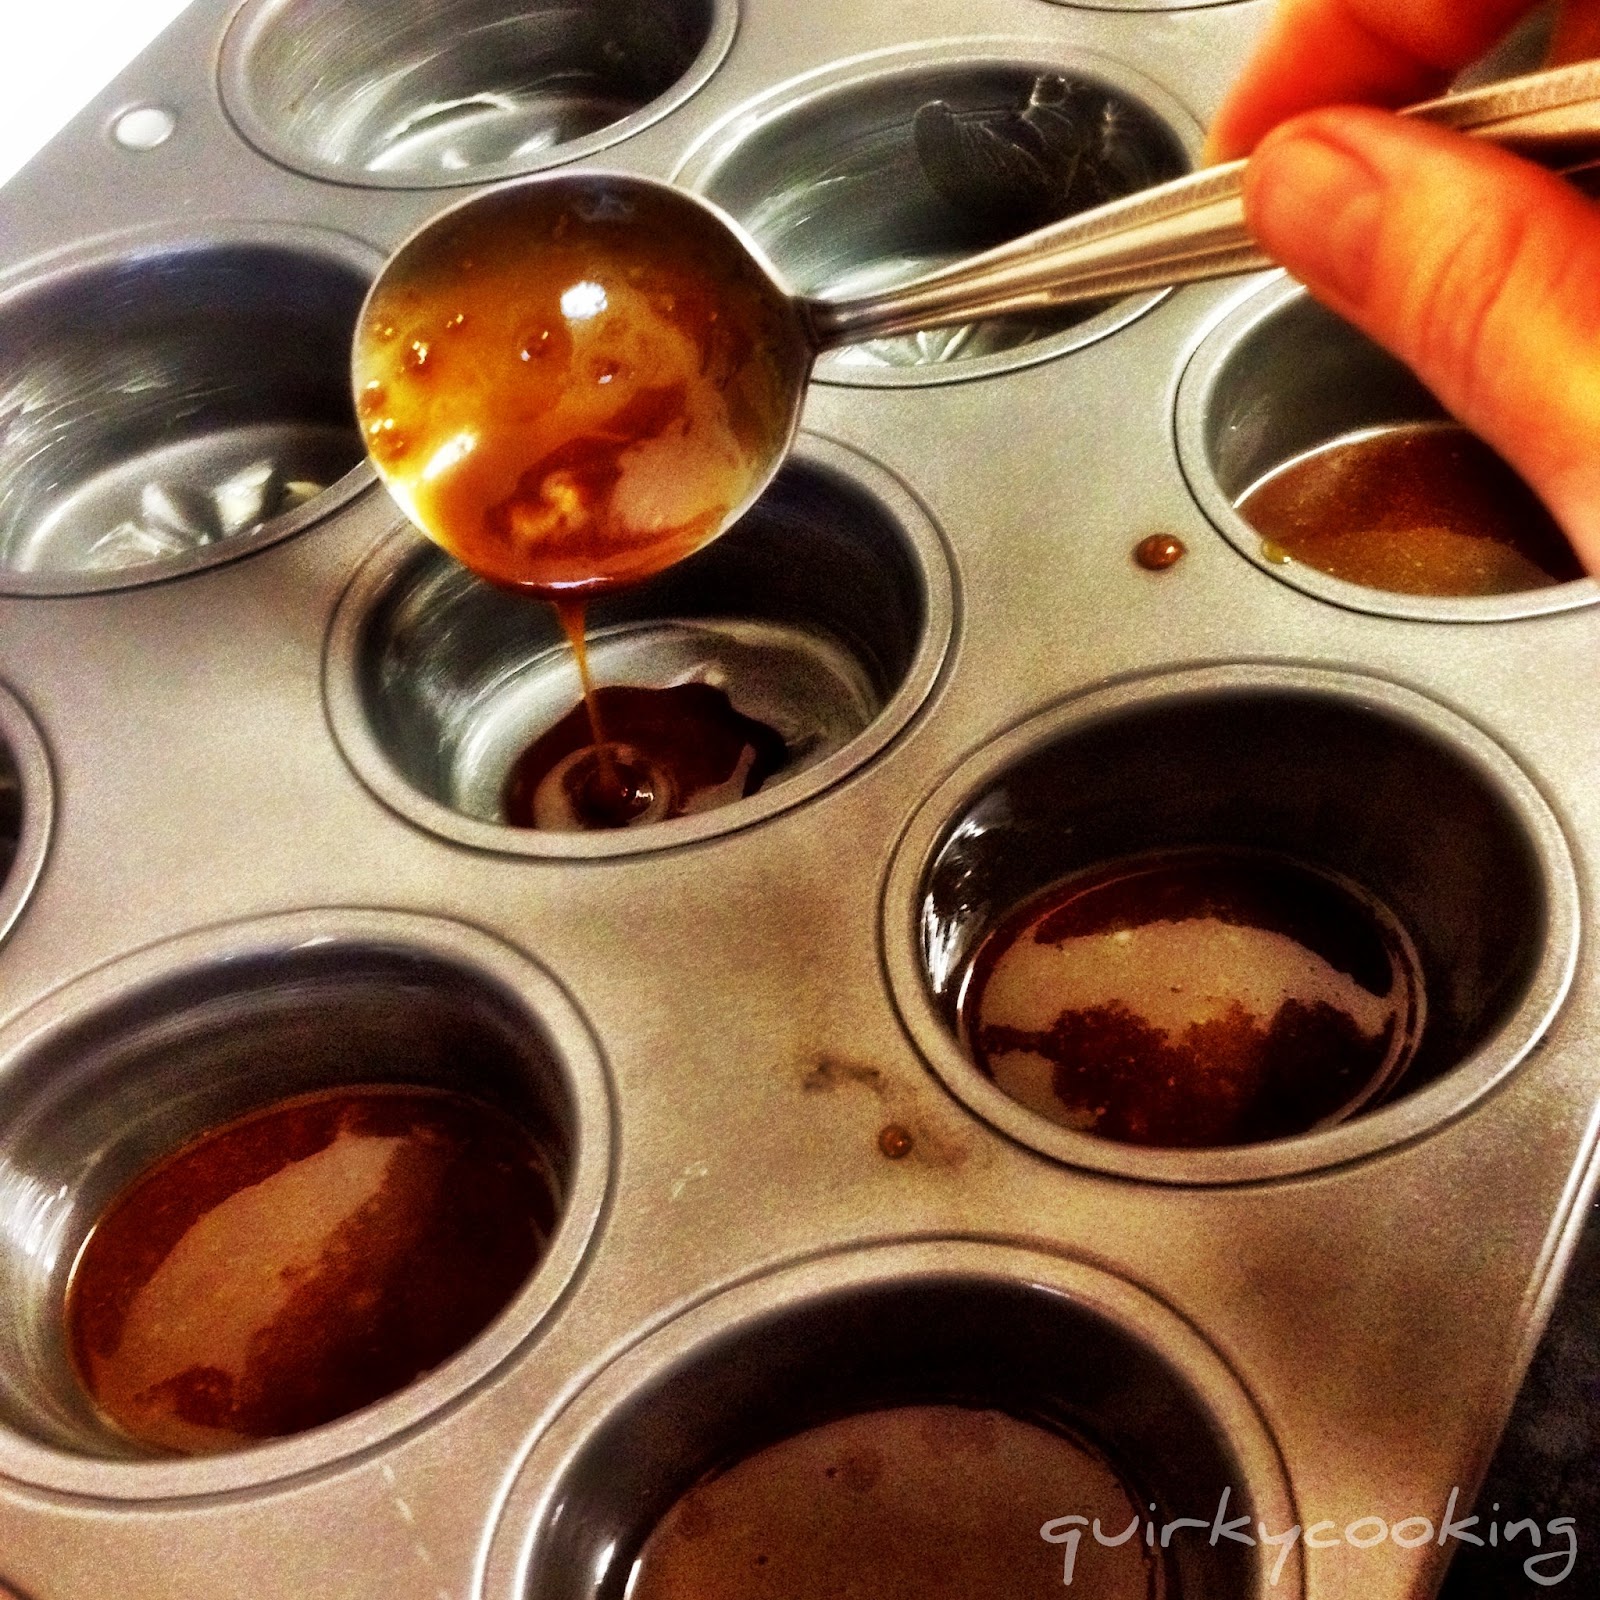
3. Spoon 1 Tablespoon of caramel mixture into each muffin cup.


Add a sprinkling of chopped pecans, and set aside.


No need to wash out Thermomix bowl.

4. Add all remaining ingredients to Thermomix bowl and mix on speed 4 for 6 seconds; scrape down sides of bowl and mix for another 5 seconds on speed 3 to combine.
- 130g raw pecans
- 110g macadamia oil
- 80g Rapadura
- 80g spelt flour (or gluten free or almond flour)
- 3 large eggs (55-60g each)
- 1 tsp vanilla extract
- 1/2 tsp baking powder
- 1/2 tsp sea salt

5. Divide mixture evenly between muffin cups. Bake for about 20 minutes at 180C, or until skewer poked into centre of muffins comes out clean.


Enjoy! I'm off to sneak the last one now that the kids have gone to bed...

Minggu, 11 Desember 2011

Caramelized Onion & Olive Spelt Bread


On Sunday afternoon's I usually bake bread, and today was no exception, even though the weather was awfully hot and sticky, and I wasn't really sure I wanted to turn the oven on... My brain didn't seem to be working too well either, and it took me ages to decide what kind of bread to make. I finally came up with the idea of experimenting with caramelized onions in the Thermomix, so I could make some onion bread.

I know a lot of people love caramelized onions (including me!), but don't think they can make them in the Thermomix because of the low heat it cooks at. Well, I did it! They ended up so mild and sweet and delicious, and the bonus was I didn't have to stand over the hot stove stirring them.

I also added some garlic, herbs, and Kalamata olives to my bread for extra flavour, and it turned out lovely. The whole, gigantic loaf was quickly demolished tonight at supper after church. I was in a rush and didn't get a photo taken before I left home, but thankfully a friend loaned me their iphone so I managed to snap a couple of photos before it was all gone! Hope you like it as much as we did. :)


First make the bread dough.

1. Mix together all the dough ingredients on speed 6 for 6 seconds:
- 500g unbleached white spelt flour (or part wholemeal)
- 3 teaspoon instant dry yeast
- 30g extra virgin olive oil
- 1 or 2 teaspoons sea salt
- 2 tsps mixed herbs (dried)
- 270g lukewarm water

2. Turn dial to closed lid position, and knead on interval speed for 1 1/2 minutes.

3. Remove dough from bowl, wrap loosely in a silicon breadmat (or place in an oiled bowl, turning over once, and cover with plastic wrap). Leave the dough to rise while you prepare the onions.

[Note: you may need to change the amount of flour or water a little if you use wholemeal flour. It's best to have the dough a little bit sticky, but not so sticky that it's unworkable.]


Caramelizing the onions (and garlic) & preparing the olives.

1. Place in Thermomix bowl and chop on speed 5 for 3 seconds:
- 2 garlic cloves
- 2 large onions, halved
(I used brown onions, but red onions would be lovely too.)

2. Add ghee or butter and cook at Varoma temperature for 25 minutes, reverse, speed soft, with the MC off so steam can escape:
- 70g ghee or butter

3. You will find there is some browning on the bottom of the bowl - it will come off easily, just rub it off with the Thermomix spatula and mix it into the cooked onions. It adds flavour!


4. Set onions aside to cool a bit.

5. Roughly halve (and deseed) the olives and set aside:
- a couple of big handfuls of whole Kalamata olives
(or other olives if you prefer.)


Prepare the bread.

1. When the dough is risen (doubled in size), punch it down and flatten it out on the silicon bread mat with your hands, forming it into a large rectangle about 2 cms thick.

2. Sprinkle the dough with the olives and onion. (Scoop the onion out of the Thermomix bowl with the spatula, leaving the melted ghee/butter behind.)


3. Roll the bread up into a long loaf. Or roll up into a sausage shape then twist into a circle so the ends join up. (I made a roll, twisted it into a circle, then squished it together a bit to make a round loaf. Because my dough was soft and a little sticky, it molded together easily.)

4. Place loaf onto a baking paper lined tray, and brush with the remaining melted butter/ghee in the Thermomix bowl. Sprinkle with some extra herbs and some sea salt flakes. Place loaf into the cold oven.


5. Leave the bread for 5 to 10 minutes to rest, then turn oven on to 190 degrees C and cook for about 30 minutes, or until outside is browned and crusty, both on the top of the loaf and underneath. (In some ovens, you may need to turn the loaf over to brown underneath for the last 5 minutes.)

6. Allow to cool for a few minutes before cutting.


Minggu, 27 November 2011

Waffle Iron Brownies


Waffle Iron Brownies (gluten free version)
with Dairy Free Chocolate Sauce (recipe below)

 
This is just a quick post to share a recipe that's an old favourite in our chocolate-loving home... Waffle Iron Brownies! I can't remember where I first came across this recipe, but I've converted it to a healthier version, and I make the batter in my Thermomix.

Now and then we have these for breakfast for a special treat - or for afternoon tea when we feel like cake and there's nothing baked. These are very quick to make, so if you have a sudden influx of hungry children on the holidays, remember this recipe. Our kids love to break the waffles up into little hearts, drizzle them with cashew cream or maple syrup - or sometimes chocolate sauce for a special treat - and run off with one in each hand. Or maybe two in each hand if they can get away with it!

I make these with either spelt flour or gluten free flour. I use this gluten free flour mix here when making them gluten free. They turn out a little less crunchy, but still delicious.


Waffle Iron Brownies

1. Melt and mix at 100 degrees, 2 minutes, speed 3:
- 110g butter or coconut oil
- 30g organic cocoa (or raw cacao powder)

2. Add and mix on speed 5 for 10 seconds:
- 100g Rapadura
- 40g water
- 2 eggs

3. Add and mix on speed 4-5 for 10 seconds, depending on how finely chopped you like the nuts:
- 50g pecan nuts (optional)
- 170g unbleached white spelt flour (or gluten free flour)
- 1 tsp baking powder
- 1/4 tsp fine sea salt

4. Heat waffle iron, oil if necessary, and drop a couple of big blobs of batter onto hot iron, so that when it spreads out it will cover the surface of the iron. Close quickly and allow to cook until browned.

5. Serve with cashew cream or pure maple syrup. Or for a special treat, some homemade chocolate sauce and cashew cream!

Quick, dairy-free chocolate sauce:

Cook in Thermomix - 2 mins, 60 degrees, speed 2:
- 30g coconut oil or butter
- 80g-120g dark chocolate chips or dark chocolate broken in pieces (depending on how thick and chocolatey you like it!)
- 30g rice malt syrup (or honey)
- 30g rice-almond milk (or other milk)
- 1 tsp vanilla extract
Use more or less chocolate depending on how thick you like your sauce. Once it's cold, it will set to a chocolate spread consistency, and you can eat the leftovers on toast like nutella.

Minggu, 24 April 2011

Anzac Biscuits (Vegan)


It's Anzac Day today. We've been to the Anzac Day parade, and when we got home we decided to make some Anzac Biscuits in memory of the Anzacs! "Lest we forget!" (You can read about the history of Anzac Biscuits here.)


After all the treats at Easter, I wasn't actually going to do any more baking for a while, but I just couldn't help myself. :) I decided that if I was going to make bikkies, I'd better make them without butter - I've had enough of that in the last few days, what with Easter pull apart breads and all... So I'm happy to announce that these biscuits are dairy free, wheat free, egg free, vegan, nut free and naturally sweetened! And they could be made gluten free if you use gluten free flour instead of the spelt, and quinoa flakes (or gluten free oats) instead of the rolled oats.


This recipe makes about 20 - 25 biscuits, depending how big you make them.

Preheat oven to 180 degrees Celcius.

1. Mix in Thermomix on speed 3 until combined:
- 160g spelt flour (or gluten free flour)
- 100g Rapadura
- 100g rolled oats (or quinoa flakes)
- 70g dessicated coconut
- 1/4 tsp fine sea salt

2. Mix together in a cup:
- 1/2 tsp baking soda
- 2 Tbspns boiling water

3. Add remaining ingredients to Thermomix and mix on speed 3 until combined, and beginning to clump together:
- 140g coconut oil (slightly melted)
- 1 Tbspn black molasses
- water & soda
The mixture should be able to be pressed together with your hands, and not fall apart.

4. Form mixture into walnut sized balls and flatten (with your fingers) on the greased trays, to about 5mm in thickness. Bake in moderate oven for 15 to 20 minutes, then cool on the trays so they'll get nice and crisp.


These are great dunked in a cup of tea!

Kamis, 21 April 2011

Hot Cross Bun Monkey Bread


I've been having fun thinking up yummy things to bake and cook for Easter... Today I decided to use my hot cross bun dough to make Monkey Bread! My mum used to make this for us when we were kids (but not with hot cross bun dough). I often asked for it for my birthday cake. I mean, you just can't beat a pull-apart bread made of soft yeast bread, all stuck together with sticky cinnamon-sugar goo - chewy on the outside, soft and fluffy on the inside! Mmmmmm...

Most of the Monkey Bread recipes I looked at on the internet used dough which was rolled in cinnamon and sugar, then placed in a bundt tin, and a syrup made of brown sugar and butter was poured over. I thought this was a bit of a 'sugar over-kill', so I made it the way I remember Mum making it, rolling each piece in melted butter, then in cinnamon and sugar. It makes it's own sticky syrup as it cooks, and uses way less sugar!!

I did try to make my version of Monkey Bread as healthy as I could - I used Rapadura instead of sugar, lots of cinnamon (I love cinnamon, and it's good for you!), and homemade butter... but if you can't have butter you could use ghee. Or for a lower fat, dairy free version, just roll the dough balls in warm rice-almond milk, then in the cinnamon and Rapadura. You can even use a mixture of warm milk and butter if you like.


Monkey Bread made in a small loaf tin

Okay, so here's how to make Monkey Bread:

1. Make a batch of Hot Cross Bun Dough, but leave the Rapadura (or sugar) out - you won't need it, since it's going to be rolled in Rapadura anyway. Or if you like you can just use plain bread dough. (I make my dough wheat and dairy free, but you can use just a regular hot cross bun recipe if you want to.) Let the dough rise in a warm spot until doubled in size.

2. Melt about a cup of butter or ghee in the Thermomix at 80 degrees, 2 minutes, speed 2 (or until all melted). Pour into a bowl. [If using rice-almond milk instead of butter, warm it up a little.]


3. Prepare tins by greasing with a little butter/ghee. I used 6 mini Bundt tins, and 1 loaf tin. You could use 2 loaf tins, or 1 big Bundt tin.

4. In another bowl, mix together about a cup of Rapadura and 2-3 teaspoons of ground cinnamon.

5. Pinch off small pieces of dough, roll them into balls, and roll them in the melted butter (and/or milk)...


... then in the cinnamon-Rapadura mixture.


6. Place the balls into the prepared tins, using smaller balls to fill in spaces. Only fill half full, or they'll overflow a bit like mine did! Oops!


7. Drizzle with any remaining butter/ghee/milk...


... then let them rise until they're nearly at the top of the tin.


8. Place in a cold oven and turn it on to 180 degrees C, and cook for about 30 minutes (depending on how big the tins are you're using). They should be nicely browned when done.


(Mine were a little too full!)

9. Let them cool for about 5 minutes, then tip them out, upside down, onto a plate.


Enjoy!


(But be careful not to burn yourself because 
you can't wait til they cool down!!)

Kamis, 14 April 2011

Easter Pull Apart Bread with Orange-Cinnamon Syrup


Easter Pull Apart Bread - a delicious Easter treat!

Aaaah, there's nothing better than homemade bread, hot out of the oven... except maybe homemade hot cross buns hot out of the oven!! But if you really can't be bothered with making buns and piping all those crosses onto them, try this recipe instead for an Easter treat... It's so easy and delicious, and one recipe makes two loaves of pull apart bread - one to keep, one to share! (Or maybe one for morning tea, one for afternoon tea - it's very addictive!)

*     *     *     *     *

First you need to make a batch of hot cross bun dough and rise it in a warm place until nearly doubled in size. (I roll it up in my Thermomix silicon bread mat and let it rise in there.)  Your dough should be nice and soft, even slightly sticky - if it's too dry you'll end up with tough bread!


While your dough is rising, make up a batch of honey-cinnamon butter in the Thermomix and set aside. Prepare two bread tins by lining with baking paper.

Once your dough is risen, punch it down on the bread mat, and spread it out flat with the heels of your hands into a large rectangle. The thickness is up to you - I like it about 1 centimetre thick. (You can use a rolling pin if you like, but I find it's quicker to use my hands, and doesn't stick like it does to a rolling pin.)


Next, spread on some of the honey-cinnamon butter, then cut it into four strips, using the spatula so you don't cut your silicon mat!


(Like this...)


Stack the four strips on top of each other, and cut them into six pieces (cut in half, then in two lots of thirds)...


 Place three of the stacks into each lined bread tin, cut sides facing up...


Using your spatula or fingers, fan the pieces of dough apart...


...so it looks like this.


Rise again until nearly doubled, then place in cold oven and turn it on to 180 degrees C and let the bread rise and bake for about 30 - 40 minutes, or until golden brown, and browned underneath. (Pull it apart slightly in the centre to check that it's done.)

Now for the syrup. 
Juice the orange that you used the zest from for the dough. Measure 50g of the juice into the Thermomix bowl, add 50g Rapadura and 1 tsp cinnamon, and cook at Varoma temp for 2 minutes, speed 2. 


Drizzle the hot syrup over the pull apart breads.


Enjoy it while it's warm! 
Or wrap some up for later... it won't last long!


Variation: You can make a glaze to go over the top instead of the orange-cinnamon syrup - just use 50g finely ground Rapadura (or raw sugar) and 50g rice-almond milk, whizz it up, and drizzle it over.