Tampilkan postingan dengan label vegan. Tampilkan semua postingan

Selasa, 10 September 2013

Coconut Vanilla Sorbet


Spring is here, and the weather is finally beginning to warm up, yippee! At least, it is here, up in the mountains in Far North Queensland. 

For the last couple of months I've been putting off testing ice cream recipes for my book, as it's just been too cold. But today was absolutely gorgeous, and the sunshine encouraged me to get started. I decided to begin with a coconut sorbet, and it turned out so delicious I just couldn't wait to share it. (Don't worry, I have way too many recipes to fit in my book anyway, so I can afford to pop one on the blog instead.) :)


Photo taken this evening on our street ~ Spring is here!

I got the idea for this recipe a few weeks ago, when I saw a coconut sorbet in the freezer section of the grocery store. The ingredients were: coconut water (60%), cane sugar, coconut cream and flavour, desiccated coconut, dextrose, natural stabilizers (xanthan, guar gum, carrageen, maltodextrine). I figured I could make my own with less ingredients, no highly processed sugar, no flavours, and no carrageen. For less money. So that was my challenge... I hope you'll let me know what you think of the outcome! I haven't actually tasted the one from the grocery store so I have no idea if mine is the same sort of flavour, but I love this one and am very happy knowing it's healthier and costs less.

This sorbet actually took me right back to my childhood, when mum would make ice cream for us from fresh snow. Have you ever eaten 'snow ice cream'? When I was 4-5, we were travelling around the USA in a camper van for a year. When it snowed we would go outside and scoop up the clean snow, take it back into our warm camper van, and Mum would mix in some sugar and vanilla. We thought it was the most amazing treat ever. It's funny, I haven't thought about snow ice cream for years, but with my first mouthful of this sorbet, that's all I could think of! So I popped some into a bowl and dashed down to mum's house to give her a taste, and mum and dad agreed - just like snow ice cream. Great memories.

I hope you enjoy it as much as we did. 


Coconut Vanilla Sorbet
(dairy, egg, nut, gluten, and cane sugar free)

Makes just under a litre.

800ml unsweetened coconut water (eg. Natural Raw C coconut water)
100g thick coconut cream, preservative free (eg. Ayam)
60-80g pure organic maple syrup
1/2 - 1 tsp pure vanilla extract or vanilla bean paste (to taste)
dessicated coconut to serve (preservative free, available at health food shops) OR fresh coconut, grated

Freeze the coconut water in ice cube trays until frozen solid.

Place 400g of the coconut water ice cubes into the Thermomix mixing bowl, and blend
5 sec/speed 9, or until it becomes 'snow'.

Add remaining 400g frozen coconut water and blend 10 sec/speed 9, until 'snow'.

Add coconut cream (the thickest part from top of tin), maple syrup and vanilla, and blend 
1 min/speed 9, using the spatula to help it along. Remove lid and scrape down sides, reblending until sorbet is smooth and creamy, approx. 30 sec/speed 9.

Serve immediately, sprinkled with a little dessicated coconut.

Note: If you need to freeze some for later, freeze in ice cube trays and reblend when ready to serve.

Variations:

If you have fresh coconuts on hand, freeze the coconut water, and grate up the flesh to make coconut cream (see this recipe for instructions), saving a little of the freshly grated coconut to sprinkle over the finished sorbet. Delicious! (And dirt cheap!) 

Sweetener can be reduced to taste, or changed to a 1/4 tsp green stevia powder for a sugar free version.


Kamis, 11 April 2013

Creamy Quinoa & Chia Porridge


Autumn is here, and it's getting too cool for cold breakfasts of raw chia pudding and green smoothies. The other morning I was trying to think of something warm and comforting for breakfast while browsing through food photos on Instagram (as you do), and I noticed a photo of banana chia quinoa porridge that was posted by Jessica Cox (a nutritionist with lots of great recipes), and I was inspired! I couldn't find a recipe, so I just made up my own. (Thanks for the idea, Jessica!)

I love quinoa, but whenever I've tried to make quinoa flakes into porridge it's usually ended up kind of sludgey, and I didn't really enjoy it. Until now. Adding chia made all the difference for me, as well as cooking it very lightly, not overcooking it. And I'm sure all the coconut cream, banana, cinnamon and nuts helped as well!

You could cook it in the Thermomix like I do, or in a pan on the stovetop if you keep the heat really low and stir until done. Or use the soak overnight method (below the recipe).

Note: The addition of mesquite powder is optional. I love to use it in my breakfast porridge as it's low GI and great for stablising blood sugar levels, plus it's high in minerals and protein. So when you combine that with chia and quinoa, you have a breakfast that keeps you from getting the blood sugar 'lows' all morning. (It's also slightly sweet, and has a caramelly flavour that goes well with the bananas and cinnamon.) Mesquite flour and chia are both traditional foods of native Americans, and it's really interesting to see these ancient 'health foods' making a comeback! My Cherokee great great grandma would be pleased to know I'm using them. :)


Quinoa & Chia Porridge

Serves 4

Weigh almonds into Thermomix bowl, and grind for 10 seconds on speed 9.
- 100g raw almonds

Add water and blend on speed 9 for 1 minute.
- 500g water

[Note: if you can't have nuts, you could use 600g of your preferred milk in place of the almond milk. Coconut milk is nice, and since it's so creamy you can reduce it to 300g milk plus 300g water.]

Add the quinoa flakes, chia seeds, honey, spices, vanilla, mesquite powder & salt, and cook at 50C for 5 minutes, reverse speed 2. (Gently blend it up for a few seconds first on speed 3 to mix together.)
- 50g quinoa flakes
- 50g chia seeds
- 2 Tbspns raw honey (or preferred sweetener)
- 2 tps ground cinnamon
- 1/2 tsp ground nutmeg
- 1 tsp vanilla extract or vanilla bean paste
- 3 Tbspns mesquite powder (opt)
- a pinch of Himalayan salt

Spoon into bowls and serve topped with:
- coconut milk or yoghurt
- sliced bananas (or whatever fruit you like)
- chopped walnuts (opt)
- a drizzle of pure maple syrup
- a sprinkle of cinnamon


Overnight soak method:

Make almond milk, mix with other ingredients apart from toppings, and refrigerate overnight. Next morning, warm gently then serve topped with fruit, nuts, etc.

Minggu, 24 Maret 2013

Raw Macadamia Lime 'Cheesecake' (dairy free)


One thing I love about living in tropical Far North Queensland is the abundance of delicious produce grown here. I love that I can go to the local markets and buy locally grown coconuts (and coconut oil), locally grown vanilla beans and cacao nibs and cacaco beans, luscious limes, macadamias, avocadoes, pineapples, lychees, passionfruit, mangoes, and I've even bought sugar cane juice that's juiced while you wait! Even better, lots of these yummy things are given to you by friends, family and acquaintances who just have too much and need to share. Love that.

Last week I did a Thermomix demo for a lady who sent me home with a big bag full of limes and bunches of fresh herbs and rocket from her garden. At other times I've come home with a box of vine ripened tomatoes, pumpkin, avocadoes, lychees and mangoes. I get given bags of passionfruit, boxes of black sapotes, chokos and lettuces. I always say to my husband, 'There's really no way you could starve living here. Why would anyone want to live in the city??' Besides, where in the city can you walk around the corner from your house and see views like this...


But I digress... back to the cheesecake.

So the other day I thought I should make something with some of the limes filling my fruit basket, and the avocados from mum's tree. I really wanted something a bit special, as I had a photo shoot with an online magazine on Friday (Confetti Mag - 1st issue, coming out in May, stay tuned!), and I thought something made with local ingredients would be a good thing to photograph. (We ended up choosing something else to make, and we had lots of fun cooking and taking photos! Two of my favourite things to do.)

{Photo taken by Karen of Confetti Mag}

I remembered a lime and avocado tart I'd made last year and really enjoyed, but I felt it needed to be creamier and less... well... tart! Okay, I know 'raw lime cheesecakes' are all over the internet and I didn't really need to make up another recipe, but I just like to play. I did get some inspiration from this lovely raw lime tart from Fragrant Vanilla Cake (a blog you really should visit if you're into raw food, vegan food, or just delicious desserts) - but I ended up changing it to make the most of some of our lovely local produce, plus whatever I had on hand.


It turned out amaaaaazing!!

My husband is very partial to a good cheesecake, and was very sceptical that my dairy free version would be something he'd want to eat... But after one bite he changed his tune and begged for more. :)

I had a lot of 'drop-ins' that day, and each one had to taste my cheesecake. I made them. (They didn't argue.) They all agreed it was a gem of a recipe, and they all told me I should save it for my book. But being the kind and generous blogger that I am, I dedided to go ahead and share it. And besides, I was a bit worried that after getting 235 comments on the photo I posted on Facebook, plus many private messages, asking for the recipe, I might have a riot if I didn't share!! (But I will have to start being a bit more secretive with new recipes I think, or there won't be any surprises left for the book!)

Consider this your Easter present from me. I think it would make a great Easter Sunday treat... because as much as I love chocolate, it can get a little 'overdone' at Easter time. I'm thinking lime will be a good change.


So here it is, the long-awaited recipe...

Oh, and just a couple of tips: buy the macadamia pieces, they're heaps cheaper than whole nuts and you don't need whole nuts for this recipe. And use organic or homegrown limes if possible, as you don't really want to be eating the zest from limes sprayed with pesticides. Just my opinion.

Raw Macadamia Lime 'Cheesecake'
(Makes one 20cm cheesecake)

Base:

Grind all the base ingredients up together in the Thermomix on speed 9 for 20 seconds, or until finely ground.
- 130g raw macadamia nuts (either unsoaked, or soaked and dehydrated)
- 70g organic shredded or flaked coconut (additive free)
- 8 fresh dates (eg. Medjool), pitted
- a pinch of fine Himalayan salt

   Grease the inside of a 20cm springform cake tin with coconut oil. Press the base mixture firmly into the base of the tin, and up the sides if you like. Set aside.

Filling:

Blitz vanilla beans and lime zest on speed 10 for 10 seconds.
- 2 vanilla beans, snipped into 4 pieces (can use 1 bean in a pinch)
- zest from 2 limes (just peel off with a sharp potato peeler)

Add cashews and grind on speed 10 for 8 seconds.
- 150g raw cashews*

Add remaining ingredients and blend on speed 9 for 1 minute, scraping down as needed, until lovely and smooth.
- flesh of 1 lime
- 320g fresh avocados (or frozen, cut in 1-2cm cubes)
- 100g pure maple syrup
- 55g coconut oil
- a pinch of fine Himalayan salt

Pour filling into springform tin, spreading over the base. Place in freezer for at least half an hour.

* If using soaked raw cashews, only soak for up to 6 hours, drain well and pat dry with tea towel, then mix with the other ingredients (lime, avocado, etc) all at once, blending until smooth.


Just look at those lovely little vanilla bean seeds in the filling.... Mmmm!

Topping:

Mix together until smooth on speed 9:
- 150g raw macadamias (soaked for a few hours, then drained and dried off a bit)
- 150g Ayam coconut cream (or other thick coconut cream)
- 1 tsp vanilla extract or vanilla bean paste
- juice of 1 lime
- 30g pure maple syrup

Pour over filling and smooth with spatula.

Decoration:

While topping is still soft, before freezing, add extra macadamia nuts and lime zest for decoration, sprinkling first the nuts, then the zest, around the edge of the cheesecake. (See photos)
- a good sized handful of macadamia nuts, roughly chopped (if you haven't bought them already in pieces)
- zest of one lime, grated with a zester

Place the finished cheesecake, covered with a plastic bag, in the freezer and leave it alone for at least 2 hours, preferably more. It's best eaten semi-frozen. It will last for weeks in the freezer... but we all know that's not going to happen. ;)

Enjoy!


Kamis, 04 Oktober 2012

Steamed Chocolate Raspberry Mudcakes with Raspberry Coconut Cream


Here's a deliciously simple recipe you can whip up at short notice... I made it tonight on the spur of the moment, and thought I'd better share! (Especially since there's going to be a riot on my Facebook page if I don't!!) You can make them either with gluten free flour, or spelt flour. They are dairy free and vegan and nut free, so that should keep quite a few of you happy! :D

The mudcake recipe is one I posted ages ago, with a recipe for orange sabayon. It's here: Steamed Chocolate Mudcakes with Orange Sabayon.


For this raspberry version, just sprinkle some raspberries in the bottom of your silicon cupcake molds, pour the chocolate batter over (only to just over half way), and steam for 20 minutes at Varoma temp, speed 2.

While cakes are cooking, freeze a tin of coconut cream, unopened, without shaking it up. This is just so the thick cream rises to the top and gets firm - it doesn't need to be frozen. You'll also want to pick out enough whole raspberries for on top of the cakes, and set them aside.

When cakes are done, let them cool while you make the raspberry cream.

Raspberry Coconut Cream

Weigh into the Thermomix bowl and mix on speed 5 for 10 seconds:
- 80g of frozen raspberries

Add:
30g pure maple syrup
- 1/2 a teaspoon of vanilla bean paste (or vanilla extract)
- 150g thick coconut cream (scooped off the top of the tin of cream)

Mix on speed 5 until just combined. It's nice to have it a bit swirly, not just completely pink.

Top the cooled cakes with raspberry coconut cream, a raspberry, and some grated dark chocolate. (I used a 65% cocoa chocolate which is dairy free.)

Recipe makes 14-16 cakes.

 
If you love these little teacup and saucer silicon molds, you can buy them here!

Rabu, 19 September 2012

Raw Vegan Chocolate Mousse


Today I had a very happy accident! I started to make my green chocolate smoothie for the kids for morning tea, but decided to change it around a bit (as I do), but before I could add the water, THIS happened...


Creamy, chocolate deliciousness! How? What?? I couldn't believe it! I grabbed a spoon out of the drawer and popped some into my mouth, and started to squeal and do happy dances all over the kitchen... it's amazing!!!
 
It's like chocolate cream only creamier. It's a mixture between a mousse and a semifreddo. The flavour actually reminds me of the Milo ice-cream I loved as a kid, only better! (Did you love that too?) So don't be put off by the quirky ingredients and lack of sugar - even the fussiest will love this one... unless they find out it has avocado in it - shhhh. ;-) And no, it's not just the usual vegan chocolate mousse made from avocado and cacao powder. You'll see.
 
I made it twice today, because the first time I was just chucking things in willy-nilly, intent only on getting some raw spinach and avocado into my 9 year old, and I didn't really take much notice of how much of everything I used. So when it became the most awesome chocolate concoction ever, I decided I'd better make it again and write down the amounts. So here it is, after much teasing on Facebook and Instragram - my deliciously decadent, sugar free, dairy free, egg free chocolate mousse! (And don't worry, I didn't add the spinach, so it's not as scary as you may have at first supposed.)


{P.S. Some would argue that it's not really 'airy' enough to be a 'mousse', and maybe I should have called it a Vegan Semifreddo... but I was in too much of a hurry to eat it to worry about the perfect name. I'm sure you understand.}
 
 
Raw Vegan Chocolate Mousse
 
{Serves 6}
 
1. Grind up the raw cashews in the Thermomix on speed 9 for 10 seconds:
- 150g raw cashews
 
2. Add ice and grind on speed 9 for 20 seconds:
- 350g ice cubes
 
3. Scrape down bowl with spatula; add vanilla, cacao and dates, and grind on speed 9 for 30 seconds:
- 1 tsp vanilla bean paste (or vanilla extract)
- 30g raw cacao powder (I used Loving Earth cacao powder & it's very strong - if not using Loving Earth brand, you may need 35g)
- 100g dates (or to taste)
 
(I used regular dates which were semi-frozen, and I think the texture of these contributed to the thickness of the mousse. If you use fresh dates, it may turn out a bit softer, but you can add more ice to thicken it if you need to.)
 
4. The mixture will be a bit lumpy at this stage, especially if you are using dried dates instead of fresh dates. Scrape down the bowl and lid with the spatula, and keep blending on speed 9 until you get a smooth, creamy mixture. It will take at least another minute.


Chocolate mixture after blending, and before adding the avocado

5. Scrape down bowl again, and add avocado. This is actually optional - without the avocado, you'll still have a lovely, thick, chocolate cashew cream as in the photo above. The avocado does make it thicker and creamier though, so don't be afraid to try it!
- flesh of 1 ripe avocado (make sure the avocado is a nice one - no bad spots, or it'll have a slightly bitter taste)

Note: If you find your mousse is not thick enough (it won't stay swirled up into a peak), add another handful of ice and reblend on speed 9 for 1 minute, until smooth.

6. Spoon into small dessert bowls and enjoy! You can freeze this for later - half frozen it tastes like the most divine soft serve ice-cream ever... If you freeze it until it's solid, you'll need to thaw it a bit before using again.


Jumat, 10 Agustus 2012

Black Bean Mole (Chilli Beans with Chocolate)


I love Mexican food. Well, maybe I'm really talking 'Tex-Mex' food, as that is what I was raised on.  My parents are from south-west Texas, and my big sister was born down on the border of the southern tip of Texas, where it pokes into Mexico, in a town called McAllen. Down there, you have to look hard to find signs in English; the shop assistants greet you in Spanish (much to my confusion as a teenager) and the food is awesome! (Albeit rather SPICY!!) 


My big sister & I at our friend's house in Mexico, 1978

My family moved to Australia just before I was born, and I grew up mostly in Far North Queensland, with occasional trips back to Texas. My friends always found the food we ate quite fascinating. Most of them had never even heard of tortillas (which is NOT pronounced tor-till-uhs, but tor-tee-ahs!), let alone refried beans, fajitas or enchiladas. They didn't have leftover cornbread for breakfast like we did, either mushed up with milk, or toasted and dripping with melted butter and maple syrup. And if you mentioned jalapeños, chimichangas, huevos rancheros, hominy or tamales, they just looked puzzled. Unless they'd been over for dinner before... then they looked hungry! They knew if Mum was cooking Tex-Mex, they'd better find a way to get invited to stay. Same as when she was cooking fried chicken. But that's getting off the topic...

Sauteeing capsicum for fajitas, while cooking up some spelt tortillas

So fast forward to 2012, and Mexican food is much more well-known in Australia. In fact, it's quite 'the thing', with authentic Mexican restaurants popping up around the country, online suppliers selling everything from ancho chillies to masa harina (for making corn tortillas), and Mexican food trucks cruising the city streets. Hey, I can even buy masa harina, hominy and tomatillos from my local IGA, and I live practically in 'the sticks'!! I'm loving this new awareness of Mexican (and Tex-Mex) food, because this is the home cooking I grew up on, and it says 'comfort food' like nothing else does.

Being an incurable chocoholic, one of my favourite Mexican dishes is the national dish of Mexico, 'mole poblano' (pronounced 'MOH-lay') - a thick chocolate chilli sauce, complex and delicious, which is usually served over turkey or chicken.

Many legends surround the origin of mole poblano. The most common one goes like this. Sometime in 1680's at the Convent of Santa Rosa in Puebla, the convent nuns heard that the archbishop was going to pay them a visit. They went into a panic because they were poor and had almost nothing to feed him. They prayed, and brought together the little bits of what they did have: chillies, spices, day-old tortillas, nuts, a little chocolate and more. They made a thick sauce out of these ingredients, killed an old turkey they had, cooked it up and served it with the sauce. The archbishop loved it. Mole poblano was born. [via this article and Wikipedia]

Every region of Mexico seems to have their own version of mole. It can be anything from dark, thick and chocolatey, to soup-like and bright green. There are red, yellow and black moles, some are served with turkey, chicken or pork, and some with vegetables. "All mole preparations begin with one or more types of chili pepper. The classic moles... such as mole poblano and mole negro, include two or more of the following types: ancho, pasilla, mulato and chipotle. Other ingredients can include black pepper, achiote, guaje (Leucaena leucocephala), cumin, cloves, anise, tomatoes, tomatillos, garlic, sesame seeds, dried fruit, hoja santa and many others. Mole poblano has an average of 20 ingredients; mole almendrado has an average of 26, and Oaxacan moles can have over 30. Chocolate, if used, is added at the end of cooking." [Wikipedia] Some moles contain ground up nuts or pepitas, ground up cacao nibs or beans instead of chocolate, cinnamon, jaggery (similar to Rapadura), and even plantains! As you can see, there's lots of room for experimenting, so feel free to add to my recipe and tweak it to your taste. I don't have access to Mexican chillies where I live, so I just used regular red chillies - but if you can find ancho, pasilla and mulato chillies (lucky you!), try those. This recipe will give you an idea of how to use them - they're not super hot, they're kind of smokey.

Traditionally, mole takes days to make. The ingredients are roasted and ground up first, which, if done by hand, takes a full day in itself. The resulting powder or paste (depending on the ingredients in it) is mixed with broth and simmered in a heavy clay cauldron until it becomes a thick sauce. It has to be stirred constantly so it doesn't burn. That's the traditional way, which obviously isn't done so much these days. Mostly people just buy a mole paste in a jar and add stock, a bit like making a curry from a jar of curry paste.
Slow-roasting the tomatoes, onions and garlic

As you know, I'm all for making quick and quirky versions of my old favourite recipes, using basic ingredients and my trusty Thermomix. (See for example Spelt Tortillas, Mexican Quinoa, Fajitas, Dairy Free Sour Cream and Mexican Black Bean & Chorizo Soup.) My version of Black Bean Mole won't take you days, although it IS more time consuming than most of my recipes. But it's totally worth it.

Note: If you're looking for black beans (also called turtle beans), you'll most likely find them at your local health food shop, or maybe in the International aisle of your grocery store. But if you can't find them, try kidney beans, or even a mixture of beans. In the mole below, I used a mixture of green lentils, black beans, and pinto beans. Still tasted great!


Black Bean Mole

1. First you need to pick through the dry beans and discard any that are shrivelled or have holes in them.
- 500g black (turtle) beans (uncooked)

Put them in a big stockpot and cover with water. Bring to the boil, simmer a minute or two, then turn off heat and leave the beans covered for 1-2 hours. (Alternatively, you can do an overnight soak by covering the beans with water in a large bowl and leaving to soak for 6-8 hours.)

2. While the beans are soaking, begin slow roasting the tomatoes, garlic and onion. You'll need:
- 5 large vine-ripened tomatoes, halved
- 1 or 2 Spanish onions, peeled and halved
- 4 large garlic cloves, in their skins
- Olive oil
- sea salt
- dried oregano

   Place the vegetables onto an oiled tray (onions cut side down) and drizzle all with olive oil, sprinkle with salt and oregano, and roast at 140C for 3-4 hours. (Take the garlic out after 2 hours, or when it's soft - don't let it cook too long or it'll go crunchy.)

3. While the veges continue to roast, drain the soaking water off the beans and place them in the Thermomix bowl. Add to bowl:
- 1/2 an onion (not chopped up)
- 2 garlic cloves (whole)
- 1 tsp of dried oregano
- 1 tsp olive oil

     Cover with water to the 2 litre mark. Cook at 100C for approx 2 hours (you'll have to reset the timer after 60 mins) reverse speed soft, with the rice basket on top instead of the MC. If it starts to bubble up, turn the heat down to 90C for a few minutes, then back up to 100C. Cook until beans are cooked through but not falling apart. It may take longer than 2 hours, depending on how old the beans are. They need to be cooked BEFORE you add any salt or tomatoes or they'll end up tough.

4. When beans are done, strain the cooking water off to a jug and reserve for the chilli. Toss out the garlic and onion.

5. Tip beans into a bowl and set aside for the moment.

6. Rinse and dry Thermomix bowl. Toast the chilli/es at 100C for 2 minutes, speed 1. Chop on speed 7, scraping down and re-whizzing if necessary.
- 1 or 2 large red chillies, deseeded and halved (or your choice of chillies, to taste)

7. Add and chop in tmx on speed 5 for 3 seconds:
- 1 carrot, quartered
- 1 stick celery, quartered
- 1/2 yellow capsicum, halved again
- 1 handful fresh coriander leaves (optional)

8. Add oil or ghee and cook for 5 minutes, 100C speed 1:
- 50g olive oil or ghee

9. Add spices and cook for another 2 minutes, 100C speed 1:
- 2-3 tsp ground cumin
- 3 tps smoked paprika
- 1-2 tsp dried oregano
- 1 tsp celtic sea salt or Himalayan salt

10. Add roasted veges to bowl (removing skin from garlic) and chop roughly on speed 5 for 5 seconds.
- roasted tomatoes, onions & garlic

11. Add beans to Thermomix bowl, along with:
- 250g of the reserved cooking water
- 2 tsps balsamic vinegar
- 2 tsps Rapadura
- 50g tomato paste
- 2 Tbspns vege stock concentrate

12. Cook at 100C for 15 mins, reverse speed soft - until water is bubbling and reducing. Grate in the chocolate and cook for another 15 mins at 100C, reverse speed soft, adding the extra cooking water as needed to keep the beans wet but not too soupy. (Remember, only fill the Thermomix bowl up to the 2 litre mark.)
- a couple of tablespoons grated dark chocolate (65-80% cocoa, dairy free, bittersweet)

13. Taste for the balance of flavours, add salt or spices or a splash more vinegar if needed. The flavour will improve as it sits. You'll notice it tastes even better the
next day!

Note: You can reheat it in the Varoma, on wet baking paper, with 500g of boiling water in the bowl.

Here's some suggestions of what to serve these beans with:
- corn bread
- brown rice cooked with a little turmeric and a tiny pinch of saffron
- guacamole
- roasted sweet potatoes
- grilled corn on the cob
- spelt tortillas
- corn chips
Black bean mole, roasted sweet potatoes, grilled corn, and cornbread

Enjoy!

Kamis, 15 Maret 2012

Brown Rice Mushroom Risotto with Macadamia Cheese


Risotto is a family favourite around here, perfect for that quick meal when you can't be bothered cooking. (At least, it is when you have a Thermomix.) But too much white rice is not a good thing, so I decided to try making a brown rice risotto the other day. It was delicious - nutty, full of flavour, and very filling. My family aren't usually all that keen on brown rice, but they gobbled this up and asked for seconds! It takes a fair bit longer than regular risotto, but that's not really a big deal when your Thermomix is doing all the stirring and cooking for you... you can just put your feet up and relax until it calls you for dinner.

I love to serve this macadamia nut 'cheese' with this risotto - it makes all the difference! The risotto becomes creamy and nutty and 'cheesey' - it's a perfect match for the brown rice. Even if you usually enjoy parmesan on your risotto, try this and see what you think. You can also bake some pumpkin pieces and raw baby spinach to stir through once it's cooked for extra flavour. Enjoy!

1. Chop in Thermomix for 3-5 seconds on speed 5:
- 1/2 a brown onion
- 2 cloves of garlic

2. Add ghee or oil and cook at 100 degrees for 3 minutes, speed 1:
- 30g ghee or extra virgin olive oil

3. Add the remaining ingredients and cook at 100 degrees for 50 minutes, reverse, speed 1 1/2:
- 200g sliced mushrooms (a mixture is nice)
- 350g brown rice
- 2 Tblspns vegetable stock paste
- 1100g water
... and a dash of truffle oil if you have some!

4. Pour the risotto into your Thermoserver, stir through a couple of handfuls of baby spinach, and place the lid on to finish it off to a perfect consistency. Then rinse the bowl to make the macadamia 'cheese'.

Macadamia Cheese (inspired by this recipe)

Mix all ingredients in Thermomix on speed 6 for a few seconds, just until a crumbly consistency is reached. Don't overprocess, or you'll have cream cheese!
- 1 cup of raw macadamias
- 1 Tblspn lemon juice
- 2 Tblspns savoury yeast flakes
- 1 tsp onion powder
- 1/2 tsp sea salt

To serve the risotto, stir through a couple of handfuls of the macadamia cheese, then sprinkle some on top of each individual serving. You can also stir through some small pieces of baked pumpkin, or serve alongside.

Note: If you're in a hurry and can't be bothered nicely slicing the mushrooms, just chuck them in after you saute the onion and give them a quick chop on speed 3-4, just for a few seconds. That's what I did with the risotto in the photo. ;)

Selasa, 24 Januari 2012

Raw Zucchini Pasta with Walnut & Mushroom Sauce {Vegan}


The other day I was thinking about a recipe I used to love to make called "Mushroom & Cheese Paté". It was from Molly Katzen's wonderful cookbook, "The Enchanted Broccoli Forest" - a vegetarian cookbook with so many creative ideas and lovely pen and ink drawings that it's still a favourite after all these years. It's the kind of book that makes me think of that poem, "Oh for a book and a cosy nook, and oh for a quiet hour..." because I could happily sit and read it for ages.

Well, there's not too many quiet hours around here, but I've managed to finally shoo the kids off to bed and I thought I'd share with you the recipe that came out of my memories of Mushroom Pate...

The original recipe had neufchatel or cream cheese and ricotta cheese in it, which is why I haven't made it in a long time. I had some leftover dairy free sour cream in the fridge, and I thought that it might be a good substitute for the cheeses. Then I remembered seeing a few versions of 'raw walnut and mushroom pate' on the internet (like this one), and I decided to kind of combine the two recipes. Or three.

I planned to make the raw paté for lunch and eat it with raw vege sticks, but my friend Brook was here and we got talking about raw recipes, and I just had to show her my Benriner, which makes the coolest raw vege pasta ever! So the mushroom and walnut pate turned into a creamy, raw, vegan mushroom and walnut pasta sauce, which we ate stirred into raw zucchini pasta. It was delicious!

The only problem I have with raw vege type dishes is that they usually leave me still feeling a bit hungry. So I was pleasantly surprised that this one stayed with me longer than usual - maybe because of the protein in the walnuts. I only needed one small piece of cacao nib almond cake to keep me going til dinner time - amazing! ;)

So here's the very simple recipe - takes hardly any time at all. Oh, and if you don't own a Benriner or vegetable spiralizer of some sort, you can just peel the zucchini with a potato peeler into thin strips. Takes a bit longer, but it's worth it.


Raw Zucchini Pasta with Walnut & Mushroom Sauce
- Serves 2-4 (depending on whether it's a main or a side dish)

1. Soak 1 cup (100g) raw walnuts in water for a few hours, or overnight. (If you forget to do this step, or you're in a hurry, it will work with unsoaked walnuts - just add a couple of tablespoons of water to the recipe.)

2. Grind up in Thermomix on speed 7 for 3 seconds:
- 1 or 2 cloves of garlic

3. Drain the water off the walnuts and place in the Thermomix bowl with the garlic:
- 100g mushrooms
- a small piece of Spanish onion (about a Tablespoon size)
- 3 teaspoons Nama Shoyu or Tamari sauce (or 2 tsp regular soy sauce)
- 1 teaspoon fresh thyme (or a sprinkle of dried thyme)
- a small handful of fresh parsley
- a splash of extra virgin olive oil
- freshly ground black pepper, to taste

4. Chop on speed 5 for a few seconds, until finely chopped, but not completely pulverised.

5. Make your raw zucchini pasta (either with a vege spiralizer, or with a potato peeler) and place in a large serving bowl.
- 2 to 3 raw zucchinis

6. Spoon the sauce over the 'pasta', top with a good sized blob of raw, dairy free sour cream (optional), stir through gently and serve.

Jumat, 06 Januari 2012

Homemade Ferrero Rocher Chocolates (Dairy free & Gluten free!)


I've been meaning to post this recipe since before Christmas, as this was one of my Christmas treat ideas - homemade Ferrero Rochers that are gluten free and dairy free! But in the holiday rush, they never actually got made. Well... I got a few made, but I ate them as quick as I made them, so there never were enough to put in the kid's Christmas stockings, or to take to the parties I intended to take them to! *grins sheepishly*


I think I should warn you that these are very dangerous, and should only be made when you are really full and don't feel like eating any chocolate. Unless you have super-human self control - then just go ahead and make them anytime. ;)

At least they're pretty healthy. That's my excuse anyway.

My recipe is simply a homemade nutella type chocolate mixture (based on my hazelnut chocolate spread recipe), molded around a roasted hazelnut and coated in crushed, roasted hazelnuts. I didn't bother with the biscuit layer - too tricky, and besides, I wanted them to be gluten free. And I never got around to coating them with chocolate - maybe next time. I thought they were chocolatey enough without the extra chocolate coating, and besides, I wanted to hurry up and eat them so I didn't want to take the time for an extra step! But if you're feeling industrious, and you have the self-control to not eat them all before you actually get the chocolate ready to dip them in, here's my recipe for homemade chocolate, which I think would work best because it's quite thin before it's set, so it would be easy to coat the balls with.


Homemade Ferrero Rocher Chocolates
(Dairy Free & Gluten Free!)


First you need to roast the hazelnuts (if they're not already roasted):

- Spread about 3 cups of raw hazelnuts on a baking tray (in a single layer) and roast at 180 degrees C for about 10-15 minutes, stirring once or twice, until slightly browned. (I buy my nuts bulk from Trumps through a co-op, so it's not so expensive.)


Then once they're cool, rub the skins off as best you can, either with your hands, or in a tea towel. Discard skins.

Take a third of the nuts and set them aside. Roughly chop the other two thirds in the Thermomix by pulsing a few times with Turbo speed. Check in between pulses so you don't overdo it.

Now make the hazelnut chocolate for the centre:


1. Grind in Thermomix on speed 9 for 10 seconds:
- 90g Rapadura

2. Add and grind on speed 9 for 10 seconds:
- 60g roasted hazelnuts

3. Then add and grind again for 10 seconds:
- 50g good quality, dairy free dark chocolate broken into pieces
(70-85% cocoa dairy free chocolate - I use Lindt)

4. Add and heat for 6 minutes, 60 degrees, speed 3:
- 20g cacao powder (or good quality cocoa)
- 50g rice/almond milk or other milk
- 70g coconut oil (I use a flavourless variety for this recipe)

5. Scrape the chocolate mixture into a bowl and refrigerate for a few hours until very firm. (Or pop it in the freezer if you're in a hurry!)

Once your chocolate has set, you can make the balls. You need to work quick, as the chocolate gets too soft to work with after a while.


Take a thin scoop of the chocolate mixture with a teaspoon, and put a roasted hazelnut on top. Mold the chocolate around the hazelnut to form a rough ball.

Roll the balls in the crushed hazelnuts, squishing them into shape as you go. Place the balls on a plate or in a container, and keep them in the fridge as you make them. They do melt pretty quickly as I found out when trying to take photos of them... I got distracted with a phone call and came back to soggy chocolate balls. So I had to eat them. ;)


Once they're firm, you could dip them in melted, raw dark chocolate if you like, then re-chill. I wrapped them in little squares of foil, but it's not really necessary - the nuts keep them from sticking together.

You can keep these in the fridge or freezer - they keep well for ages. That is, if they're well hidden!

Jumat, 27 Mei 2011

Creamy Coconut Vanilla Rice Pudding


Rice pudding. The perfect comfort food.

We love it hot with cherries or caramelized fruit as dessert, cold as an after school snack (great for lunch boxes too!), or as a satisfying just-before-bed snack. It's not too rich, not too sweet, can be 'dressed up' or eaten as is. My version of rice pudding is dairy free, gluten free and vegan, and the Thermomix makes it so simple and quick - great for when you don't really feel like cooking, but you really want something for dessert!


I use Rapadura to sweeten this, which is why it's a darker colour than what you may be used to. The Rapadura gives it a lovely, slightly caramel flavour - much nicer than the bland, super-sweet taste of refined sugar!

If you don't have a vanilla bean, you can just add vanilla bean paste or vanilla extract to the ingredients in step 2. I do love to use a whole vanilla bean though - you get all the little vanilla-y bits and the delicious seeds all through your pudding!

1. In your Thermomix, grind up the Rapadura and vanilla bean for 1 minute on speed 9:
- 60g Rapadura
- 1 whole vanilla bean, snipped in pieces

2. Scrape down lid and sides and add remaining ingredients. Cook for 20 minutes at 90 degrees, reverse, speed 1 1/2.
- 200g arborio rice (or 250g if you like it thicker)
- 400g organic coconut cream (use organic so you don't get all the nasty additives)
- 600g water

3. The rice pudding will still be quite runny - don't worry, it thickens after a few minutes. You can pour it straight into a serving dish (a Thermoserver is ideal) and leave it for 5 minutes before serving, and it will be perfect.

For a delicious dessert, top with caramelized mango or peaches or nectarines. Halve or cube the fruit, sprinkle with Rapadura or palm sugar, and cook in a heavy frying pan (or char grill pan) for 1-2 minutes each side, or until caramelized.

Jumat, 29 April 2011

Walnut & Raw Cacao Nib Bliss Balls


I love raw cacao nibs. 

Yesterday I was trying to think of what I could make with my stash of cacao nibs (which I got for my birthday), and I decided they'd be great in bliss balls. When you need a 'pick-me-up' type of snack, these are just perfect. The mixture of dates, nuts and raw cacao make these balls like mini 'high protein power bars' - but they're much better for you than commercial power bars

So do you know why these are called 'bliss balls'? Because raw cacao just makes you feel so good!! Know why? It's not just the delicious taste... Raw cacao contains "naturally occurring phytochemicals like theobromine (considered an aphrodisiac), phenylethylamine (PEA – released when we fall in love), and anandamide (the ‘bliss' chemical)." (Quoted from the Power Super Foods website - you can order your raw cacao nibs here!) There's some more info about raw cacao with my recipe for Treat Balls, which are another version you might like to try.

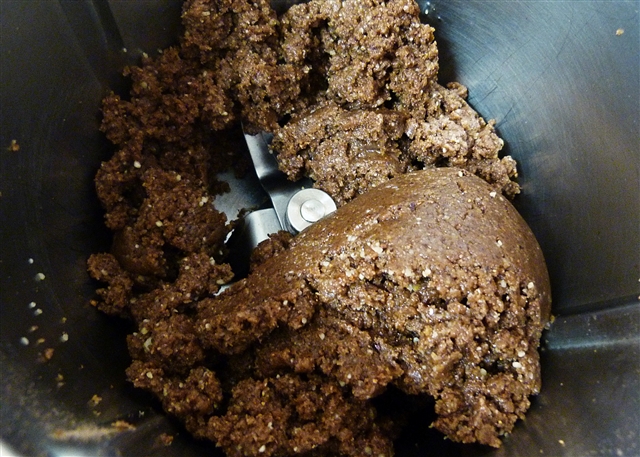
I ground up the raw cacao nibs in my Thermomix, then added the other ingredients, including a little Rapadura to balance the slightly bitter taste of raw cacao. After making half of them into balls, I decided they'd be nice with a little bit of 'crunch', so I added some more walnuts and cacao nibs to the rest of the mixture. Yum! My favourites were definitely the crunchy ones, but the smooth ones were pretty good too. So take your pick - crunchy or smooth. :) Enjoy.


1. Grind up in Thermomix on speed 9 for 15-20 seconds, or until fine:
- 85g raw cacao nibs


2. Add and grind on speed 8 for 5 seconds, until dates are chopped up:
- 250g fresh dates, deseeded (eg. Honey or Medjool dates)
- 20g Rapadura
- 1/4 tsp fine sea salt
- 1 Tbspn vanilla extract (preferably a good, organic one!)

3. Add walnuts and grind on speed 9 for about 1 minute, or until mixture comes together and is smooth:
- 230g fresh walnuts (make sure they're not old and bitter!)
You could also use pecans if you'd rather.


4. If you like these smooth, go ahead and roll them into balls. If you like them with a bit of 'crunch', add the extra walnuts and raw cacao nibs and mix in on speed 5 for a few seconds, until roughly chopped:
- handful or two of walnuts
- handful of raw cacao nibs


5. Roll into balls and keep in the fridge. 


I was really glad to find some of these still left in the fridge when I got home today from a demo - I desperately needed energy! Hope you like them :)