Tampilkan postingan dengan label vegetables. Tampilkan semua postingan

Kamis, 30 Januari 2014

Paprika Chicken with Creamy Paprika Sauce (an easy all-in-one Thermomix dinner)


Last night I got home late after a busy day and didn't have dinner organised, so it was 'Thermomix to the rescue' once again! I had a quick think, and this is what I came up with. Nothing fancy, just an easy and tasty dinner with basic ingredients, that took all of 25 minutes to make. Sometimes that's just what we need when we can't be bothered, right? (It is really yummy though, and the chicken breasts are amazingly tender and juicy when steamed!)

This fed our family of six and there were plenty of leftovers, which is always a bonus since everyone generally wants dinner for breakfast at our house. :)

This recipe is gluten free, and egg free, and if you omit the butter is also dairy free. The sauce is blended with cashews to make it creamy, but if you can't have nuts, see the nut free variation below. I've added some tips for those of you without a Thermomix, so you don't miss out.


Paprika Chicken with Creamy Paprika Sauce
(Serves 6-8)

Ingredients:

Rice
900g water
380g basmati rice

Veges (these are just suggestions, use what you have)
3 carrots, peeled and sliced thinly
200g green beans, topped and tailed
1-2 zucchini, thinly sliced
150g frozen corn

Chicken
600-700g chicken breast fillets, sliced in 2cm thick pieces
smoked paprika powder (approx 1 tsp)
herb salt (eg. Herbamare)
garlic powder (approx 1/2 tsp)
1 Tbsp butter or ghee (optional)

Sauce
60g raw cashews
60g water
2 tsp chicken or vegetable stock paste (my chicken stock paste recipe here)
1 tsp smoked paprika powder


Method:

Pour water into mixing bowl.

Weigh rice into steaming basket and rinse well, then place basket inside mixing bowl.

Place chicken pieces onto Varoma tray and sprinkle with paprika, herb salt and garlic powder, and dot with butter or ghee if using.

Place Varoma into position with lid on.

Turn speed dial to speed 5 for a few seconds to wash the water through the rice. (That's my little trick to make sure the top of the rice cooks well and you don't end up with crunchy bits.)

Begin cooking for 20 mins/Varoma/speed 2 while you cut up the veges, adding them to the dish as you go. (It takes about 10 minutes for the steam to really start filling the Varoma, so it's easy enough to get the veges cut up in that time.)

At the end of the cooking time, check that the chicken is cooked; add a couple more minutes if not.


Remove chicken, vegetables and rice to Thermoservers or serving dishes. (Or if you're having an 
"I don't feel like doing heaps of dishes" night, just leave them in the Varoma and basket and set aside.)

Add all the sauce ingredients to the little bit of liquid left in the bowl. (There should only be about 3cm of water left as the rice has absorbed most of it.)

Blend 1 min/speed 9. Scrape down lid and sides of bowl with spatula and blend again if needed, until smooth. Season to taste.

Serve the rice onto plates, top with veges and chicken, and drizzle with sauce.

Easy peasy! :)

Variations:

Nut free version: I haven't tried this yet, but I think it would be simple to leave out the cashews and add a can of Ayam coconut cream instead, with the 2-3 tsp vege stock paste and 1 tsp paprika powder. Warm it up a bit, 1 min/90C/speed 4. Season to taste.

Non Thermomix version:  Pour 100ml boiling water over the raw cashews and allow to soak (covered) while the meal cooks. Cook the rice in a rice cooker or on the stovetop. Cook the chicken and vegetables in two layers in a steamer, or in a large frypan with a lid, over med-low heat, until done. Blend the soaked cashews with soaking water and remaining sauce ingredients in a powerful blender until smooth and creamy. Season to taste. (Massel stock powder can be used instead of stock paste.)


Selasa, 24 Januari 2012

Raw Zucchini Pasta with Walnut & Mushroom Sauce {Vegan}


The other day I was thinking about a recipe I used to love to make called "Mushroom & Cheese Paté". It was from Molly Katzen's wonderful cookbook, "The Enchanted Broccoli Forest" - a vegetarian cookbook with so many creative ideas and lovely pen and ink drawings that it's still a favourite after all these years. It's the kind of book that makes me think of that poem, "Oh for a book and a cosy nook, and oh for a quiet hour..." because I could happily sit and read it for ages.

Well, there's not too many quiet hours around here, but I've managed to finally shoo the kids off to bed and I thought I'd share with you the recipe that came out of my memories of Mushroom Pate...

The original recipe had neufchatel or cream cheese and ricotta cheese in it, which is why I haven't made it in a long time. I had some leftover dairy free sour cream in the fridge, and I thought that it might be a good substitute for the cheeses. Then I remembered seeing a few versions of 'raw walnut and mushroom pate' on the internet (like this one), and I decided to kind of combine the two recipes. Or three.

I planned to make the raw paté for lunch and eat it with raw vege sticks, but my friend Brook was here and we got talking about raw recipes, and I just had to show her my Benriner, which makes the coolest raw vege pasta ever! So the mushroom and walnut pate turned into a creamy, raw, vegan mushroom and walnut pasta sauce, which we ate stirred into raw zucchini pasta. It was delicious!

The only problem I have with raw vege type dishes is that they usually leave me still feeling a bit hungry. So I was pleasantly surprised that this one stayed with me longer than usual - maybe because of the protein in the walnuts. I only needed one small piece of cacao nib almond cake to keep me going til dinner time - amazing! ;)

So here's the very simple recipe - takes hardly any time at all. Oh, and if you don't own a Benriner or vegetable spiralizer of some sort, you can just peel the zucchini with a potato peeler into thin strips. Takes a bit longer, but it's worth it.


Raw Zucchini Pasta with Walnut & Mushroom Sauce
- Serves 2-4 (depending on whether it's a main or a side dish)

1. Soak 1 cup (100g) raw walnuts in water for a few hours, or overnight. (If you forget to do this step, or you're in a hurry, it will work with unsoaked walnuts - just add a couple of tablespoons of water to the recipe.)

2. Grind up in Thermomix on speed 7 for 3 seconds:
- 1 or 2 cloves of garlic

3. Drain the water off the walnuts and place in the Thermomix bowl with the garlic:
- 100g mushrooms
- a small piece of Spanish onion (about a Tablespoon size)
- 3 teaspoons Nama Shoyu or Tamari sauce (or 2 tsp regular soy sauce)
- 1 teaspoon fresh thyme (or a sprinkle of dried thyme)
- a small handful of fresh parsley
- a splash of extra virgin olive oil
- freshly ground black pepper, to taste

4. Chop on speed 5 for a few seconds, until finely chopped, but not completely pulverised.

5. Make your raw zucchini pasta (either with a vege spiralizer, or with a potato peeler) and place in a large serving bowl.
- 2 to 3 raw zucchinis

6. Spoon the sauce over the 'pasta', top with a good sized blob of raw, dairy free sour cream (optional), stir through gently and serve.

Kamis, 06 Januari 2011

Chicken and Cashews with Coconut Satay Sauce and Coconut Rice


Don't you love recipes where everything is cooked all at once, in one pot?  Well, this is one of those all-in-one meals, except it's made in the Thermomix, not a pot - which makes it even better because you can do three or four different things at once!  So while the sauce is cooking in the jug, the coconut rice is steaming in the basket above it, and the chicken and veges in the Varoma tray on top!  This is one of our favourite quick-and-easy meals... when I don't feel like cooking, I can have this on the table in half an hour.  And everyone loves it :)  (Adapted from the Chicken and Cashews recipe in the Thermomix Everyday Cookbook - but with my coconut satay sauce!)

The first 3 steps, marinating the chicken, can be done ahead of time for more flavour - but if you're doing it at the last minute like I usually am, don't worry, it still tastes good!

1. Cut chicken into smallish cubes (about 1.5cm square) or slices and place in a bowl:
- 300g - 400g chicken breasts or thighs

2. Chop in Thermomix bowl for 5 seconds, speed 7:
- 1-2 cloves garlic
- 1-2 cms fresh ginger
  Scrape out with spatula and mix with chicken in bowl.  (Don't wash out Thermomix bowl.)

3. Add to chicken, mix in, cover, and set aside:
- a couple of tablespoons of tamari or soy sauce
- a splash of sesame oil

4. Pour into Thermomix bowl:
- 450g coconut cream (1 tin)
- 750g water

5. Sit lid on top of jug, and rice basket on top of lid. Set scales and weigh rice into basket:
- 400g basmati rice (or less if you don't want that much)
    Remove basket and lid, rinse rice under tap (in basket), place basket in jug, then replace lid and lock into place.

6.  Place Varoma tray on top of lid, tip chicken into it and spread out so there's holes open for the steam to come through.  Start cooking at Varoma temperature, 20 minutes, speed 4.

7. Meanwhile, chop up the veges and place them into the Varoma as it's heating up.  I start chopping the harder veges first and put them in as I get them chopped, leaving the ones like snow peas, capsicum and shallots until the end.  Make sure there's a hole in the middle for the steam to get through.  Here's a list of suggested veges - use what you've got:
- some thin wedges of onion
- 2 stalks of celery, leaves removed, thinly sliced
- 2 carrots, thinly sliced
- broccoli, small pieces
- green beans
- chinese cabbage, thinly sliced
- boy choy, thinly sliced
- red (and/or green) capsicum, thinly sliced
- snow peas
- shallots, sliced and sprinkled on top

8. Sprinkle over the top of the veges:
- some sesame seeds
- a handful of cashews (roasted or raw)
- a dash of sesame oil
- a dash of tamari (or soy sauce)

9. When the time's up, remove the rice (placing in the Thermoserver to keep warm), and stir the chicken and veges, breaking the chicken apart and making sure there are holes unblocked for the steam to get through. Cook for another 5 or 10 minutes on Varoma temperature, speed 2, checking that the chicken is cooked through.  You may need to add a little more water if there's not much left in the bowl.  Once cooked, remove Varoma tray while you finish the sauce.  (Tip: You can take the lid off the Thermoserver with the rice in it, and sit the Varoma tray on top so they both stay warm.)

10. To the juices and coconut cream left in the bowl, add the following ingredients and blend on speed 9 for 1 minute:
- a couple of handfuls of raw cashews
- 1 inch of fresh red chilli (or more if you like it hotter)
- a good handful of fresh parsley or coriander
- 2 cloves of garlic
- 1 inch of fresh ginger
- a couple of tablespoons of tamari (or soy sauce)
- 1 teaspoon of Rapadura (optional)
- a tablespoon of chicken stock paste (or vege stock paste)
(I don't measure - just chuck in what you think, blend it, taste it, and adjust if necessary!)

Serve immediately - rice, chicken and veges with cashews on top, and sauce drizzled over liberally!  

Hope you like it! :)


Jumat, 27 Agustus 2010

Chicken Pesto Pasta Salad


The boys made pasta salads for lunch today (with a bit of help from me).  We had some chicken thighs in the fridge that needed using up, as well as some homemade pesto, and some tuna, so we decided to make two pasta salads, a tuna one, and a chicken pesto one. The tuna pasta salad is the same as the recipe below, except you just add tuna, sliced black olives and chopped boiled egg instead of the chicken and pesto, and dress it with some homemade mayonnaise, or balsamic vinegar.  
Pasta salad is something I don't really use specific amounts for, so excuse my vague measurements - and the ingredients always vary with whatever I have in the fridge, so use your imagination :)

1.  Cook up a batch of pasta - I usually use shells or spirals - as much you think will feed your family:
- 250g (or more) pasta (I use gluten free Orgran pasta)

If you're adding broccoli to your salad, cook it with the pasta, adding it during the last few minutes of cooking time:
- one head of broccoli, cut into florets

Tip the pasta (and broccoli) into a colander in the sink, and rinse well with cold water.  Tip into a big salad bowl (or two).

2.  In Thermomix bowl, cook at 100 degrees, 8 mins, reverse, speed soft:
- a couple of handfuls of cubed chicken thighs/breasts
- 2 Tablespoons of olive oil
(You may need to stop halfway through and push chicken off blades with spatula.)

3.  Now, this is where all the little helping hands come in useful...  Prepare whichever of the following additions you like, and mix them into the pasta and broccoli, along with the cooked chicken and pesto:
- a few big blobs of fresh basil & cashew pesto (with or without parmesan, just add salt if not adding parmesan)
- a drizzle of olive oil
- grated carrot
- thinly sliced celery 
- torn lettuce leaves
- baby spinach leaves
- semi-dried tomato strips
- halved cherry tomatos
- cucumber pieces
- sliced black olives
- thinly sliced Spanish onion
- sliced shallots
etcetera...

Season with salt and freshly ground black pepper, and enjoy!

P.S.  This would also be really nice with sun-dried tomato and red capsicum pesto - my favourite! You can find the recipes for both these pestos in the Thermomix Everyday Cookbook.

Sabtu, 26 Desember 2009

Leftover Roast Meat Pie


Hi everyone - I hope you all had a wonderful Christmas! Ours was pretty quiet and relaxed - which was nice for a change, I guess. Boxing day was even more relaxed - plenty of leftovers to eat, nothing much to do except take the kids for a swim at the lake and sit around reading books and having naps... ah, dolce far niente!* 

This pie is a great way to use up leftover roast, gravy and vegies. This one was made with roast beef and veges, but you can use lamb, chicken, turkey - even ham with a white sauce instead of gravy. When I cook a roast I always use the pan juices to make lots of gravy, so I have plenty for pies the next day.

I've used lard in my pastry to keep it dairy free (I'd rather lard than any man-made 'plastic' butter substitutes!), but you can use butter if you'd rather, or a mixture of butter and lard. The lard makes the pastry very stretchy and easy to work with - you can pick up the rolled out dough and it won't break! It's very easy to make in the Thermomix, but if you don't feel like bothering with pastry, (or you are gluten free), you can make mashed potatoes or rice and serve the filling over that.

This recipe makes two pies in standard sized pie dishes - you can halve it if you only have a little bit of leftover roast and vegies.

[Note: if you're unsure about lard, check out this website to find out why it's better than margarine.]

First, make the pastry:

1. Grind on speed 9 for 1 minute:
- 200g spelt grain

2. Add and mix on speed 6 for about 10 secs:
- 300g unbleached plain spelt flour
- 2 tsp baking powder
- 200g chilled lard (and/or butter), chopped in pieces
- 1/2 tsp fine sea salt

3. Add and knead on interval speed for 10-20 seconds until dough is formed:
- 100g chilled water (unless using all lard, then it's not necessary to chill the water)
- a good squeeze fresh lemon juice
(may need more water or flour, until dough is right consistency for rolling out)

4. If using butter, wrap in plastic bag and place in fridge to chill while you cook the filling. If using lard, no need to chill the dough, unless you won't be using it straight away - it will be easier to work with at room temperature.

The Filling:

5. Clean out bowl and chop garlic on speed 7 for 3 seconds:
- 1 clove garlic

6. Add and chop on speed 5 for 3 seconds:
- 1 onion, quartered
- 1 carrot, quartered
- 1 stick of celery, quartered
(can add more vegies if you don't have many leftovers)

7. Add oil and cook for 3 minutes, 100 degrees, speed 1:
- 30g olive oil

8. Add, and chop on speed 3 for 10 seconds:
- 150g whole mushrooms, raw (opt.)

9. Cook for 2 minutes, 100 degrees, speed 1.
Add about 1 kg leftover roast meat (cubed) and leftover cooked vegies (roughly chopped) and any leftover gravy. (I sometimes add a bit of leftover mashed potato or rice too.)


10. Top bowl up with water, to the 2 litre mark. Add:
- 2 Tblspns cornflour/rice flour/spelt flour
- 1 Tblspn vege stock concentrate or stock powder (or to taste)
- salt and pepper (to taste)
Cook for 10 minutes, 100 degrees, reverse speed 1.
(Add more cornflour if needed to thicken.)

11. While cooking, divide dough in half and roll out on a lightly floured bread mat, making a large circle about 5 mm thick. Pick up with the rolling pin (see picture) and drape over pie dish. Repeat with other half of dough. Press into dish, then when filling is cooked, place half the filling inside each crust and flop the sides over the filling to make a free form pie. (Alternatively, you can divide dough into four pieces and roll them out to make a base and top for each pie.)


12. Cook for 30 - 40 minutes in moderate oven (180 C) or until pastry is lightly browned. Set aside to cool for a few minutes before slicing. Pies may be frozen once cooled, and reheated in the oven.
* P.S. 'Dolce far niente' means 'sweet doing nothing' in Italian - it's the name of a painting I love!

Rabu, 19 Agustus 2009

Thermomix 'Fried' Rice


This is a very easy, quick and healthy way to make a big batch of fried rice. It easily feeds our family of six, with leftovers. The rice, veges and egg are actually steamed - no oil is needed. You can use basmati rice and it will cook in about 20 minutes, or with brown rice it will cook in 35 minutes. And you don't have to stand there stirring! Thanks to my friend Nancy for teaching me this method years ago with bacon and veges - there's lots of possible variations, so be creative and make up your own versions too. You can use as much meat and veges as will fit in the Varoma - I've just given some suggestions, not definite amounts.

1. Place rice basket into Thermomix bowl, and weigh in:
- 400g of raw rice (or less if you want a smaller batch).

2. Remove basket, and pour into bowl:
- 400g coconut milk
- 500g water (for white or basmati rice) / 700g water (for brown rice)

3. Rinse rice under tap, then place basket back in bowl. Fasten lid onto bowl, place Varoma on top, and start cooking - Varoma temperature, 20 mins (white) or 35 mins (brown), speed 4.

4. While rice begins cooking, chop up meat and/or veges, placing it into the Varoma as you go.
(I do it this way, as it's quicker than preparing it all then starting the cooking. I put each ingredient in as it's prepared, replacing Varoma lid each time - meat, then hard veges, then quicker cooking veges - that way the hard and soft veges and the meat are all finished cooking at the same time.)

5.  Place the cubed meat in the bottom of the Varoma in a single layer, then top with the preferred veges:
- 100g - 200g of cubed chicken or fish and/or prawns (you can marinate it for a little while first in some soy sauce, curry powder, garlic, ginger, and honey, or whatever marinade you prefer)
  (or some chopped bacon, preferably organic)
- 1 sliced onion/shallots/leeks
- carrots, sliced or julienned
- celery, sliced
- kohlrabi, thin strips or julienned
- broccoli/cauliflower florets
- cabbage, shredded
- spinach/silverbeet, sliced
- frozen peas & corn
- cashews or slivered almonds (opt.)

6. Line the top Varoma tray with a piece of wet baking paper, and pour in:
- 4 to 5 eggs, whisked
Replace lid, and leave to steam.

7. Check meat, veges, egg and rice after 20 mins to make sure they're all cooked. (With basmati rice, it's generally cooked after about 17 minutes, but I just leave it for the full 20, and everything's usually done by then. With brown rice, just add the veges when there's only 15 minutes left to go, and add the eggs when there's 5 minutes left, and they should be done at the same time as the rice that way.)

8. Remove Varoma and place lid underneath.  Remove rice basket using spatula, and tip rice into Varoma bowl.  Add the meat and veges. Slice the egg up in tray (see photo) and tip into Varoma bowl with rice.  Season with some tamari sauce / soy sauce / sweet chilli sauce, mix together gently, and serve!


Slice egg in the tray and add to rice and veges.


Serve fried rice in the Varoma bowl with the lid underneath to catch any drips.

Selasa, 18 Agustus 2009

Baked Chicken with Cashew Satay Sauce


This is my favourite 'satay' sauce ever - it's so quick to make, and very tasty! If you don't have time to bake the chicken, you can just add the cashew sauce to stir-fried chicken and veges, or even just veges (and leave out the extra chicken stock).

1. Place chicken skin side up in roasting pan & brush with butter/oil:
- 1 large chicken, cut into pieces, or chicken thighs/breasts
- 2 Tbspns melted butter/ghee/olive oil

2. Bake for about 2 hours at 180° (350°) while preparing sauce.

Cashew Satay Sauce

3. Grind up in Thermomix for about 30 seconds on speed 7:
- 130g raw cashews
- 6 garlic cloves, peeled
- 2 inches fresh ginger, peeled
- 2 inch piece of fresh red chilli (or to taste)
- 1 large bunch cilantro / flat leaf parsley / coriander (or mixture)
- 1 Tbspn extra virgin olive oil
- 40g Tamari
- 40g rice vinegar
- 1 Tblspn chicken stock paste (or some chicken stock powder - eg. Massel brand)

4. Add and blend on speed 8 for 10 seconds:
- 400ml coconut cream/milk

5. When chicken is baked and golden, remove to a pre-heated platter and keep warm. Add to roasting pan and scrape bottom of pan to remove drippings:
- 2 cups chicken stock
- 1 Tbspn gelatin (optional)
6. Pour juices into Thermomix (with cashew sauce) and cook for 5 minutes at 90 degrees, speed 4. Season to taste.

7. Serve chicken on rice with cashew sauce poured over, and stir-fried veges, steamed veges, or salad on the side.

[Note: picture shows sauce which is not as green as usual as I only had a small bunch of coriander - make it as 'green' as you like!]

Selasa, 11 Agustus 2009

Sunny Scalloped Eggs & Broccoli (or Silverbeet)


This is an easy, light meal that is handy for using up all that lovely fresh broccoli or silverbeet that's in season right now. We like it for lunch, as it's got lots of protein from the eggs and the broccoli/silverbeet, and protein is very helpful for keeping you awake and energised! We're dairy free, so I make my own rice & almond milk, which saves us lots of money, but you could use regular milk if preferred. We're getting lots of eggs from our chickens right now as well, so all round, this is an very inexpensive meal for us. Serve with raw vege sticks.

1. Chop up and place in Varoma
- 2 cups of broccoli (or silverbeet)

2. Place in steamer basket in bowl:
- 6 eggs
Fill bowl with 500g water. Put on the lid, and place Varoma on top.

3. Steam eggs and broccoli (or silverbeet) for 15 mins, Varoma temperature, speed 1. (If the veges need more time, take the eggs out, and keep steaming until done.) Tip water out of bowl, set eggs aside.

4. Add to bowl, and chop for 5 seconds on speed 5:
- 1/2 onion
- 1 stick of celery, quartered
- a few mushrooms (optional)

5. Add oil and saute for 2 minutes, 100 degrees, reverse speed 1:
- 20g olive oil

6. Add remaining ingredients and cook for 7 minutes, 90 degrees, reverse speed 3:
- 500g rice/almond milk
- 4 Tblspns plain flour (I use spelt, but rice or other flour would work)
- 1 tsp sea salt (or to taste)
- pepper

7. While white sauce is cooking, peel eggs and slice in half. In a baking dish, spread greens, then place eggs on top in two rows. When sauce is cooked, pour and spread over eggs.

8. Without cleaning out bowl, add and mix on speed 6 for a few seconds until made into crumbs:
- two pieces of wholemeal bread (use your day old bread that's getting a bit dry)
- 2 tsp of olive oil or butter
- a handful of fresh parsley

9. Sprinkle crumbs over white sauce. Place casserole dish under hot grill to brown slightly, and serve.

Minggu, 09 Agustus 2009

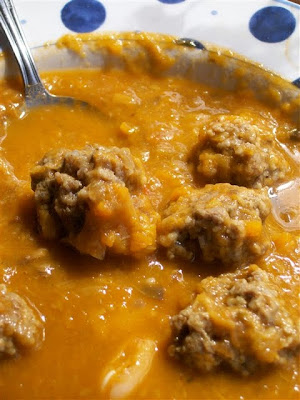
Meatball, Vege & Bean Soup


I made up this recipe today, and it's delicious! (If I may say so myself!) I made it completely in the Thermomix, but if you want to make it on the stovetop, just chop the veges and saute in oil, add stock & water & beans, bring to boil, and drop in meatballs and simmer til cooked. Yum!

1. Grind bread into crumbs and set aside:

- 2 pieces wholemeal spelt/gluten free bread

(Also grind meat into mince if making your own, then set aside.)

2. Place in TMX bowl, and chop on speed 5 for about 5 secs, or until consistency desired:

- 2 cloves garlic
- 1/2 onion
- 1 large leek, chopped in chunks
- 1 carrot, quartered
- 1 celery stick, quartered
- 2 ripe juicy tomatoes, quartered
(or any other combination of veges you prefer!)

3. Add oil and saute at 100 degrees for 5 mins, reverse, speed 1:

- 2 Tblspns olive oil

4. Add and cook for 25 minutes, Varoma, reverse speed 2 (while making meatballs):

- 2 Tblspns vege stock concentrate (or to taste)
- 2 Tblspns tomato paste
- a couple of handfuls sliced mushrooms
- 1 tsp Italian herbs (dried)
- water (up to 2 litre mark)

5. Meanwhile, mix together in a bowl and make into bite-sized meatballs, and place them in the Varoma (both trays) spread slightly apart for the steam to get through:

- 500g beef / turkey / chicken mince
- breadcrumbs
- 1 large egg
- dash each of ground cumin, ground sage, cayenne pepper, oregano, salt & pepper
- dash of tamari sauce
(As soon as they're made, take the MC off the TMX bowl and place the Varoma on top - try and get it done before the steaming begins!)

6. Remove Varoma (put lid underneath to catch drips) and add to bowl:

- 1 tin cooked cannelini beans, drained
- water to top up soup to 2 litres again

7. Replace Varoma, cook for 5 more minutes at Varoma, reverse, speed 1. Make sure meatballs are cooked!

8. Serve soup into bowls, add a few meatballs, and enjoy! (You could sprinkle with some grated parmesan if you can have it.)


Jumat, 31 Juli 2009

Yummy Pea & Lettuce Soup


I love a mug of hot soup for lunch on a cold day - here's one I made today, adapted from Cyndi O'Meara's wonderful cookbook, "Changing Habits, Changing Lives". I needed a recipe to use up all those lettuces in my fridge - it's been so cold, wet and miserable that salads aren't going down too well here, so soup is the next best thing! I know, lettuce in soup sounds weird, but this is really yummy. Try it!

(Note: I make this in my Thermomix, but you can make it in a saucepan, then puree using a blender or hand-held processor.)

1. Place in Thermomix bowl and chop for 5 seconds, speed 5 (or chop by hand):
- 2-3 cloves garlic
- 1 onion, halved

(I actually peel my garlic in the Thermomix too, especially when they're small cloves, by throwing in the unpeeled cloves and knocking them about on reverse, speed 5, for 5 seconds. You can just pick out the papery skin, or add some water and it will float to the top, and you can scoop it off then tip out the water!)

2. Saute onion and garlic with oil for 3 minutes, 100 degrees, speed 1:
- 2 Tblspns olive or macadamia oil

3. Add vegetables, and chop for 5 seconds speed 5, using spatula to push them down to the blades:
- 1 potato, quartered
- 1 carrot, quartered
- 1 lettuce, well washed and separated
- 300g frozen or fresh peas
- a handful of fresh chives
- a few sprigs of parsley or coriander (opt.)

4. Add and cook for 20 minutes, 100 degrees, speed 1:
- 1 Tblspn vegetable stock concentrate (or vege stock powder such as Massel)
- 750g water

(If chopping veges by hand and cooking in saucepan, simmer soup for about 30 minutes. Because the veges are chopped so fine in the Thermomix it needs less cooking time.)

5. Slowly turn speed dial to speed 8 and blend soup for 30 seconds (or blend in blender or with hand-held processor).

6. Add and mix in briefly:
- 2 Tblspns lemon juice
- 150g cup sour cream substitute (or real sour cream or natural yoghurt)

Selasa, 14 Juli 2009

Coconut Lemon Chicken Soup


Whenever anyone in our family starts to come down with a cold, I get out the stock pot and make a great big batch of chicken stock so I can make lots of chicken soup! There's nothing better than old-fashioned chicken soup when you're feeling achy and miserable, in the throes of a bad cold. But when you get tired of 'old-fashioned' chicken soup, try this one for a change. This is my new favourite - it's so delicious, and the fresh herbs and spices and chilli are great for colds, not to mention the thick, jellyish, golden stock. It's a comforting remedy for colds, chills and sore throats. (Adapted from recipes in "Nourishing Traditions" by Sally Fallon.)

It really is true that a rich chicken broth - the famous Jewish penicillin - is a wonderful remedy for the flu. "Science validates what our grandmothers knew. Rich homemade chicken broths help cure colds. Stock contains minerals in a form the body can absorb easily-not just calcium but also magnesium, phosphorus, silicon, sulphur and trace minerals. It contains the broken down material from cartilage and tendons--stuff like chondroitin sulphates and glucosamine, now sold as expensive supplements for arthritis and joint pain." - Weston Price Foundation (see full article)

So get out your stock pot, and start cooking!

(P.S. You can make enough stock for this recipe in your Thermomix - just use chicken wings, necks, and backbone with cartilage; crack the bones, and cook in steamer basket with a few celery leaves, onion, carrot and garlic, covered with water, with a tsp of vinegar.)

Chicken Stock

You will need:
- 1 whole chicken (free range, organic if possible), or 1 to 2 kg bony chicken parts
- 4 litres cold filtered water
- 2 Tbspns apple cider vinegar
- 1 large onion, roughly chopped
- 2 carrots, peeled and roughly chopped
- 3 celery sticks with leaves, roughly chopped
- 5 cloves garlic, roughly chopped (opt.)
- 1 bunch parsley

1. Cut the chicken into several pieces, sawing through bones or cracking them with a meat hammer. You can cut off the breast and put it aside for another meal (eg: a stir-fry or pasta). Just leave the fat on - don't worry, chicken fat is good for you! However, if you don't want the fat, when the stock cools it will solidify on top so you can easily scoop it off if you like. If you are using your own home-raised chicken, throw in the feet too, and even the head if you're game - the stock will have a lot more 'gel,' which is so good for you.

2. Place chicken pieces into a large stainless steel stock pot, cover with the cold water, add vinegar and vegetables (except parsley), and let stand for 30 minutes.

3. Bring to a boil, remove scum that rises to the top, reduce heat and simmer for 6 to 24 hours. I cook it on low in my slow cooker. (If you don't have time, at least simmer for 3 hours.) The longer you cook the stock, the richer and more flavourful it will be. About 10 minutes before you're ready to turn it off, add the parsley. (This will add more minerals to the broth.)

4. Remove chicken pieces with a slotted spoon and refrigerate. When they're cool, take the meat off the bones. Save 200-300g for your soup (recipe below) and store the rest in zip-loc bags in the freezer for other recipes - soups, salads, enchiladas, sandwiches and curries.  Strain the broth into a large bowl and place in the fridge until the fat rises to the top and can be skimmed off (optional). Once cold, the stock should be 'jellyish'. Set aside 1 litre of stock for the soup; place any leftover stock into small containers and freeze.


Coconut Lemon Chicken Soup (Thermomix version)

1. Chop in TMX for 5 seconds speed 7, until finely chopped:
- 1 inch fresh ginger
- 1/2 inch fresh turmeric
- 1 large clove garlic
- some fresh coriander or cilantro (to taste)
- a few fresh chives or shallots
- a piece of fresh red chilli (to taste)

[Note: For extra goodness and 'zing', double the amount of ginger, turmeric, garlic, coriander and chilli (opt). After whizzing it up, remove half to a bowl, then add it back into the soup after it's finished cooking. That way you'll get the benefit of the raw enzymes, not to mention more flavour!]

2. Add, and cook for 10 minutes, 100 degrees, speed 1, or until starting to boil:
- 1000g home-made chicken broth

3. Add remaining ingredients, and cook 10 minutes, 100 degrees, speed 1:
- 1 tin coconut cream or milk
- juice of 1 lemon
- 2 tsp Rapadura
- a few good splashes of fish sauce
- sea salt to taste

4. Add in the 200-300g cooked chicken reserved from making the broth. Cook for another 2 minutes at 100C, reverse speed soft. Then add in the extra minced herbs, garlic, ginger, etc if using.

5. Pour into bowls, and garnish with fresh cilantro or shallots.

Senin, 08 Juni 2009

Gemüse Eintopf (one-pot vegetable meal)

This is an Algerian dish which is perfect for using up an oversupply of pumpkin, of which I have a lot at the moment! It can be served chunky, or pureed. (I like it chunky.) You could add some peas towards the end of the cooking time, or some chopped leafy greens. Serve with a green salad and some crusty bread for a complete meal. Tasty and easy!

1. In Thermomix (speed 7, 5 seconds) or food processor, chop until fine:
- 1 large clove garlic
- 1 medium onion
- 2 TBS fresh parsley

2. If using Thermomix, add and chop speed 5 for 3 secs:
- 1 stalk celery, quartered
- 1 carrot, quartered

3. Add and cook slowly until vegetables are tender (Thermomix: 15 mins, 100˚, reverse speed soft):
- 500g potatoes, chopped in 1 inch pieces
- 500g pumpkin, chopped in 1 inch pieces (or carrots or turnips or a mixture)
- chopped celery and carrot if not already added (see above)
- 2 TBS vegetable stock concentrate (or 2 tsp chicken/vege stock powder)
- 30g (2 TBS) olive oil or butter
- 50g water
- salt and pepper to taste

4. Serve as is, or puree and serve as side dish.

Senin, 25 Mei 2009

Avocado Topping for a Dairy Free Pizza


When you love pizza and you can't have cheese, life is tough! But thank goodness I found this recipe for a creamy avocado pizza topping in 'Rejuvenate Your Life' by Serene Allison (which I've slightly altered). It is so delicious, even my kids love it and come back begging for more. Yay! So for all you dairy-free pizza lovers out there - here's one for you! (By the way, you don't have to be dairy free to love it. And it's great as a dip too.)


I also like to sprinkle macadamia 'cheese' on top - you can find that recipe here in this post.


1. First, make and cook your pizza bases - I usually make either a yeast spelt crust, or a yeast-free scone dough crust, or a gluten free crust. (The gluten free crust can be made with 2 tsp baking powder instead of yeast, if you want it to be yeast free.)  You can even make a raw, dehyrdrated crust if you like.

2. While they're cooling, make the topping. In your Thermomix, mince the garlic on speed 7 for 3 seconds, then add the remaining ingredients and mix until smooth & fluffy:
- 2 cloves garlic
- 4 large avocados
- 4 tblspns raw almond butter (or you can just chuck in a couple of handfuls of roasted or raw almonds and a tablespoon of olive oil if you don't have any almond butter made up already)
- 2 tblspns Tamari
- a small piece of fresh chilli (optional)
- handful of fresh parsley
- 1/4 tsp cumin powder
- 1/4 tsp curry powder
- 1/4 tsp ginger powder
- 1/8 tsp cinnamon
- 1/8 tsp nutmeg
- sea salt to taste
- juice of 1 lemon 


3. Spread a good, thick layer on each pizza base, and top with some or all of the following:
- sun dried tomato strips
- kalamata olives
- green olives
- raw capsicum strips or pieces
- roasted red capsicum or eggplant
- diced fresh tomato or cherry tomato halves
- chopped fresh herbs (chives, lemon balm, oregano, basil)
- drizzle of fresh lemon juice (opt.)


I like to put all the toppings into separate bowls and let everyone choose their own toppings - the kids enjoy eating this way.  Warning: you will have garlic breath afterwards, but it will be completely worth it!!!  :D

Senin, 04 Mei 2009

Corn & Potato Chowder with Chorizo Sausage


This is one of my favourite crockpot meals! I found it ages ago on the internet, and can't remember where it came from - but I changed it anyway, as usual, so here's my version.  If you want to make the chorizo sausages yourself, see the recipe below (adapted for the Thermomix). I'm going to try turkey instead of the traditional pork, as I'm a bit wary of pork.


1. Make your white sauce using recipe link below (or if you don't mind dairy and additives and preservatives, and too much salt, use tinned creamy corn soup!)
- 2 cups dairy-free white sauce with some vege stock concentrate (or Massel chicken stock powder) & 1 cup corn added before cooking, then pureed (I make mine in the Thermomix)

2. Tip it into crockpot and add:
- 2 cups chicken or vege broth (or more if you want it soupier)
- 5 potatoes, cubed
- 2 carrots, sliced
- 500g frozen corn
- Spanish chorizo sausages, sliced
(however much you like)
- 1 bag baby spinach leaves (or a couple of cups)

3. Cook on low for 8-10 hrs, or high for about 4 hrs. Yum!

Chorizo Sausages...
(This is Gluten-free Girl's recipe adapted for the Thermomix. For the original, see here.)

1. Drop garlic in bowl & mince for 3 seconds on speed 7:
- 2 cloves garlic, peeled

2. Add meat to bowl & mince for 8-15 seconds on speed 7 until desired consistency.
- 500g (1 pound) cubed pork or turkey

3. Add, and mix for 20 seconds on speed 5 (use more or less, to taste):
- 2 teaspoons chilli powder
- 1 1/2 teaspoons smoked paprika
- 1/2 teaspoon cayenne pepper
- sherry vinegar
- 1 teaspoon each sea salt and cracked black pepper


4. Make a tiny taster of the sausage. Bring a sauté pan to high heat. Pour in a splash of oil. Put the tiny sausage patty in the hot oil. Cook, and taste, to check the seasonings. Adjust accordingly.

5. Roll into small sausages or patties and cook as above.

Kamis, 26 Maret 2009

Beetroot Salad

Beetroot Salad (this photo shows one with a little more carrot, as my kids love carrot!)

This is a very quick and easy salad, especially if you have a Thermomix! You can make it in a food processor, but you may need to cut the veges in smaller pieces before processing or you'll crack the jug! (I know, I've done it in my pre-Thermomix days!) Recipe from Thermomix cookbook.

- 400g raw beetroot (peeled & quartered)
- 100g carrot, quartered

- 1/4 small red onion
- 1 green apple, quartered & deseeded
- 1 handful of fresh coriander/Italian parsley leaves
- 2 tbsp olive oil
- juice of 1/2 lemon

- 1 tsp Rapadura
- pinch salt


Place roughly cut vegetables in Thermomix/food processor and chop on medium speed (sp. 5) until evenly chopped (2-3 seconds in Thermomix). Scrape down sides and chop again for a couple of seconds until desired consistency.

If you accidently process too much, or you have leftovers, add some raw cashews or almonds, process until finely ground, and use as a dip!

I sometimes make this with half carrot, half beetroot - it's a bit cheaper, and the kids like carrot more than beetroot! :)

Selasa, 10 Maret 2009

Sausage Strata


This is my version of this yummy casserole which I first found in Sue Gregg's "Meals in Minutes" cookbook. It can be made with ground (minced) turkey, beef or lamb. It is a great dish to make double of, and freeze the extra one for another day. (This recipe makes enough for six people - serve with a salad to stretch it.) You might find, however, that your family likes it so much they won't let you freeze the extra one - my kids ate the first one for lunch and then wanted the second one for dinner! I gave in, because I was busy drawing and didn't want to stop to cook.

I use my Thermomix to make the bread crumbs, then make the white sauce, then saute the veges, then cook the meat mixture and add in the eggs - then I put it all together in a casserole dish.

1. Lightly saute zucchini and mushrooms in oil until barely cooked, and remove to bowl:
- 2 Tblspns olive oil
- 4 cups unpeeled, thinly sliced zucchini
- 1 to 2 cups thinly sliced mushrooms, optional

2. In large pan, saute onion in oil, then add other indgredients and mix and brown; set aside to cool:
- 1 small onion, chopped
- 2 Tblspns olive oil
- 500g (1 lb) ground beef, turkey or lamb
- 1 Tblspn tamari/soy sauce
- 1 tsp sea salt
- 1/2 tsp nutmeg
- 1/2 tsp thyme
- 1/2 tsp garlic powder
- 1/4 tsp sage
- pinch cayenne pepper

3. Make 2 cups of white sauce or cheese sauce (see recipe here for dairy free version). If not using cheese, add 2 tsp chicken or vege stock concentrate to add flavour (or a couple of tsp of savoury yeast flakes).

4. Add to cooled meat mixture:
- 3 eggs, beaten
- 1 cup wholewheat spelt bread crumbs or gf bread crumbs

5. In casserole dish, layer cheese sauce, zucchini, mushrooms and meat mixture in two layers. Start and end with cheese or white sauce.

6. Bake uncovered at 175 degrees C (350 F) for 30 minutes. Eat now, or cool and freeze.

7. To cook a frozen casserole, place frozen dish in oven and cook, covered, for 3 hours on moderate heat. Or thaw out in fridge and cook for 1 hour.

Selasa, 10 Februari 2009

A Very Versatile Quiche Formula!

This is a great recipe for using up leftover veges, or whatever veges are in your garden or fridge... I've adapted it from a recipe in Mollie Katzen's cookbook, "The Enchanted Broccoli Forest". Hope you like it!

1. First you need a crust. If you have a favourite crust recipe, go ahead and make that, or you could use one of these:

Basic Spelt Crust (makes 2 crusts)
Place in food processor or Thermomix:
- 2 cups (300g) spelt flour (mixture of wholemeal & white)
- 2 t baking powder,
- 3/4 cup butter/lard or 1/2 cup olive oil
- 1 t salt
Mix until looks like crumbs, then add and mix until a ball of dough forms:
- 1/4 cup icy cold water (approx.) 
- squeeze of lemon juice
Roll out on bread mat or floured board and place in buttered pie/quiche pans. No need to prebake.

Crumb Crust (makes 2 crusts) - easy - doesn't have to be rolled out.
(I use this when I've had a failure with my bread! I grind the whole thing up into crumbs and freeze them.)
Mix in food processor/Thermomix:
- 2 cups (300g) wholemeal spelt bread crumbs
- 1/2 cup wholemeal spelt flour
- 1 cup raw spelt/rice bran
- 1 cup rolled oats
- 1/4 t salt
- few dashes of italian herbs
- 1/2 cup melted butter or oil
Press into buttered pie pans and prebake in moderate oven for 10 mins.

2. Preheat your oven to 180 degrees C (350 degrees F).

3. Okay, now for the easiest part. There are only three steps to go.
First, The Cheese. (If you can't have cheese, leave this part out, or replace it with a dairy-free substitute.) The cheese goes first, as the fat in it melts and forms a moisture-resistant layer between the filling and crust, so the crust doesn't go soggy. I usually use:
- 1 cup shredded mozarella cheese (divided between the two crusts). You can also add come crumbled fetta cheese if you like. It just needs to be enough to barely cover the bottom of the crust.

4. The Filling: place the filling of your choice over the cheese. There's so many options for this part - steamed/leftover veges, leftover cooked, chopped meat, tuna/salmon... Try a different one for each quiche - here's a few ideas...
- Spinach/Silverbeet/Bok Choy (a few handfuls, chopped and sauteed with chopped onions, dry mustard and nutmeg)
- Mushrooms (a few handfuls, sliced and sauteed with shallots/green onions, garlic, oregano and thyme)
- Asparagus (sliced and steamed, or tinned, with herbs)
- Broccoli (one large stalk, chopped and steamed, with lemon juice and garlic)
- Tomato (1-2 tomatoes, sliced and sauteed gently in olive oil and/or butter, with italian herbs)
- Fresh herbs (marjoram, thyme, basil, dill, chives, parsley - snipped and sauteed with onions and capsicum/peppers)
- Marinated artichoke hearts (drained and chopped)
- Mixed veges (steamed/leftover broccoli, carrot, corn, etc, with sauteed onion and garlic, and slices of tomato on top)
- Tuna/salmon (tinned, with steamed broccoli, sauteed onion or fresh shallots)
- whatever else you can think of!

5. The Custard -beat together and pour over the top:
- 4 large eggs
- 1 1/2 cups rice/almond milk
(or you can use a mixture of sour cream and milk, or buttermilk instead of rice/almond milk.)
Dust the top with paprika or herbs.

6. Bake for 35-40 minutes in moderate oven, or until set.

If you end up with too much pastry and filling, make some mini quiches in muffin cups. Or if you have some scraps of pastry, roll them out and bake them on a tray for the kids to eat like crackers.

I hope these amounts are right - I'm notorious for altering recipes and not writing it down!