Tampilkan postingan dengan label Thermomix. Tampilkan semua postingan

Minggu, 16 Februari 2014

Dairy Free, Egg Free Aioli


This recipe has been a long while in the making. Over the last few months I've experimented a lot, determined to come up with a dairy free, egg free aioli that isn't runny. Sometimes I've had six or seven different batches lurking in my fridge at once... good thing I buy my macadamia oil in bulk*! 
I didn't give up because I wanted so badly to have this recipe in my book. Sadly, it just wasn't ready in time, so I've decided to post it here so all that hard work (and many litres of macadamia oil) doesn't go to waste. :)

This is not a traditional 'olive oil and garlic' aioli (which is of course dairy and egg free), but the flavour is more like an aioli than a mayonnaise so I call it aioli. I love it with fish, or on baked potatoes, or you can even add herbs and use it as a dip with crudites (see variation below). You can, of course, also use it instead of mayonnaise on sandwiches and wraps, or in a potato or chicken salad. 

I have tried making this with rice milk but it doesn't thicken like cashew milk does, so I stuck with cashew milk. If I come up with a nut free version I'll let you know! 

So here it is... I hope you like it. :)


Dairy Free, Egg Free Aioli
Makes 300g - lasts for 2-3 weeks in the fridge

Ingredients

100g raw cashews
500g water
2-3 garlic cloves
¼ tsp fine sea salt
150g macadamia oil
3 tsp lemon juice, freshly squeezed

Method

Place cashews into mixing bowl and mill for 8 sec/speed 9.

Add water and blend 1 min/speed 9. Pour into a separate container and wash and dry mixing bowl.

Place garlic into mixing bowl and chop 3 sec/speed 7. Scrape down sides of bowl with spatula.

Add salt and 150g of the cashew milk, and insert butterfly. Cook 5 mins/100C/speed 4. Scrape down lid and sides of bowl with spatula. (Place remaining cashew milk in fridge.)

Weigh macadamia oil into a small jug with a pouring spout.

With butterfly rotating on speed 4 and MC in place, drizzle oil very slowly onto lid, starting with just a few drops at a time, and progressing to a very thin stream. Take your time! With butterfly still rotating on speed 4, drizzle in lemon juice. This process should take approximately 6-7 mins.

Remove aioli carefully to small jug or jar, without mixing it with spatula so that it stays light and airy. Cover and store in fridge.

That's it! Very easy, just make sure you take your time while drizzling in the oil, as that will make all the difference.

Herb & garlic variation:

When chopping the garlic, add a few green shoots from spring onions, or some chives, and a sprig or two of parsley.

Notes:

- You will have cashew milk left over - store in fridge to use in cuppas or cooking. Makes great cappucinos!

- If you do try another kind of milk in the aioli, it needs to thicken in the cooking stage before the oil is added, or the aioli will be runny. I've found that soaked cashew milk doesn't work so well as it's thinner, so stick with this method.

- If you're wondering where I buy my macadamia oil in bulk (because I know I'll get that question!), I buy Pressed Purity (extra virgin cold pressed) in a 10 Lt container through my co-op, from Fitness Products. 

Rabu, 05 Februari 2014

Chocolate-Cherry-Berry Dessert Pizzas


Last Saturday my niece came to visit from down south, so we got the kids' friends over for a pizza party to celebrate. There were at least 20 teenagers, plus a few other younger kids, and we all had a lot of fun!


To make the food side of things simpler, I got them to all bring pizza toppings to share. They chopped up the toppings while I made enough spelt pizza dough for about 20 pizzas (easy peasy in the Thermomix!), and then they all made their own pizzas. (In between soccer games, board games, remote control aeroplane flying, chatting, laughing, singing, and everything else!) So much more fun than buying pizzas, not to mention cheaper, healthier and yummier. Oh, and in case you're wondering, we used two ovens - mine and mum's - she just lives two doors down. :)


I also made mango sorbets with magic chocolate topping (see 'Day 7') for afternoon tea, which they loved, and no one complained about the lack of softdrink or junkfood, so they must be getting used to my strange ways! :D

After dinner I had a bit of a brainwave, and whipped up these dessert pizzas with the leftover pizza dough. I topped them with my homemade Chocolate Hazelnut Spread, some cherries and blueberries, zabliagone (a kind of egg yolk custard, no milk, a bit like sabayon), and flaked almonds. Delish!!

I used spelt bases for the kids, but if you're gluten free, don't despair. Use my recipe for Gluten Free Pizza Bases, adding 1 Tbspn of rapadura or coconut sugar to the batter. Blend it well so that the seeds are blended in. You could also use an almond meal pizza base recipe if you want a grain free, yeast free option. Try this one, leaving out the rosemary and garlic; swap the olive oil for macadamia oil, and add 2 tsp coconut sugar per base. See suggestions in recipe for a nut free version.


These pizzas are best served hot, so if you don't want to invite 20 hungry teenagers over for a party and your family won't eat three in one go, try this:

- Make the dough and divide into three portions; place remaining dough in bags and refrigerate or freeze dough for another day. (Dough can stay in fridge for up to a week.) 

- The chocolate spread will last in the fridge for a couple of weeks no problem, as will the cherries if left in the juice in the jar. The blueberries can be frozen. 

- Make zabliagone with 2 egg yolks, 1 tsp maple syrup and 1/2 tsp vanilla, for 10 mins cooking time total. 


Chocolate-Cherry-Berry Dessert Pizzas
Dairy free, with gluten and grain free options, and nut free option

(Makes 3 large pizzas)


Ingredients

Bases:
500g unbleached, plain spelt flour
2 tsp instant yeast
1 1/2 tsp fine sea salt
1 Tbspn Rapadura or coconut sugar
50g macadamia oil (or olive oil for nut free), plus extra for shaping dough
260g water

(or see gf options above)

Toppings:
1 batch of Chocolate Hazelnut Spread (or nut free chocolate spread/ganache, from this recipe)
  (freshly made - or use your own version of 'Nutella' or ganache)
1 800g jar of Morello cherries, drained
1 125g punnet fresh blueberries, rinsed
zabliagone (see below)
80g flaked almonds (or flaked coconut for nut free)

Zabliagone:
3 egg yolks
2 tsp pure maple syrup
1 1/2 tsp vanilla or almond extract

Method

Line 3 large pizza trays with baking paper, and set aside.

Place all base ingredients into mixing bowl and mix 6 sec/speed 6.

Knead on interval setting for 1 1/2 mins, then wrap dough loosely in Thermomat (or silicon bread mat, or place in oiled bowl and cover) and let it rest for 20 mins while you prepare the toppings.

Preheat oven to 200C, with pizza stones on racks if you have them.

After dough is risen, divide into three portions and press out into circles using a little more oil, and place on trays.

Divide chocolate hazelnut spread between the three pizzas and spread evenly over bases.

Scatter the cherries and blueberries over the pizzas, and set aside to rise while you make the zabliagone.

Zabliagone: Place egg yolks and maple syrup into mixing bowl, insert butterfly, and mix 6 mins/50C/speed 4. Add vanilla or almond extract and mix another 6 mins/50C/speed 4.

Drizzle pizzas with zabliagone and sprinkle over the flaked almonds.

Bake for approx 18-20 mins in hot oven on pizza stones (if you have them), until the zabliagone is lightly browned and the bases are cooked through.

Best served hot, while the base is crisp.

(Leftovers can be stored in the fridge in an airtight container, but they will get a bit soggy and the zabliagone will melt into the chocolate - although my kids don't complain! They still taste good.)


Kamis, 30 Januari 2014

Paprika Chicken with Creamy Paprika Sauce (an easy all-in-one Thermomix dinner)


Last night I got home late after a busy day and didn't have dinner organised, so it was 'Thermomix to the rescue' once again! I had a quick think, and this is what I came up with. Nothing fancy, just an easy and tasty dinner with basic ingredients, that took all of 25 minutes to make. Sometimes that's just what we need when we can't be bothered, right? (It is really yummy though, and the chicken breasts are amazingly tender and juicy when steamed!)

This fed our family of six and there were plenty of leftovers, which is always a bonus since everyone generally wants dinner for breakfast at our house. :)

This recipe is gluten free, and egg free, and if you omit the butter is also dairy free. The sauce is blended with cashews to make it creamy, but if you can't have nuts, see the nut free variation below. I've added some tips for those of you without a Thermomix, so you don't miss out.


Paprika Chicken with Creamy Paprika Sauce
(Serves 6-8)

Ingredients:

Rice
900g water
380g basmati rice

Veges (these are just suggestions, use what you have)
3 carrots, peeled and sliced thinly
200g green beans, topped and tailed
1-2 zucchini, thinly sliced
150g frozen corn

Chicken
600-700g chicken breast fillets, sliced in 2cm thick pieces
smoked paprika powder (approx 1 tsp)
herb salt (eg. Herbamare)
garlic powder (approx 1/2 tsp)
1 Tbsp butter or ghee (optional)

Sauce
60g raw cashews
60g water
2 tsp chicken or vegetable stock paste (my chicken stock paste recipe here)
1 tsp smoked paprika powder


Method:

Pour water into mixing bowl.

Weigh rice into steaming basket and rinse well, then place basket inside mixing bowl.

Place chicken pieces onto Varoma tray and sprinkle with paprika, herb salt and garlic powder, and dot with butter or ghee if using.

Place Varoma into position with lid on.

Turn speed dial to speed 5 for a few seconds to wash the water through the rice. (That's my little trick to make sure the top of the rice cooks well and you don't end up with crunchy bits.)

Begin cooking for 20 mins/Varoma/speed 2 while you cut up the veges, adding them to the dish as you go. (It takes about 10 minutes for the steam to really start filling the Varoma, so it's easy enough to get the veges cut up in that time.)

At the end of the cooking time, check that the chicken is cooked; add a couple more minutes if not.


Remove chicken, vegetables and rice to Thermoservers or serving dishes. (Or if you're having an 
"I don't feel like doing heaps of dishes" night, just leave them in the Varoma and basket and set aside.)

Add all the sauce ingredients to the little bit of liquid left in the bowl. (There should only be about 3cm of water left as the rice has absorbed most of it.)

Blend 1 min/speed 9. Scrape down lid and sides of bowl with spatula and blend again if needed, until smooth. Season to taste.

Serve the rice onto plates, top with veges and chicken, and drizzle with sauce.

Easy peasy! :)

Variations:

Nut free version: I haven't tried this yet, but I think it would be simple to leave out the cashews and add a can of Ayam coconut cream instead, with the 2-3 tsp vege stock paste and 1 tsp paprika powder. Warm it up a bit, 1 min/90C/speed 4. Season to taste.

Non Thermomix version:  Pour 100ml boiling water over the raw cashews and allow to soak (covered) while the meal cooks. Cook the rice in a rice cooker or on the stovetop. Cook the chicken and vegetables in two layers in a steamer, or in a large frypan with a lid, over med-low heat, until done. Blend the soaked cashews with soaking water and remaining sauce ingredients in a powerful blender until smooth and creamy. Season to taste. (Massel stock powder can be used instead of stock paste.)


Sabtu, 18 Januari 2014

{Guest Post} Recovering from Crohn's Disease


Talisha and her daughter, Ariella

A couple of weeks ago I had the pleasure to 'meet' (online and over the phone) this gorgeous young woman who is absolutely vibrant with energy and cheerfulness. You would never guess that only one and a half years ago, she was so sick with Crohn's disease that her doctors said her only option was to have her large intestines removed and a colostomy bag installed.

Talisha has been on a very difficult journey with her health and has come out the other side strong and smiling. Her journey and her beautiful little girl have together inspired her to develop a great product, "Little Mashies." I was so impressed by her story that I asked if she would share it here for all of you. 

You can read more about Talisha and her "Little Mashies" Reusable Squeezie Pouches on her Facebook page and website.


Talisha's Story...

"I’m a single mum with a severe bowel disease. If I have to get my intestines removed and have a poo bag how am I ever going to meet a man?"

This was my first thought when my gastro specialist said that surgery was my best and only option to heal my digestive problems. This is what led me to try natural remedies alongside my medication, and it's what kept me focused through what has been the hardest time of my life. I know it might sound silly, or egotistical, but honestly, at the time it was my biggest fear.

I had been diagnosed with Crohns Colitis and after having my daughter Ariella, my health became drastically worse. Juggling being a single parent without family close by, and being so sick was extremely difficult. But I soldiered on because I didn’t have any other option. I had severe intestinal bleeding, constant cramps, high fevers and felt so ill that it was like having food poisoning or Bali belly, 24/7. I focused on my daughter, and during those first few months of being sick we played lots of games in bed. She was the sun in my sky (and still is!).


Ariella was 5 months old when I was first admitted to hospital. I was disgustingly skinny, my skin looked grey, and my hair had started to fall out. I was in really bad shape. I spent ten days in hospital, then went home for a few days, but was admitted to emergency again. My body was just not coping. I had been so sick for months, and even though I was taking the medications they recommended, nothing was working. For another ten days I lay in the hospital bed, and every one of those ten days the surgeon would come and talk to me, and tell me my only option was to have my large intestine removed. He'd ask me if I was ready, and every day I would say no. In their minds, surgery was my only option, and the longer I stayed in hospital, the more I began to believe them. But I just couldn't bear the thought of having a 'bag' for the rest of my life. I wanted to try and heal myself naturally. 


Eventually I was discharged, but told to stay close by, to call an ambulance if I needed to, and to come back when I was ready for the surgery. I went home, and my father, sister, and amazing friends from my mother's group gathered around to support me and to help look after Ariella. The mother's group ladies made a roster for cooking food, walks with Ariella, and play dates. Their support was amazing!

I began studying and researching natural ways to heal myself. One day one of the mums in the mothers group turned up on my doorstep to bring me a meal. When she saw the state I was in, she said, "I can't leave you like this. I'm an acupuncturist. I will treat you every day until you're well. You work on healing yourself with food, I'll help with acupuncture." She begged me just to hold on until Christmas before deciding about the surgery. I had no money because I was unable to work, and Ariella’s father didn’t help out, so she treated me for free. Each day she would console me, praise me for my efforts to get through another day, and encourage me to keep trying my natural methods whilst continuing treatment from the doctors. Whenever I felt like giving in, I thought about being single forever and that spurred me on to keep trying.

I tried many things in my efforts to heal myself naturally. It was a long, slow, process, and it took a lot of time before I really saw significant changes in my health. Some of the things I tried were:

-       Stopping eating (just drinking fresh coconut water)

-       Cutting out dairy and wheat


-       The SCD diet

-       Drinking elemental shakes with added Udo’s oil (Absorb Plus brand) 

-       Eating only soft foods like soup, purees, smoothies, and baby food

-       Bone broths (amazing!) - chicken slow cooked in the broth with pumpkin, then blended, was my favourite

-       Foods naturally high in good bacteria (yogurt, kefir, sauerkraut, etc)

-       Anti inflammatory foods (fresh coconuts and coconut water, coconut oil in peppermint tea, turmeric, salmon)

-       Flaxseeds, and flaxseeds soaked in water overnight

-       Hormone therapy (I had tests done by my GP which showed I was deficient in testosterone, progesterone, and DHEA)

-       Vitamins and Minerals (Omega 3, 6 & 9, Vitamin D, Multi-Vitamin, Iron infusions, Vitamin B injections, Vitamin C)

-       Chinese herbs to remove the “heat” from my system

-       Sleep

-       Relaxation techniques

-       Fecal Transplants (4 times per week for 6 weeks)

-       Nano Vita Water drops

-       Immunity II tablets

-       Alkaline water

At the start of implementing these natural therapies, changes were extremely slow. Microscopic changes. Many times I lay in bed all day with a raging fever, and would be too exhausted to eat or drink. So if I had a fever for only 12 out of 24 hours then that was a positive step. If I slept for longer than 2 hours at a time without waking in pain, that was also a victory. 


My bleeding and bowel habits were constantly terrible right to the very end of my healing journey. I say end, but in reality my healing journey will be forever. It will never end because my intestines are my weak spot and whenever I get stressed that’s where I feel it! 

The thing I learnt whilst battling my illness is that everyone is different. Some things that worked for others didn’t work for me. And some things that worked for me may not work for you. It's all a matter of working out what your body needs, listening to your body, and not giving up.

I view my disease as though it is on a spectrum. I believe it started as Irritable Bowel Syndrome then it got worse and took on the form of Ulcerative Colitis. When I still continued to ignore my body crying for help, my intestinal ulcers became deeper, and biopsies showed Crohns disease. I am not a doctor, and I have always seen the best specialists and taken all the medication prescribed for Inflammatory Bowel Disease. But I truly do believe that the body is designed to be able to heal most problems and that there are many different nationalities that have healed themselves for thousands of years with herbs, foods, and natural remedies. I do believe that my problems started by eating the wrong foods from childhood, which is why I'm so careful with what I feed my daughter.


I started "Little Mashies" while I was in and out of hospital, because I was living off baby food, soups, broths and shakes. At the same time I was weaning my own baby onto solid foods. I researched the nutritional content of what was in the packaged baby foods and yogurt squeezies, and I was unhappy to feed it to Ariella or myself. So I cooked my own purees and stored them in zip lock bags.


One day I had a light bulb moment, and began designing my own 'squeezie' bags! With "Little Mashies," I can give my child (and myself, when I am sick) healthy, nutrient rich, additive free food wherever we go.

It was such a huge long journey to get my idea to reality. I had no money and was stuck in bed most days. But I was as dedicated to achieving this as I was to fixing my health. I tested, tested and retested until I was happy with the quality of my product.  It took over a year. None of it has been easy, in fact I honestly feel like I have been fighting for survival ever since I became pregnant with Ariella. But I now have my own business (which is growing every day), I would say my health is the best it has been in years, and my daughter is thriving!

I just want to say that looking after our children’s health is so important, and it is something I am really passionate about because of my own journey. To those of you who use Little Mashies Reusable Squeezie Pouches, I am so happy to be able to provide a way for your kids to be able to get the healthy, additive free food that they need.

I feel blessed to be able to share my story with you and hopefully help you on your journey to healing. Please feel free to contact me through my Facebook page or website - I'm happy to answer your questions and share what I've learnt.

Don't give up!
Talisha xx


Note from Jo: This post was not sponsored in any way, I just wanted to share this story of an amazing young woman with you all, in the hopes it would help and encourage those of you who are going through a difficult time with your own health. I have offered to do a giveaway of some of Talisha's "Little Mashies" in the near future, and will let you all know about that soon.
Jo xx

Kamis, 26 Desember 2013

Quirky Cooking Birthday Giveaway & an Update!


Guess what? Quirky Cooking is 5 years old today! Woo hoo!!!

Five years ago on Boxing Day I started this blog as a place to record my recipes, menu plans and tips for those who needed some help with healthy, allergy friendly cooking.

Well, I never would've imagined that so many people would be joining me on this journey, and that five years later I would be working on publishing a cookbook. Thank you, thank you, thank you all for your support! At the end of this post there's a Birthday Giveaway, so keep reading to see how to enter.

(If you'd like to see a video interview where I explain my food journey, why and how I started my blog, why I use a Thermomix, etc, click here.)


The last few weeks (and months) have been a bit of a whirlwind, with lots of recipe testing and the photo shoot for my book in Perth, so I've been a bit absent from my blog. Thank you for being so patient. I had no idea how much work a cookbook entailed - phew! I still have another photo shoot here at home in early January, and bits and pieces of writing to finish off, but nearly there. For those of you who are wondering, the book will be available in Autumn. Not long now, so stay tuned!

Here's a glimpse of behind the scenes at the photo shoot... Thanks to the super organised team at Thermomix Australia, it all went really well. I absolutely loved working with these guys, they're amazing.


It was exciting watching the photos come together with the help of the photographer (Craig of F22 Photography), the stylist (Tarsh), and the art director (Becky of Chil3). There were quite a few of us working in the kitchen/studio each day, so the food never went to waste. Whatever we didn't eat was divided up and taken home by everyone at the end of each day. 


Quirky takeaway - pizza night! :D

I also managed to squeeze in a few catch ups with friends in Perth, including the wholefood guru extraordinaire, Jude Blereau! What fun :) (This lady is a legend!)


We arrived home from Perth a week before Christmas and I think I slept for almost two days, and I'm still catching up, so we had a very simple Christmas and just enjoyed a relaxing time with family and friends.


My friend bought me this very apt sign... ha ha!


And I managed to get a little bit of Christmas cooking done - thankfully mum did most of it!


So a fun time was had by all, and now it's Boxing Day and everyone's relaxing... except me, because I started a blog on Boxing Day five years ago, so now every Boxing Day is spent blogging. Ha ha! Good thing I love it... ;)

Every year I do a Birthday Giveaway to say thank you to you all, and this year we have some lovely prizes from Skin Juice and Blendstyle! Hope you like them.

To win a prize, all you need to do is comment on this blog post saying why you'd love to win. Winners will be picked randomly on Thursday 2nd January at 7pm, via Random.org, and will be contacted via email. Winners names will also be announced on this blog post. Competition open to Australian residents only.

[Note: If commenting on a mobile device, you will need to scroll to bottom of page, click View Web Version, then scroll down again to see comment option.]

Skin Juice Packs:

I believe it's really important to not only to be aware of what foods you are putting into your body, but also what you're feeding your skin. Anything you put onto your skin goes into your bloodstream, so why would you want to use products full of chemicals and nasties? Skin Juice is a natural range of skin products I've recently discovered and am loving, so I really wanted to share!

Skin Juice is an innovative new kind of skin care which breaks the 'rules', using cleansing oils instead of soapy formulas, and night oils in place of nights creams. The oils are natural, undiluted vegetable, fruit, seed and nut oils that lubricate, moisturise and protect without clogging up the skin pores. The oils feel amazing on your skin, smell beautiful, and are free of synthetic fragrances, parabens and dyes. They are environmentally sustainable and against animal testing. For more information, check out the Skin Juice website, Facebook page, and Instagram page.

Blendstyle Apron:

Blendstyle's gorgeous designer aprons come in many different styles - choose from luxurious embroidered aprons, vintage/retro inspired aprons, or quirky, whimsical, fun aprons. Check out the Blendstyle website and Facebook page.

Nutra Organics Health Bundle:

I love using Nutra Organics powders to add some extra nutrition to smoothies, juices, bliss balls and more. They are an Australian company that uses only wholefoods and natural sweeteners in their products - no synthetic or artificial ingredients, not fillers, no nasties. Check out their website, Facebook page and Instagram for recipes and tips for adding phytonutrients, vitamins, minerals, anti-oxidants, etc, to foods and drinks for an extra boost. Great for kids that are fussy eaters!

[Prize draw now finished]

1st Prize: 

1 Skin Juice Essential Juice Box, valued at $190 (contains 6 beautiful, juicy, full size products) 
+ 1 Spud Sponge valued at $12.90 
+ 1 Blendstyle Apron of your choice, valued at up to $37.95


2nd Prize: 


1 Mini Squeezes Travel Pack valued at $75 (contains 5 travel size refillable skin juice products) 
+ 1 Spud Sponge valued at $12.90


3rd Prize: 


1 Skin Juice Pack valued at $69.50 (this pack plus this pack) 
+ 1 Spud Sponge valued at $12.90


4th Prize: 


1 Nutra Organics Health Bundle valued at $119.00
(1 x Acai Berry Blend 200g, 1 x Super Greens & Reds 250g, 1 x Organic Maca 300g)
+ some samples of each of the energy bars

Thank you to Skin Juice, Blendstyle and Nutra Organics for the generous gifts, 
and thank you to all of my lovely readers for your support over the last few years!

Have a wonderful week!

Cheers, Jo xx

Senin, 23 Desember 2013

Christmas Breakfast Casserole


I often feel a bit overloaded with all the sweet stuff at Christmas, and the kids tend to dig into their Christmas stockings first thing and start in on the homemade sweets, so a savoury breakfast/brunch on Christmas day makes a lot of sense to me. (I prefer a savoury breakfast any day, actually.)

This year, we're having our traditional Christmas dinner of roast turkey and all the trimmings on Christmas Eve. Christmas day we're having a lazy breakfast after the kids open their presents, then getting together for dinner with friends on Christmas night. So this is the breakfast I'm making for Christmas day - a 'prepare ahead' brunch casserole. Oh, and mum is bringing Monkey Bread too, so that should keep everyone happy. :)


This casserole might not look like much (it was hard to photograph!) but the kids love it - it's very tasty. The bottom layer is homemade hashbrowns, made with a mixture of potato and orange sweet potato. Then there's a layer of egg, then a spicy American style turkey or beef mince layer, and egg and zucchini on top with a sprinkle of herbs and savoury yeast flakes. You can use grated parmesan instead of savoury yeast flakes if you don't need it to be dairy free.

You can prepare this the day before if you like, and bake it on Christmas morning while the family is opening presents. Easy.

P.S. This is obviously also just a great midweek dinner with a salad!

Christmas Brunch Casserole 
(Gluten Free, Grain Free, Dairy Free, Nut Free)


Serves 6

Preheat oven to 180°C.

1kg potatoes, roughly chopped (I use a mixture of potatoes and orange sweet potatoes)
1 brown onion, halved
2 garlic cloves
3 Tbsp ghee or coconut oil
2 tsp herb salt
Freshly ground black pepper
500g turkey or beef mince
1/8 tsp sage, ground
1/4 tsp cayenne pepper
1/2 tsp oregano
2 Tbsp tamari
2 Tbsp tomato sauce
10 eggs
1 tsp garlic powder
1 tsp onion powder
1 zucchini, quartered
2 tsp savoury yeast flakes

1. Place potatoes, onion, garlic, 1 tsp of herb salt and some freshly ground pepper into mixing bowl and chop 30 sec/speed 4.
 
2. Melt ghee or oil in a large frypan and add potato mixture. Stir and fry until lightly browned and cooked through, approx. 10 mins. Spread over base of a 34 x 22 cm rectangular baking dish and set aside.

3. Meanwhile, place mince, sage, cayenne, 1/4 tsp oregano, tamari and tomato sauce into mixing bowl and mix 10 sec/reverse/speed 3. Cook 4 mins/Varoma/reverse/speed soft with MC off (until barely cooked). Remove to a bowl and set aside.

4. Place eggs, 1 tsp herb salt, garlic powder and onion powder and some freshly ground black pepper into mixing bowl. Mix 5 sec/speed 4, then drizzle half the mixture over the potatoes.

5. Sprinkle mince over the egg layer. 

6. Add zucchini to remaining egg mixture in mixing bowl and chop 3 sec/speed 5. Spread over mince layer and sprinkle with 1/4 tsp oregano and yeast flakes.

6. Cover with foil and bake in preheated 30 mins, then remove foil and bake a further 30 mins, or until set and browned.

OR

To Prepare Ahead:

Cover casserole with foil and place in fridge overnight. In the morning, place in preheated 180°C oven and cook 45 mins, then remove foil and cook 30 mins or until set and browned.

Minggu, 10 November 2013

An Update, a Creamy Pine Lime Green Smoothie Recipe, and a Glass Straws Giveaway!


Hi guys! What have you all been up to? I've been too busy for blogging much lately, but I thought I'd better pop in and update you all on what's happening around here! And because I miss you :)

So let's see, what's been happening...

Well last weekend I cooked for The Organic Experience grassroots food tour, which was a blast as always. If you ever get a chance to go on this tour, I highly recommend it - you will learn HEAPS about sustainable farming, why it's important to buy local produce, healthy homegrown living, back to basics cooking, and creating a strong, vibrant community where you live. I wish I could go on every tour, they're amazing! Emma Lodge does a great job of organising them. The photo above is where I cooked lunch, at a quaint little community hall out amongst the green fields not far from home...


Sjoerd of Real Food Network was the tour guide this time, and did a great job

It was really lovely to meet Sarah (aka the Clever Cook) on the tour - her and her husband flew up from Brisbane to come along! So see? It must be worth it! ;) (Btw, check out her blog if you love healthy food with an emphasis on low carb, gluten free options - lots of yummy ideas.)


Me and Sarah (and yes, I was pretty tired by then!)


For those of you who have wondered how the Ford Territory Titanium test driving is going (I've had lots of questions): YES I love it, I'd buy one in a flash! I've been driving it for the last 6 weeks thanks to Voices of 2013 and Ford (thanks Ford, can I please keep it??) and it's just a beautiful car to drive. As you can see, it fits heaps in the back with the two back seats down. I've had all sorts of cargo in it, from cooking gear for my classes and demos, to luggage (and Thermomix of course) when we went away for a week (all six of us), the kids and their soccer balls and jackets and boots and bags, the vege box from our co-op...


Yes, tomorrow will be a sad day, as I have to give the Ford back. :( One last goodbye photo... 


Sigh.

In other news, I started a Quirky Cooking Chat Group! Have you joined yet? We have such a great community on Facebook, and I think that collectively you guys know the answers to just about everything there is to know. So, after lots of requests, I decided last night to set up a group where you can post your questions and our quirky community can help answer them... which takes some of the pressure off me, because I can't keep up lately!

There's lots of great discussions happening over there (and already nearly 4000 members in 10 days!) so check it out and request to join if you'd like to. There are a few admins looking after things and I'll pop in when I can (although when I do, they tell me to 'go write that book'!! ha ha)

I have turned off the private messages on my facebook page for now, but if you need to contact me privately you can still email through the email button on my blog. I will of course still be posting on facebook as usual, but the 'chat group' is great for getting a quick answer to your questions, and you can 'search' for topics in the group too, which will be helpful. (Note: If you've sent me a private message already, I can still read and answer them, and will try to when I can, but if possible, repost it in the group, then other readers can pitch in to help.)

So that's my news for now, other than that it's still work work work on the book, and getting ready for the photo shoot which is happening in Perth next month! Yay!! (All a bit exciting!)


And now for a little recipe and a GIVEAWAY! Because I know this is what you were waiting for... right?


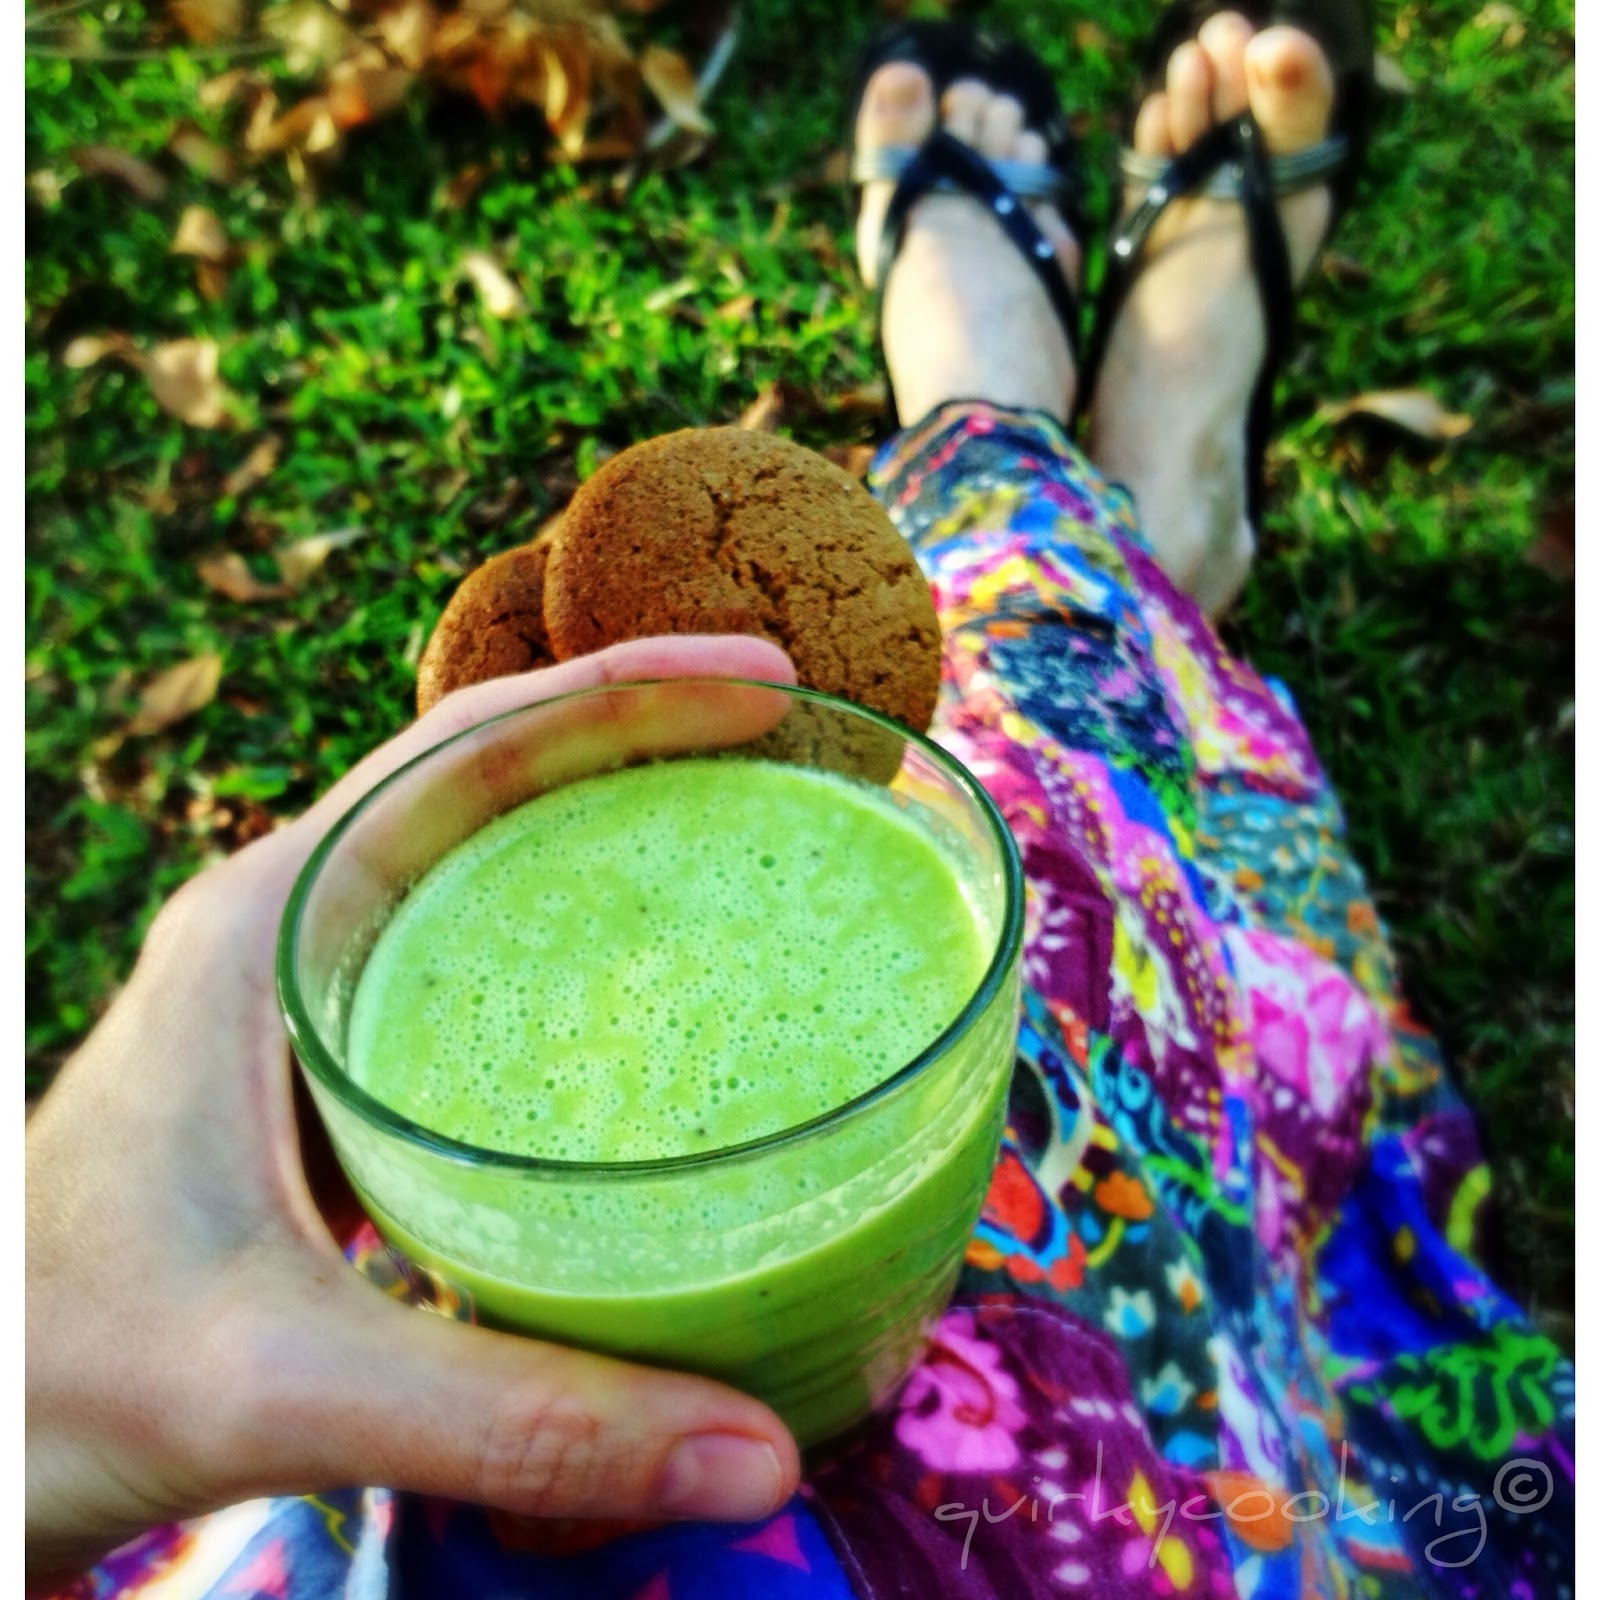
The other day my daughter was feeling sorry for herself because she'd just had her braces adjusted and her mouth was too sore to eat, so I made up this smoothie for her. (Oh, and some gingerbread biscuits.) So so yum. And because I love you guys so much, I'm not only going to give you the recipe, I'm also going to give you the chance to win one of five 'Smoothie Starter Pack' from glassstraws.com.au! (Check out their Facebook page here.) 

image.jpeg

WIN!

1 of 5 'Smoothie Starter Packs' 
Includes: 
1 bent glass straw
1 straight glass straw
1 cleaning brush

To win, all you need to do is comment on this blog post and say why you'd love some glass straws. The winner will be randomly drawn next Sunday evening (17th Nov) at 8.30pm, via Random.org, and announced here and on my Facebook page. (Winners must be Australian residents only.)

Note: If you are reading this on a mobile device, you will need to switch to web version (scroll to bottom of page) to be able to comment.

Winners: Jodie Fitch; Cassie; Deb; Rachel and Helen
Winners have been notified via email.

And here's the recipe...

Creamy Pine Lime Green Smoothie
(Serves 4)

100g activated (or raw) cashews
1 pink lady apple, quartered
1 large naval orange, peeled & halved
1 lime, peeled
200g frozen pineapple, cut in 2cm cubes
60g baby spinach leaves
300-400g Natural Raw C coconut water

Place all the ingredients into your Thermomix or a powerful blender, and blend 2 mins/speed 10.

And if you were wanting the gingerbread bikkie recipe, it's a bit of a spin off of these ones. The new version will be in my book, but these are yummy too.

So that's it from me tonight, I hope you enjoy the smoothie, have a great week.

Jo xx