Tampilkan postingan dengan label cacao powder. Tampilkan semua postingan

Minggu, 20 Mei 2012

Marike's Coconut Flour Brownies


I was browsing through photos on Instagram the other day and some coconut flour brownies caught my eye. They looked delicious, and were not only made without grains, but were also dairy free and sweetened with rapadura - just my style. So I asked hopefully for the recipe and Marike, who developed the recipe herself, was happy to share. Thanks so much, Marike! :)

Within 24 hours of getting the recipe, these were made and eaten. (Well, except for two squares I managed to hide for the next day!) They were just as delicious as they looked.

Marike converted her old faithful brownie recipe from 'flour, butter, cocoa and sugar' to 'the good stuff', and after a couple of flops, this is what she came up with. See? You don't have to feel deprived once you start eating healthy. You just have to learn how to substitute the good stuff for the bad stuff, and be willing to experiment. If you've never tried coconut flour before, don't be put off by the price - it's actually quite economical because you use a fraction of the amount you would usually use of flour in baking - it expands with liquids. If you want to save money and make your own coconut flour, take the shredded coconut that's left over after you've made coconut cream and milk with it, dehyrdrate it for 24 hours in a dehydrator, then grind it up in the Thermomix.

Marike has kindly agreed to let me share her recipe on my blog so you can all enjoy it too. Thanks so much, Marike! Here's her recipe:


And here's my Thermomix version:

Mix together in your Thermomix on speed 6 for about 20 seconds:
- 70g coconut oil
- 50g coconut flour
- 35g raw cacao powder
- 100g Rapadura
- 6 large eggs
- 1/2 tsp Himalayan or sea salt
- 1 tsp vanilla bean paste (or vanilla extract)

If you can have nuts, add and mix on speed 5 for 3 seconds to chop and mix into batter:
- 120g raw walnuts (or pecans)

Bake at 175C for 30 minutes. Remove from oven and let stand for 10 minutes before cutting, if you can wait that long. Bet you can't. Ha ha!!

Note: I also sprinkled the top of the brownies with dairy free chocolate chips before baking. Couldn't help myself. ;)

We enjoyed these with Cashew Honey Vanilla Bean Custard - delicious.


Sugar free variation: I also tried making these with dates and green stevia instead of Rapadura, but I must admit, the Rapadura ones tasted a lot better! But if you can't have Rapadura and need a less sweet alternative, try adding 100g raw dates (pitted) and 1 tsp green stevia powder instead of the Rapadura. You may need to cook it a bit longer, and the texture will be heavier, but my kids still liked them.

Rabu, 26 Oktober 2011

Green Chocolate Smoothie (Dairy Free)


I love green smoothies. A lot of people wrinkle up their noses at them and won't give them a try because they can't imagine a drink with spinach in it could taste any good. Are you one of those people? Well I'm here to tell you that green smoothies are delicious! And for those of you who haven't been game to try them yet, here's a chocolate version that will help you 'put your foot in the door' of green smoothie addiction!

I make this one (or variations of it) fairly often, and my younger kids have no idea it has spinach and avocado in it. You honestly can't taste it. So why bother adding the spinach, you ask? Because it's soooooo good for you! And most of us don't get enough raw leafy greens in our diet, especially the kids. And it's a lot easier to drink up your greens than to eat a big salad. By the way, I add the frozen avocado when I have it because it makes it so thick and creamy.

You can pretty much add any leafy greens to any juice or smoothie to make a green smoothie, but my favourite greens to use are baby spinach, lettuce or kale. I've also used vine spinach (Ceylon spinach), which I don't mind, but my kids found it a bit odd tasting in a chocolate smoothie. So if you're new to green smoothies, stick with baby spinach or cos lettuce - it's pretty bland. Add as much as you like - start with a big handful, and add more as you get used to it. You can also add leafy greens to sorbets for a 'green sorbet' - see the variations at the end for ideas.

This smoothie is based on an old favourite of ours, my Chocolate (or Carob) Almond Smoothie.

Green Chocolate Smoothie

1. First grind up the nuts, seeds and dates on speed 9 for about 10 seconds:
- 4-5 pitted raw dates
- 100g raw almonds (if you can't have nuts, try sunflower seeds instead)
- 2 Tbsp of seeds (whatever you like: chia/sunflower/pepitas/linseeds)

2. Next add the ice and grind on speed 9 for about 10 seconds:
- 200g ice (or more, depending how thick you like it)


3. Add and grind on speed 9 for 10 seconds, mixing with the spatula if needed:
- 30g raw cacao powder (if you use regular cocoa or carob powder, you may need a bit less)
- 2 frozen bananas, chopped in pieces
- 1 frozen avocado, chopped in pieces (fine to use fresh if you don't have frozen, or leave out)


4. Add the greens and water and mix on speed 9 for a minute or so, until well blended and creamy:
- 60g (2 big handfuls) of baby spinach or butter lettuce
- 600g unsweetened coconut water, or filtered water


Variations:
- Leave out the banana, increase the frozen avocado or ice, add a handful of fresh mint, and add a few more dates.
- Leave out the avocado.
- Use more or less ice depending on how thick you like it - you can always add more ice at the end if it's too thin, and whiz it up for another minute.
- Try frozen berries instead of frozen banana.
- Add a couple of spoonfuls of spirulina powder.
- Add a couple of spoonfuls of MiEssence Berry Radical (for an antioxidant boost) and/or In-Liven (for probiotics, also contains spirulina).

- Green Sorbets: Try adding a couple of handfuls of leafy greens to your sorbets - works well in just about any flavour. You can also add a couple of handfuls of fresh Italian parsley, or fresh mint, to lemon or orange sorbet - it's delicious!


Mmmmm...

Jumat, 29 April 2011

Walnut & Raw Cacao Nib Bliss Balls


I love raw cacao nibs. 

Yesterday I was trying to think of what I could make with my stash of cacao nibs (which I got for my birthday), and I decided they'd be great in bliss balls. When you need a 'pick-me-up' type of snack, these are just perfect. The mixture of dates, nuts and raw cacao make these balls like mini 'high protein power bars' - but they're much better for you than commercial power bars

So do you know why these are called 'bliss balls'? Because raw cacao just makes you feel so good!! Know why? It's not just the delicious taste... Raw cacao contains "naturally occurring phytochemicals like theobromine (considered an aphrodisiac), phenylethylamine (PEA – released when we fall in love), and anandamide (the ‘bliss' chemical)." (Quoted from the Power Super Foods website - you can order your raw cacao nibs here!) There's some more info about raw cacao with my recipe for Treat Balls, which are another version you might like to try.

I ground up the raw cacao nibs in my Thermomix, then added the other ingredients, including a little Rapadura to balance the slightly bitter taste of raw cacao. After making half of them into balls, I decided they'd be nice with a little bit of 'crunch', so I added some more walnuts and cacao nibs to the rest of the mixture. Yum! My favourites were definitely the crunchy ones, but the smooth ones were pretty good too. So take your pick - crunchy or smooth. :) Enjoy.


1. Grind up in Thermomix on speed 9 for 15-20 seconds, or until fine:
- 85g raw cacao nibs


2. Add and grind on speed 8 for 5 seconds, until dates are chopped up:
- 250g fresh dates, deseeded (eg. Honey or Medjool dates)
- 20g Rapadura
- 1/4 tsp fine sea salt
- 1 Tbspn vanilla extract (preferably a good, organic one!)

3. Add walnuts and grind on speed 9 for about 1 minute, or until mixture comes together and is smooth:
- 230g fresh walnuts (make sure they're not old and bitter!)
You could also use pecans if you'd rather.


4. If you like these smooth, go ahead and roll them into balls. If you like them with a bit of 'crunch', add the extra walnuts and raw cacao nibs and mix in on speed 5 for a few seconds, until roughly chopped:
- handful or two of walnuts
- handful of raw cacao nibs


5. Roll into balls and keep in the fridge. 


I was really glad to find some of these still left in the fridge when I got home today from a demo - I desperately needed energy! Hope you like them :)

Kamis, 10 Maret 2011

Flourless Chocolate Brownie Cookies


Need a chocolate fix? Well hold onto your tastebuds, these chocolate pecan cookies will knock your socks off!! 

I got the idea for these cookies from a recipe for 'brownie cookies' that used wheat flour, but I decided to try ground pecans instead. I'm always looking for ways to make gluten free (or even grain free), dairy free treats that are even better than their original wheat and dairy counterparts... I love pecans and chocolate together, and I was hoping the pecans would give these a chewy 'brownie' texture. They did!  I also changed the sugar to Rapadura, which gives them a richer flavour, and is of course better for you than refined sugar.


I promised to post this recipe ages ago, but I needed some photos, so today my daughter Cassia helped me make these again. (She loves to use the Thermomix, and is always quite happy to pose for photos.) I also invited my Quirky Cooking Facebook friends to join in the baking fun! A few of us baked 'together' via the internet, exchanging hints and tips as we cooked. (Check out some of their tips and variations below the recipe.) We'll have to do some cooking together again via Facebook - it was a lot of fun!

So here's the recipe - please let me know how you like it in the comments below. Recipe makes about 40 cookies.

1. Chop for 8 seconds on speed 6:
- 220g dairy free dark chocolate, broken in pieces (I use Lindt 70% cocoa - it's dairy free; or you could make your own!)

2. Melt chocolate at 50 degrees for 3 minutes on speed 1.

3. Add and mix for 20 seconds, speed 8:
- 150g pecans
- 3 eggs
- 1 tsp dry, instant coffee (or raw cacao powder)
- 1 tsp vanilla extract
- 120g Rapadura
- 1/4 tsp sea salt
- 1/4 tsp bicarb soda (opt.)


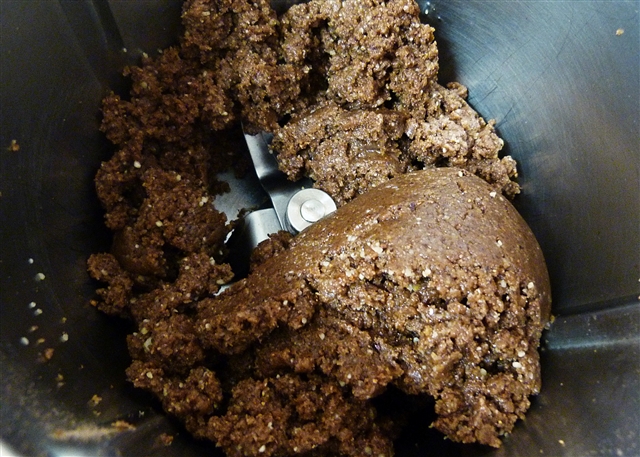
The mixture will be thick and sticky, not quite as thick as usual cookie dough. Try not to eat all the raw mixture - I know, it's hard!


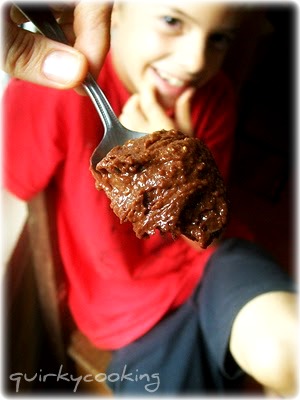
The raw mixture is soooo yummy!

4. Drop by heaped teaspoonfuls onto lined baking trays and bake at 160 degrees C for about 11-15 minutes, until cookies have risen and cracked slightly. You don't want to overcook them, as they are supposed to be slightly 'gooey' in the centre - just barely baked through! Leave on trays for 5 mins, then remove to cooling rack. They will sink down as they cool and become flatter and chewy. 


If you can manage to keep everyone from scoffing them all straight away, store them in an airtight container in the fridge - they taste delicious cold!

P.S. I think next time I'd better double or triple this recipe!

Tips and Variations:

Phiazy used a mixture of almonds and hazelnuts instead of the pecans - her cookies were a little firmer, and puffed up a little more. She also used a mixture of dark and milk chocolate, and sugar instead of Rapadura (because she didn't have any). Actually, she forgot the sugar in the first batch, but she said they were still yummy (since she didn't use 70% cocoa chocolate, so they were pretty sweet already) - they were just a little flatter. So if you don't use dark, 70% cocoa chocolate, make sure you cut down on the sugar!

Raelene made these the old-fashioned way - she doesn't have a Thermomix (yet!)... She chopped the chocolate, melted it in a double-boiler, got water in it and had to start again, ran out of chocolate and had to go to the shop again, used 100g pecans plus 50g almond meal (but found she needed more almond meal because the mixture was too thin), and used raw sugar because she'd run out of Rapadura - but they still worked! She decided next time she'd use Rapadura plus add some raw cacao powder to make them richer and more chocolatey. Despite her setbacks, Raelene decided these were definitely worth making, and even worth the extra trip to the shop!!

Jessica made these using macadamia nuts instead of pecans - yummo!!

Selasa, 17 Agustus 2010

Chocolate Orange Sorbet


Here's a quick and refreshing dessert (or snack!) that I invented for our Master Thermy Chef competition at our last Thermomix cooking class... It's been quite a hit around here!  I think I've made it about six times in the last two weeks :)  I used less dark chocolate than my original Chocolate Sorbet recipe, so this one's a bit more economical - but still very chocolatey, as I added more cacao powder.  Hope you like it :)

1.  Grind in Thermomix on speed 9 for 30 seconds:
- 100g - 140g Rapadura (depending how sweet you like it)
- peel of 1 navel orange (wash & dry orange first, then peel in the zest with a potato peeler, no white)
- 40g raw cacao powder (or cocoa powder)

2. Scrape down sides, add chocolate, and grind on speed 9 for 15 seconds:
- 50g - 100g dark 70% cocoa chocolate (make your own with this recipe, or use Lindt chocolate)

3. Remove chocolate mixture to a bowl.  (I take the chocolate mixture out and add it back on top after the ice is ground up, otherwise it freezes to the bottom of the bowl once the ice hits it.)


Don't taste the chocolate mixture - 
you might not be able to stop eating it!! Lol!

4. Add to bowl and grind on speed 9 for 10 seconds, until ice is crushed:
- 400g ice cubes (about 2 trays of ice)


It never ceases to amaze me how powerful the Thermomix is!
Look at this - 400g of ice blitzed into snow in 10 seconds!

5. Add orange, chocolate mixture, and egg white to bowl and grind on speed 9 until mixture is fine, and whizzing around, creating a vortex in the bowl:
- flesh of orange (cut off and discard the pith)
- 1 large or two small egg whites
- chocolate mixture

6. As the mixture is whizzing around in the bowl on speed 9, drop ice cubes one by one into the vortex until you reach desired consistency. You don't need to use the spatula as much if you do it this way, although it might spit a bit so it can get messy! ;)
- 400g - 500g ice cubes (2 or 3 more trays)


A bit messy - but worth it!

Eat it quickly before it melts!  Or freeze for later.

Jumat, 12 Februari 2010

Chocolate Banana-Nut Ice-Cream


Here's an ice-cream recipe that is very quick and won't make you feel guilty!!!  It's so healthy you can even eat if for breakfast - we do!  It's a great way to get the kids out of bed on a school day - just yell, 'Chocolate ice-cream for breakfast!' and they'll come running.  :)  I always buy a few bags of over-ripe bananas when they're in the throw-out box at the supermarket - just peel them and toss them in a bag and freeze them, then they're ready for ice-cream anytime you want it.  Cut them into pieces about an inch long before processing.

I don't usually measure the amounts in this recipe - it's very flexible.  But I've added approximate amounts (in brackets) for those of you who want them.

If you're looking for somewhere to buy cacao powder or agave syrup, you can buy them either at health food stores, or at online stores such as Loving Earth.

Toss into Thermomix bowl and process on speed 9 until it all comes together - about 30 seconds:
- (500g) half a TM bowl of frozen banana pieces (cut in 1 inch chunks)
- (150g) a good handful or two of raw pecans or macadamia nuts
- (20 - 30g) a couple of heaped tablespoonfuls of cacao powder (or organic cocoa powder)
- (30g) a couple of tablespoons of agave syrup, to taste (or pure maple syrup/raw honey)
(It will be crumbly at first, but keep mixing and it will come together.)

That's it!  Serve it immediately before it melts.  This makes enough for 4 - 6 people.

Note: to make it even more special, you can add some Rapadura sweetened choc chips at the end!

Kamis, 11 Februari 2010

Raw Cacao Treat Balls


These yummy little treat balls are a firm favourite at our house - the kids love snacking on them for morning tea, and they are quite filling.  I love to use cacao powder in raw recipes, as it has so much more goodness than cocoa.  It's a bit like the difference between Rapadura and refined sugar, or extra virgin olive oil and refined oils.  Regular cocoa is usually heat extracted (up to 150 degrees celcius!) with solvents.  Organic cocoas are better, such as 'Planet Organic', which is sun-dried, chemical free and fair trade - but cacao powder is the best (and is generally fair-trade also)!  (I use Planet Organic cocoa powder when cooking, but cacao powder in raw foods such as treat balls, raw slices, smoothies, and raw chocolate pudding.)

Cacao is cold pressed without solvents, and the nutrients are preserved much better than in cocoa - in fact, organic cacao has over 360% more anti-oxidants than regular cocoa!  It has 21 times more anti-oxidants than green tea, and 7 times more than dark chocolate!  Cacao does not raise blood cholesterol, it contains a fair amount of protein, and all three types of energy: fat, carbohydrates and sugar. It also contains high levels of catechin, fiber, carbohydrates, B vitamins and anti-oxidant-like substances. Calcium, Phosphates, Vitamins A, C and D occur in smaller quantities.  (Read some really interesting facts about cacao here, as well as some myths about chocolate!)

Since Cacao contains fat, sugars, carbohydrates and protein, it has historically been used as energy food -- it's energy content is high, 18500 kj/kg (2000 kcal/lb). There is no caffeine in cacao (or chocolate, contrary to popular opinion), but it does contain small amounts of theobromine, which is similar to caffeine in that it stimulates the mind, muscles, kidneys and heart - but it has less effect on the central nervous system than caffeine does. Theobromine is not addictive, and is a much gentler stimulant than caffeine (see findings here), but it's still best not to overdo it. I find cacao powder makes me feel wide awake, so don't munch out on these just before bed!  (And if you're breastfeeding, don't eat too many or your baby will happily stay awake for hours!)

If you're dairy free, you'll be pleased to know these balls are a good way to get some calcium into your diet because both the cacao powder and the tahini contain calcium in usable forms.

These are great for school lunch snacks - if your child's school is 'nut-free' you can just substitute the almonds for a mixture of pepitas and sunflower seeds.

[Amounts are very flexible - I don't generally measure, I just chuck in a couple of handfuls of dates (and sometimes sultanas or other dried fruit), and a couple of handfuls of almonds (and/or cashews and seeds), a couple of heaped tablespoons of cacao powder, a few blobs of tahini and a splash of agave syrup... and grind it all up adding more dates if it needs more moisture!]

Put all the ingredients in the Thermomix bowl and grind up on speed 9 for about 40 seconds, or until well ground and mixed and able to be squished together into balls.  If mixture is too dry, add some more dates or other dried fruit.
- 200g raw almonds
- 220g dates
- 30 - 40g cacao powder (to taste)
- a dash of pure maple syrup (to taste)
- 3 large tablespoons of tahini

Roll into balls and keep in the fridge.  Can also be rolled in dessicated coconut if preferred.