Kamis, 17 Januari 2013

Spicy BBQ Chicken All-in-One Dinner


One of the things I love most about my Thermomix is that it makes super-delicious and super-easy 'all-in-one' meals! (You may have noticed that. There's quite a few on my blog.)

Who doesn't love a meal that's quick to put together, doesn't use up every pot in the cupboard, saves electricity by cooking everything at once, and tastes delicious to boot? Not to mention the fact that steamed veges are much better for you than veges boiled to death in a pot of water. So I tend to make a lot of these 'all-in-one' meals, just varying the layers to use whatever I have. When the cooking time is finished, if there's liquid in the bowl, I often use it to make a sauce to pour over the top so nothing is wasted.

Here's one I made up the other night - chicken thighs cooking in a spicy BBQ sauce, with veges and either rice, potatoes or quinoa cooking in the basket in the bowl, and a sauce made with the juices that are left in the bowl at the end. Very simple, a great mid-week meal. It's a little bit spicy, so adjust the chilli powder to taste!

Spicy BBQ Chicken All-in-One Dinner

1. Mince garlic in Thermomix bowl on speed 7 for 3 seconds:
- 2 cloves garlic
 
2. Add remaining sauce ingredients and mix on speed 5 for 10 seconds:
- 60g apple cider vinegar
- 30g butter, ghee or oil
- 2 tsp seeded or Dijon mustard
- 2 Tbspns Tamari
- 2 Tbspns lemon juice
- 20g Rapadura or 15g honey
- 1 tsp herb salt
- 1-2 tsp chilli powder
- 2 tsp smoked paprika
 
3. Pour over chicken thighs in a bowl and marinate for half an hour. (If you don't have time you can just go ahead and cook them.)
- 1 kg chicken thighs, fat removed
 
4. Pour water into bowl, insert rice basket, and weigh in rice/quinoa/potatoes.
- 900g water
- 400g basmati rice
    OR
  350g quinoa (rinsed)
    OR   
  fill basket with thickly sliced potatoes (skin on)

5. Put lid on bowl, with Varoma on top. Add veges to lower Varoma tray, and place the upper Varoma tray on top. Line with wet baking paper, and arrange chicken on paper, drizzling with some of the sauce. Set remaining sauce aside for later.
- sliced veges: carrots, broccoli, green beans, red capsicum... or even just frozen peas and corn if you're in a hurry
- chicken in BBQ sauce


6. Start cooking for 20 minutes at Varoma temp, speed 4 for rice or quinoa, or 25 minutes for potatoes. When cooking time is finished, remove Varoma (set it on it's lid to catch drips) and remove rice/quinoa/potatoes and cooked veges to a Thermoserver or covered serving dish to keep warm. The chicken will need a little more time to cook.

7. If you cooked rice/quinoa, there won't be much 'juice' left in the bowl. Add some more liquid by carefully draining the juices off the chicken into the bowl. Also, add the reserved BBQ sauce to the bowl (from marinating the chicken). Replace lid and Varoma (bottom tray will be empty), and cook for another 10 minutes at Varoma temperature, speed 2. Chicken should be done - cut a thigh in half to check.

    If you cooked potatoes in the basket, there'll be lots of water left in the bowl. Tip all but about 2 inches of water out. Add juices from chicken and reserved sauce, replace chicken in Varoma tray, and cook as above.

 
The juices left in the bowl - BBQ marinade is added and it is thickened to make sauce.

8. Remove cooked chicken to another Thermoserver or covered serving dish. Make the sauce by adding cornstarch/arrowroot mixture to bowl and cooking at 100C for 4 minutes, speed 4.
- 2 Tbspns cornstarch or arrowroot, mixed with 2 Tbspns water in a cup


9. Serve chicken, veges and rice/quinoa/potatoes together, drizzled with the sauce.
 
As you can see, it's very handy to have more than one *Thermoserver!
They'll keep your food hot for up to three hours, so you can make dinner ahead of time and keep it in the servers until everyone's ready to eat. No more cold dinners.
 
* A Thermoserver is a double insulated stainless steel serving dish valued at $60, available only through Thermomix home demonstrations in Australia. 
 
* Special Deal for January 2013 *
You can receive TWO Thermoservers for free by purchasing a Thermomix in January,
and holding your home demonstration before the end of February!
Visit the Thermomix website for more details.

Selasa, 08 Januari 2013

Raw Chocolate Truffles

 
Raw Chocolate Truffles with Dried Cranberries

Lately I've been craving these. I'm working hard this month to keep off sugars as much as possible, for my January Body Springclean Challenge! I'm only having a very small amount of natural sweeteners like fruit, dates, raw honey, pure maple syrup, yacon syrup, green stevia, and coconut sugar. That's not so hard, but it's the chocolate I miss most. So now and then I like to have a couple of these raw chocolate truffles to satisfy that sweet, chocolate craving... usually in the late afternoon when my energy levels are getting low.


I love the silky, smooth, chocolate texture of these truffles, which is achieved by using cacao wafers (or raw cacao licor as it's also known) instead of just raw cacao powder. The cacao wafers are made from raw cacao nibs ground up into a very smooth paste, then set into wafers. The cacao butter hasn't been removed, so it gives just the right creamy texture for raw chocolates and bliss balls. They don't contain any sweeteners or additives, so they are perfect for making all sorts of delicious, healthy chocolate treats!

 You can buy Changing Habits cacao wafers here.


I made up this recipe a couple of months ago and have been meaning to get it on the blog ever since, but time has gotten away. At Christmas time, I divided the mixture in two, and mixed one half with naturally sweetened dried cranberries (deeeeeelicious!), and the other half with some naked ginger and dried apricots. So so good.


I use these organic, naturally sweetened dried cranberries - ingredients are: organic dried cranberries sweetened with organic concentrated apple juice, organic Sunflower Oil (less than 0.5%). I prefer these to the sickly sweet sugary supermarket ones. And I love that they have no preservatives.

You could mix in some roughly chopped nuts instead of dried fruit, or some raw cacao nibs for extra crunch. Or just leave it smooth and plain, and press it into a square dish and cut into small squares like fudge.


Raw Chocolate Fudge

Don't be scared of the 'secret ingredient' - banana! It doesn't taste like banana - that just helps with the texture. The chocolate is so powerful it overtakes the banana. ;) Yes, this is definitely a recipe for hard-core chocolate lovers... so beware if you're one of those strange 'milk chocolate' kinda people. (Ha ha!) For me, the darker the chocolate, the better. And the good thing about dark chocolate is you only need a tiny bit to feel satisfied. So try this recipe for a deliciously healthy, naturally sweetened chocolate hit - mmmmm...


Raw Chocolate Truffles

1. Grind almonds on speed 8 for 8 seconds to make flour, and set aside.
- 150g blanched almonds

2. Grind cacao wafers and vanilla bean for 5 seconds on speed 9.
- 250g cacao wafers
- 1 vanilla bean, cut in thirds

3. Add dates and chop for 10 seconds on speed 9.
- 170g raw dates (or regular dates - chop 20 seconds)

4. Add syrup and cook for 7 minutes at 37C, speed 3.
- 50g pure maple syrup or yacon syrup

5. Add salt, reserved almond flour, and banana and mix on speed 8 until very smooth.
- pinch Himalayan salt
- reserved almond flour
- 1 ripe banana, peeled (not over-ripe, as the flavour will be too strong)

6. Either roll mixture into small balls for truffles, or press into a square dish for fudge. Place in the fridge to harden.

These truffles will last in the fridge for a couple of weeks. Unless you eat them first. ;)

Selasa, 01 Januari 2013

January 'Body Springclean' Challenge!


Happy New Year everyone!

I hope you all had a lovely Christmas and New Year's, sharing delicious food and special times with your family and friends. We've enjoyed having family here for the holidays, it's been a fun time. (Well, except for the tummy bug that popped in for a visit for a couple of days, but let's not dwell on that...)

 
Mum preparing the gluten free cornbread stuffing for the turkey
 
Christmas dinner was lovely. We had a homegrown turkey (from our neighbour) stuffed with gf cornbread stuffing, gravy made with slow-cooked chicken stock, roasted crispy-skinned duck with orange-cherry sauce, homegrown ham (from a friend), and lots of veges. So blessed.


I was very careful not to go 'overboard' with sweets and breads over the last week, but I still feel like I've had enough to last me for a fair while. Well, I guess I did have a few cinnamon scrolls over the last month (all in the name of recipe testing, you know!)...


Then there was my mum's cherry and pecan pies, with my cashew-vanilla ice cream...


And my decadent chocolate coconut cream ice cream...


Plus a little bit of Christmas cookie making at Grandma's house...
(I only ate one - I promise!)


And a few nibbles of maple syrup & rapadura butter toffee... Hmmm, I guess all those little 'bits' add up, don't they.
 
Well, enough is enough. My body is telling me it's time for a 'spring clean' and I think I'd better listen. We've been discussing this on my Facebook page today, and over 100 people have agreed to join me in a 'body springclean' challenge this month! What about you? Want to join in too?

January is a good time to re-focus on healthy eating and healthy living. Let's share our goals for a January 'Body Springclean', and throughout the month we can keep each other updated on how we're doing - encouraging and inspiring each other to stay motivated!

Here's how:

1. Write down your 'body springclean' goal/s for this month. What's the main thing (or couple of things) you want to focus on this month to change your habits for the better? Write your goals out, nice and big, and stick them up on the wall or the fridge where you will see them every day. Then share them with us, either in the comments on this post, or on my Facebook page. If you're on Twitter or Instagram, you can share them there, using the hashtag #bodyspringclean.

If you like, take a photo of your goals and share it on my FB wall; or you can just leave a comment, either on my FB page, or on this blog post. (And don't worry if you didn't manage to start on January the 1st - begin where you are. Every day makes a difference.)

Remember the K.I.S.S. principle - Keep It Simple, Stupid! I have a tendency to make great long lists of things I'm going to do, which makes me feel very pleased with myself for being so organised. Then I put my list away and forget about it because it's too overwhelming to do all at once. I'm not going to do that this month! So these are my goals...


They might not look like much, but I get so busy I forget to drink enough water and exercise... and it's time I kicked out the sugar again! Keep your goals simple and doable and they're more likely to happen. You can always add more next month. :)

2. Every day, take a photo or write a comment to demonstrate how you met your goal that day. For example, if your goal is to have a green juice each day, let us know what you're putting in your juices, which ones you like, which ones you don't, any benefits you're noticing, etc. And take a photo now and then and post it on my FB page, or Instagram, or Twitter.

I have started a special album on my FB page, called 'January Body Springclean Challenge'. I'll post my photos there each day, and if you post your photos on my page I'll share some of yours too! It'll be fun :D

3. At the end of the month, if you've stayed motivated and shared photos and/or comments, you'll go into the draw to win a prize! (YES, there's PRIZES!!) Here's what you can win (one prize per person):

- 1 of 3 vouchers from Organics on a Budget for $25 to spend in their online store

- 1 of 2 ebook bundles from Blue Sky Health & Fitness, valued at $89, which include:
* Healthy Lifestyle Guide
* 6 Week Clean Eating, Healthy Lifestyle Recipe & Meal Plan (dairy, wheat and sugar free)
* 6 Week Exercise Plan

- 1 x 28 Day Body & Mind Transformation Bootcamp, from Mummy Bootcamp @ Home, valued at $149

- 1 of 3 Regenerating Night Creams from Cosima Skincare (Certified Organic Cosmeceutical Skincare), valued at $49 each.

- 1 400g container of Organic Barley Spirulina Blend from Nutra Organics, valued at $49.95.

- 1 280g tin of Coconut Sugar from Loving Earth

- 1 250g packet of Lucuma powder from Loving Earth


Thank you for the donations, guys!!

 
So come on and join in the fun, and do your body a favour. Let's do this!! Who's in?
 
 P.S. If you need some ideas of where to start, here's a few - but don't try to do them all at once!
- substituting natural sweeteners for refined cane sugar
- getting rid of wheat
- bye bye dairy
- going grain free
- starting to menu plan
- 10 minute a day workout

Selasa, 25 Desember 2012

Pomegranate Lemonade

* This recipe includes support for Paprika * 


It's Boxing Day. A day to clean up the messes, enjoy the leftovers, eat lightly, and relax.  And it's also the day I started my blog, four years ago!

Seems a long time ago that my friend Bel gave me my first blogging tips, and I posted my first little blog post... Thanks to all of you who have followed along! I've learnt a lot over the last four years, and it's partly thanks to all of you, from near and far, who have cooked with me and shared your results, thoughts and tips. I hope I've encouraged you in your creative cooking adventures - I know you've encouraged me in mine! So thank you.


I thought I'd better keep up the tradition of posting something on my blog birthday, so here's a celebration drink which is perfect for this time of year - Pomegranate Lemonade.

I love pomegranates, and the other day when I was browsing the shelves of our local health food store I found a bottle of pomegranate juice concentrate. I just had to buy it, as I'd never seen it in the shops here before, and I knew my Grandmother uses it as dressing for fruit salad. Well, the other day I started to make some of my Raspberry Lemonade, but I had a brainwave and made this instead. It's mouth-wateringly refreshing. I hope you enjoy it too!

Have a lovely, relaxing Boxing Day... and if you happen to have a pomegranate, some lemons, and some pomegranate juice on hand, I hope you'll try this!


Pomegranate Lemonade


1. Grind rapadura on speed 9 for 10 seconds.
- 60g Rapadura

2. Add ice and grind on speed 10 for 10 seconds.
- 300g ice

3. Add lemons, water and pomegranate juice and cover hole in lid with a cup that seals the hole. (I don't use the MC for this as the water squirts out the gap as you pulse - you'll need to hold the cup onto the lid firmly so it doesn't make a mess!) Lock lid, and pulse 3 times on Turbo, or until lemon is chopped roughly.
- 2 lemons, washed, ends cut off, and quartered (not peeled)
- 100g pomegranate juice concentrate
- 500g water

4. Remove bowl lid, add soda water to the 1 1/2 litre mark and push rice basket carefully down into bowl. Pour the juice into a large 2 or 2 1/2 litre jug, holding the basket in the bowl with the spatula to strain. Add more soda water to bowl, swish around, and pour. Repeat until jug is full or soda water is all added. I use a full 2 litre bottle of soda water, so it works out to about 2 1/2 litres of juice.
- 2 litre bottle of soda water

5. Add pomegranate arils and lemon slices if desired, and serve with extra ice.
- arils from 1/4 of a pomegranate
- a few slices of lemon

Minggu, 23 Desember 2012

Brioche Cinnamon Scrolls ~ Prepare Ahead


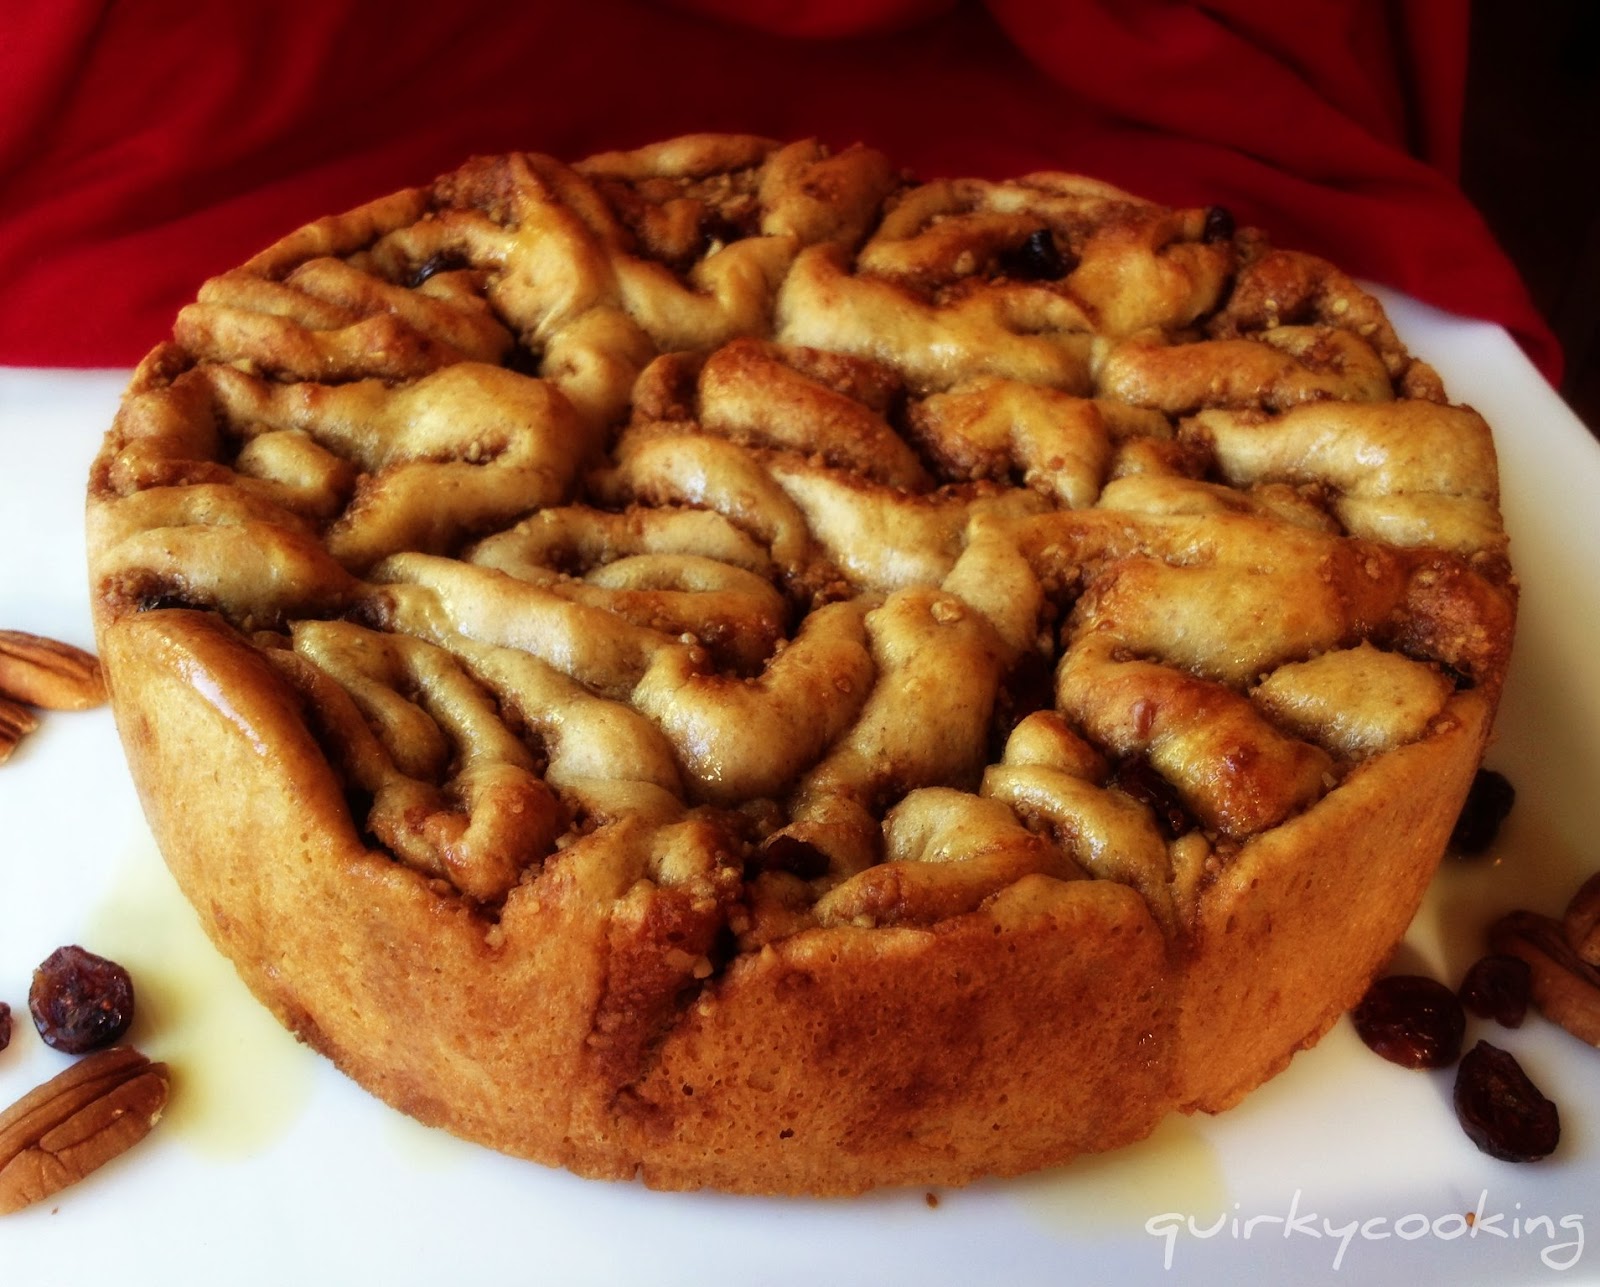
Okay, by popular demand, here's my recipe for dairy free cinnamon scrolls made with brioche dough, that you can prepare ahead and bake another day. We usually have cinnamon scrolls for Christmas breakfast, but we've had so many in the last month while I've been testing my recipes, that I really think we'll give it a miss and have something else this year. I never thought I'd say this, but I'm all cinnamon-scrolled out. But for those of you who aren't, here's the recipe! (Don't worry, by New Year's I'll probably be craving these again... these would be perfect for a lazy New Year's breakfast!) :D

By the way, if you're gluten free and wanting some cinnamon scrolls too, here's a recipe that looks good - I'm hoping to try it out soon, but if you beat me to it, let me know how it goes!


First, make brioche dough. (This is my spelt, dairy free version - if you're not dairy intolerant, you can use the regular recipe in the Thermomix Everyday Cookbook.)

1. Warm milk and rapadura at 37C for 2 minutes, speed 1:
- 300g rice-almond milk (or preferred milk)
- 30g Rapadura

2. Add remaining ingredients and mix for 10 seconds on speed 7, then lock lid and knead on interval speed for 2 minutes.
- 2 tsps instant yeast (1 sachet)
- 1 tsp salt
- 80g macadamia oil (or butter)
- 650g white spelt flour
- 1 egg

3. Wrap dough in a silicon bread mat (or place in oiled bowl and cover), and rise in a warm spot until doubled. Meanwhile, prepare filling.

4. Filling: Mix ingredients on speed 5 for 5 seconds, then set aside:
- 120g Rapadura
- 120g pecans or walnuts
- 2 tsp cinnamon
- pinch of sea salt
- 2 Tbspns coconut cream (or ghee or butter)

5. When dough is risen, roll it out on silicon bread mat to make a large rectangle, about 1 cm thick. Spread with soft butter or coconut cream. Sprinkle with all the filling, and dried cranberries or other berries.
- 2 Tbspns coconut cream (or soft butter)
- filling
- a couple of handfuls of dried, naturally sweetened cranberries (or fresh blueberries)
(I love these cranberries from
Honest to Goodness - they're sweetened with apple juice concentrate, and are very plump and delicious!)

6. Roll dough up into a log, lift carefully onto a cutting board, and cut slices about 3cms thick with a serrated knife. (If dough is too sticky, chill until firmer and easier to work with.) Lay slices in two greased or lined springform tins, bunched up together to fit them all in. (You can also cook these in cake tins, or even just on pizza trays. I find an enclosed tin works best though, so they don't spread out too much. They will dry out if they're too thin.)

7. If cooking straight away, drizzle with butter or coconut cream, then leave to rise until nearly doubled. Preheat oven to 200C while scrolls are rising. Bake for about 30 minutes, or until golden brown.
- 2 Tbspns coconut cream (or melted butter)

Drizzle with glaze while warm:

8. Glaze: Place ingredients in Thermomix bowl and cook at 100C for 2 minutes, speed 1:
- 50g pure maple syrup (or Rapadura)
- 50g coconut cream (or regular cream)
- 1/2 tsp vanilla extract


Preparing ahead to bake later:

- Quickest prepare ahead method: Don't drizzle with cream or butter, just cover the tin with plastic bags and place in the coldest part of the fridge overnight. The next morning, remove bags, drizzle with the melted butter or coconut cream, place in cold oven and turn it on to 200C. The bread will finish rising as the oven warms up, and will be baked in about half an hour. Drizzle with glaze and serve.

- Freeze ahead method: as above, but half rise then freeze. When ready to bake, allow to thaw in a warm spot (I place in cold oven with a pan of boiling water underneath) for about 1 1/2 to 2 hours (less if you are making scrolls in small tins). Set the timer so you don't forget they're there! They should be risen and thawed out before you turn on the oven. Drizzle with butter/cream, cook at 200C for about 30 mins or until golden brown. Top with glaze and serve.

Tip: You can make this a few days ahead, freeze, thaw in the fridge Christmas Eve, then finish thawing Christmas morning in a warm spot, then bake - that cuts down on thawing time for frozen scrolls.


Senin, 17 Desember 2012

Quick Maple Pecan Cinnamon Scrolls

* This recipe includes support for Paprika * 


Cinnamon scrolls are a favourite breakfast at Christmas time in our family. Usually I'll make a batch of yeast dough scrolls and freeze or refrigerate them unbaked, then thaw and bake them on Christmas morning. I'll be explaining more about that in the next post. But if you're wanting a quick, yeast-free version, this is a great one to try. It'll only take you about an hour from start to finish. A word of warning, though - this recipe is a little bit naughty! LOTS of butter and rapadura... But it is Christmas - that's my excuse! ;-)

For a dairy free version, you could try ghee if you can have it; or use macadamia oil in the dough, and coconut cream on the rolled out dough instead of melted butter. It won't be quite as caramelly and sticky, but still good.

Okay, keeping this short as I've been trying to get this posted for two days, and I'd better hurry up before there's a riot on Facebook!!

Oh, and speaking of my Facebook page, there are now over 10,000 of you following!! WOW! So thank you to all who follow and contribute to the discussions - I learn so much and really enjoy hearing from you all. ❤


Quick Cinnamon Scrolls
*This recipe has Paprika support*

Preheat oven to 220C. Grease a 24 cm springform tin with butter and set aside. (Or you can use ghee or coconut oil, or baking paper.)

1. Prepare filling - mix together first five ingredients on speed 5 for 5 seconds - then set aside.
- 100g Rapadura
- 100g pecans or walnuts
- 2 tsp cinnamon
- pinch of sea salt
- 1 Tbspn butter

2. Mix dry ingredients on speed 8 for 6 seconds to 'sift'.
- 450g plain, unbleached spelt flour (not wholemeal)
- 1 tsp baking powder
- 1/2 tsp baking soda
- 1/2 tsp sea salt

3. Add wet ingredients and mix on speed 6 for 6 seconds, then on interval speed for 20 seconds. (Don't forget to lock the lid, or interval speed won't work!)
- 200g almond or rice-almond milk
- 1 tsp apple cider vinegar or lemon juice (helps with rising)
- 80g soft butter
- 80g pure maple syrup

4. Sprinkle silicon dough mat (or counter top) with a light dusting of flour, and turn dough out of bowl. Give it a quick, gentle knead to form a ball, then press out gently with your hands to form a rectangle about 1 1/2 cms thick.

5. Melt butter. Spread 2 tbspns over dough and sprinkle with filling, leaving a 1 cm border around the edges.
- 4 Tbspns melted butter (Note: Reserve 2 tbspns for topping. Can be melted in tmx at 100C for 30 seconds or so, speed 1.)
- prepared filling

6. Roll up the dough into a log shape, lift carefully, and place on a cutting board. (If the dough is too sticky, roll it up in the bread mat and place in the fridge or freezer to chill until firmer and easier to handle.)

7. Cut the rolled up dough into scrolls with a large serrated knife, making the slices 2-3 cms thick. Place them in the prepared springform tin, bunched up together, cut side up. Drizzle with remaining 2 tbspns melted butter.

8. Place in hot oven and cook for 20-25 minutes, until golden brown.

9. While scrolls are cooking, make the maple glaze. Place ingredients in Thermomix bowl and cook at 100C for 2 minutes, speed 1.
- 50g pure maple syrup (or Rapadura)
- 50g coconut cream (or regular cream)
- 1/2 tsp vanilla extract

10. When scrolls are cooked, drizzle over the glaze. Serve warm.

Keep in an airtight container for a couple of days. Best eaten on day of baking. (That shouldn't be a problem. Ha ha!!)


This recipe inspired by my mum and sister's recipes, this one from Bakingdom,
and my own version, all rolled into one. :)

Sabtu, 15 Desember 2012

Luxurious Homemade Moisturiser

*


I love to make homemade gifts for Christmas presents for my friends and family. This year I thought I'd whip up a few body products in my Thermomix, with ingredients that are all natural and good enough to eat! (Well, I don't suppose you'd really want to eat this, but it's nice to know it wouldn't hurt you if you did.)

There's a lot of scary ingredients in the body products you buy in shops, so I always avoid those by buying mostly from MiEssence. I love that they are Australian and use good quality, organic, food grade ingredients. But now and then I make my own, just for fun.

I started making a few of my own body products before I ever got a Thermomix. Actually, I remember making lip sticks and lip glosses with my sister as teenagers, stirring concoctions on the stove... Some of those were pretty scary. Especially the one that stained my lips bright pink for 24 hours. Don't worry, this is nowhere near as scary.


This recipe is based on one by Jackie French (whose books I've always loved), which was in a Women's Weekly recipe magazine I had years ago. I've changed it around a little to use the ingredients I generally have in my cupboard, and have also made it Thermomix-friendly. To make this traditionally you need to warm and stir the oils and wax for 15 minutes in a double boiler, then whisk for a few minutes to beat air into the cream until it's thick and emulsified. But if you have a Thermomix it's much simpler - no standing and stirring, no double boiler necessary, and no hand-whisking. So this really is a very simple present, but I promise it will be well received! The cream is thick and luxurious, and smells amazing.

I know some of you will ask how long this cream lasts - I'm sorry, I really don't know. The ingredients are oils that will sit on your shelf for years and be fine, so I figure it should last for ages... but just to be on the safe side, store the cream in a cool, dark spot - like in a cupboard. A small pot of moisturiser will be fine at room temp for a long time. 

* UPDATE * Tracey has sent a message to say that it is the bacteria in the water which reduces shelf-life. She uses distilled water or boils tap water for 10 mins. You can also add a teaspoon of vitamin E oil which will inhibit bacteria growth. ( Squeeze out a capsule if you like!). That in itself is moisturising as well. (Thanks Tracey!)

I've used rose water and lavender essential oil in this batch. You could use all rose water, or orange flower water, or a mixture of water and essential oils of choice. Add the oils sparingly, mix in, then check to see if it's enough. You don't want an overpowering smell - it's better to have too little than too much. You can always add more if you need to. You can also change the base oils around a little - there's some suggested variations under the recipe.

Enjoy!


Luxurious Homemade Moisturiser

     Use as a body moisturiser for silky soft skin. Also lovely as a night cream for your face.

Makes approx. 500g

1. Weigh oils and beeswax into the Thermomix bowl and cook for 15 minutes at 60C, speed 2, or until all the beeswax is melted:
- 130g apricot oil
- 260g macadamia oil
- 50g beeswax pellets or a block of beeswax chopped up in small pieces

[Note: You can buy beeswax as pellets, blocks, sheets or candles - just chop it up roughly if you don't have pellets, then chop it finer in the Thermomix before adding the oils. The good thing about using a block of beeswax is it's usually more pure. Do not subsititute paraffin wax.]

2. Add and mix on speed 6 for 3 minutes, scraping down halfway through:
- 2 Tbspns rosewater or orange flower water (available from Chemists - although grocery store rose water essence will work too)
- 4 Tbspns distilled or boiled water
- 1/4 to 1/2 tsp lavender or rose essential oil; or orange essential oil if using orange water
- 1 Vitamin E capsule (squeezed out)

3. Pour into clean pots or jars straight away, while still warm.

Variations:
~ use any mixture of macadamia, apricot, avocado and almond oil for the base oils
~ use orange flower water instead of rose water, with orange or bergamot essential oil
~ omit essential oil and filtered water, and use 6 Tbspns rose water or orange flower water instead
~ omit flower waters, use 6 Tbspns filtered water and 1/2 tsp essential oil of choice (or a little more if needed)