Minggu, 27 November 2011

Thermomix Menu Plans - 28th November


How can it be Monday again already? I'm sure the days speed up as it gets closer to the end of the year! Although the kids thinks time slows down as it gets closer to Christmas... Miss C has been begging me for weeks to put up some Christmas decorations. I finally gave in and put up a few, and we've done a little bit of Christmas cooking already too. The gingerbread men are all gone (I think we'll go through a few batches of those!), so we're hoping to make some more this week. We have quite a large collection of cookie cutters, because we have a family tradition of making cut-out Christmas cookies with all the kids (cousins, neighbours and friends) every December, which is a lot of fun. And I just won some animal shaped cookie cutters from Edible Issues' Spring Hill Farm gluten free baking kit giveaway, which the kids are excited about! So lots of cookie making is planned. A plate of hand decorated cookies are a great gift for neighbours, school teachers and friends. And it keeps the kids busy on the holidays.


As we get closer to the end of school, I'll be posting some more holiday cooking ideas... still a bit crazy here with running Thermomix Christmas Cooking Classes, finishing up school work, and getting people's Thermomixes ordered and delivered before Christmas. What a great present! If you're wanting a Thermomix for Christmas, make sure you order before the 9th of December to get it in time... And don't forget there's a special deal at the moment where you can pay it off over 12 months, interest free, no deposit. Woo hoo!!!


Mother's Day Mess - a great alternative to the usual Christmas trifle!


So another busy week for me this week, but I'm sure I'll manage to fit in some baking. I don't put my baking on my menu plan, as I just fit it in wherever I can. Here's some of the things I'm hoping to make this week (both baking and pantry staples):
- Gingerbread men
- Mini gluten free, egg free, dairy free gingerbread cakes
- Dark chocolate bark with craisins and roasted almonds and pistachios
- Gluten free Christmas cake (based on the Celebration cake in the EDC, but with my gf flour mix)
- Dairy free German chocolate cake (for my hubby's birthday)
- Gluten free waffle iron brownies with chocolate sauce
- Gluten free bread (Cyndi O'Meara's recipe)
- Spelt artisan bread
- Christmas wreath bread
- Blender batter berry muffins
- Quick quinoa granola
- Mango butter (from Melanie Avery's new cookbook, "Let's Celebrate Christmas - Additive Free")
- Chicken stock paste
- Spelt tortillas
Here's a youtube clip I made recently to show the method of making your own tortillas/wraps. It's very easy, and they taste a lot better than shop bought ones, not to mention being a lot healthier!


Here's my menu plan for this week - I hope you'll share yours too, and link to it below so we can all get some inspiration from each other. For link up instructions, check out Thermomix Menu Plans; or if you're new to menu planning and need a little help, read How to Menu Plan. If you'd like a menu plan template that you can print out and write your weekly plan onto, there's one here at My Little Thermomix. Have a great week!

Monday:
(lunch) Chicken & cashews with coconut rice and coconut-cashew satay sauce (tmx - to show a new Thermomix owner how to use her Varoma)
(dinner) Boiled egg version of Curry in a Hurry (tmx)

Tuesday:
(lunch) Baked potatoes & salad (sandwiches for kids - school day)
(dinner) Grain free pasta made with vege pasta sauce (tmx) & zucchini 'noodles' made with vege spiralizer & steamed in Thermomix

Wednesday:
(lunch) Thermomix demo here
(dinner) Salmon salad pizza (dairy free, using spelt artisan dough - tmx) and birthday cake for hubby!

Thursday:
(lunch) Pasta e Fagioli (tmx - using gf noodles)
(dinner) Roast chicken & veges (for family, while I'm cooking at our Thermomix Christmas Class!)

Friday:
(lunch) Chicken & brown rice soup (tmx - using leftover chicken)
(dinner) Zucchini & smoked salmon fritters (tmx - from Melanie Avery's new cookbook "Let's Celebrate Christmas - Additive Free") & salad

Saturday:
(lunch) Thermomix Christmas Party!! I'm taking a Christmas potato salad (tmx),Mother's Day Mess (obviously it doesn't have to be Mother's Day to make this!), chocolate almond pistachio cranberry bark, and Christmas wreath bread (tmx).
(dinner) Fish sandwiches (bread made in tmx)

Sunday:
(lunch) Roast lamb & veges, gravy made in tmx
(dinner) leftovers


Phew! I've got lots of cooking to do... better go get started!

Waffle Iron Brownies


Waffle Iron Brownies (gluten free version)
with Dairy Free Chocolate Sauce (recipe below)

 
This is just a quick post to share a recipe that's an old favourite in our chocolate-loving home... Waffle Iron Brownies! I can't remember where I first came across this recipe, but I've converted it to a healthier version, and I make the batter in my Thermomix.

Now and then we have these for breakfast for a special treat - or for afternoon tea when we feel like cake and there's nothing baked. These are very quick to make, so if you have a sudden influx of hungry children on the holidays, remember this recipe. Our kids love to break the waffles up into little hearts, drizzle them with cashew cream or maple syrup - or sometimes chocolate sauce for a special treat - and run off with one in each hand. Or maybe two in each hand if they can get away with it!

I make these with either spelt flour or gluten free flour. I use this gluten free flour mix here when making them gluten free. They turn out a little less crunchy, but still delicious.


Waffle Iron Brownies

1. Melt and mix at 100 degrees, 2 minutes, speed 3:
- 110g butter or coconut oil
- 30g organic cocoa (or raw cacao powder)

2. Add and mix on speed 5 for 10 seconds:
- 100g Rapadura
- 40g water
- 2 eggs

3. Add and mix on speed 4-5 for 10 seconds, depending on how finely chopped you like the nuts:
- 50g pecan nuts (optional)
- 170g unbleached white spelt flour (or gluten free flour)
- 1 tsp baking powder
- 1/4 tsp fine sea salt

4. Heat waffle iron, oil if necessary, and drop a couple of big blobs of batter onto hot iron, so that when it spreads out it will cover the surface of the iron. Close quickly and allow to cook until browned.

5. Serve with cashew cream or pure maple syrup. Or for a special treat, some homemade chocolate sauce and cashew cream!

Quick, dairy-free chocolate sauce:

Cook in Thermomix - 2 mins, 60 degrees, speed 2:
- 30g coconut oil or butter
- 80g-120g dark chocolate chips or dark chocolate broken in pieces (depending on how thick and chocolatey you like it!)
- 30g rice malt syrup (or honey)
- 30g rice-almond milk (or other milk)
- 1 tsp vanilla extract
Use more or less chocolate depending on how thick you like your sauce. Once it's cold, it will set to a chocolate spread consistency, and you can eat the leftovers on toast like nutella.

Minggu, 20 November 2011

Thermomix Menu Plans - 21st November


So how's the menu planning going, guys? It was great to see a few of you are menu planners too. And for those of you who aren't (as yet), don't be frightened off because you think your plan has to be perfect and complete and you can't deviate from it. If you're just starting, why not pick five or six main meals for this week and shop for those ingredients, then fit them into your week as you go. That way you have a day or two free for leftovers, or sandwiches, or eating out, or for 'impulse recipes' (which is what I call those recipes that jump out at you from the internet, magazines, cookbooks, etc, and you just have to make them right away!!) You don't have to say, 'Monday we're having such-and-such...'; you can just say, 'Here's the main meals I'm planning to make this week'.

Some people are natural list makers - like me - and can plan way ahead and stick to it - unlike me. I often 'tweak' my menu plan, changing meals around to different days, having leftovers instead of the planned lunch, etc. But whether you stick to a strict plan, or have a more flexible plan, the idea is to have a plan of some sort, because it will decrease your stress levels and save you money. So even if you don't feel like you can go 'the whole hog,' just start somewhere, and see what a difference it makes.


We have smoothies every day! (This is my Green Chocolate Smoothie)


Here's a few other ideas I find helpful for saving time with meal preparation (and preparing school/work lunches):

- When you buy your salad greens for the week, go ahead and separate the leaves and wash them well with cold water, spin the water off in a salad spinner, and place in bags in the fridge ready to use. It's much quicker to whip up a salad at dinner time, or put together sandwiches for lunches, if this step's already done. (And it takes up less room in the fridge than whole lettuces do.)

- Wash, peel and/or cut up raw vege sticks (carrot, celery, capsicum) for snacks and lunches in one big lot, wrap them in a damp tea towel and keep them in the fridge. You'll be surprised how long the veges stay fresh and crisp kept this way! This is great for kids, as they can get some vege sticks to snack on whenever, even if you don't have time right then to cut them up.

- If you have lots of fruit that is ripening too quickly, cut it up and freeze it in small sandwich bags. Pop a little bag of frozen fruit into kid's lunch boxes (mine like strawberries, pieces of orange, and grapes). It's also handy to have fruit pieces pre-frozen to use in smoothies, sorbets, fruity dream, crumbles, cobblers, cakes, muffins, jams, etc.

- If you've got the oven on cooking a casserole or roast, go ahead and bake bread, cake, muffins, etc for the week at the same time. You can freeze slices of cake, muffins, biscuits, slice individually wrapped, which is handy for quick lunch box packing, or for grabbing a snack to take with you when you're going out for a while.

- If anyone in the family takes a cooked meal to work, serve it out into their container when serving up the plates for dinner. That way it's ready to go for the next day, and you don't have to worry about whether there's going to be enough left over from dinner.

- And don't forget to look at your menu plan each night for the next day so you can get out any meat that needs thawing, or soak anything that needs soaking!


Sue-Ellen's Singapore Noodles - a firm favourite here!


Okay, so here's my plan for this week... not including all the baking I'll be doing for family and Christmas class preparation!


(P.S. Sorry I didn't get my Huevos Rancheros recipe up yet - will try again tomorrow!)

Monday:
(lunch) Tuna fishcakes (prepared in tmx) with raw vege sticks & homemade mayo (tmx)
(dinner) Leftover roast meat pie (tmx) with green salad; also cooking mini meatballs and spelt bread rolls for kid's lunch tomorrow while pie is cooking

Tuesday:
(lunch) Mini meat balls (tmx), spelt bread rolls (tmx), raw vege sticks
(dinner) Vege spaghetti (tmx - a double batch of vege pasta sauce so I can freeze some for another day) & salad

Wednesday:
(lunch) Quinoa & chia seed flatbread (tmx) with tuna, avocado, salad
(dinner) Fish, mashed potatoes, steamed veges (potato & veges cooked at same time in tmx; fish coated in cornmeal & shallow fried)

Thursday:
(lunch) Baked potatoes, salad and a big chocolate green smoothie (tmx) for energy - it's going to be a big day! Thermomix Christmas Cooking Class in Innisfail this evening...
(dinner) Leftover spaghetti sauce in slow cooker with chicken breasts/thighs, cooking all afternoon, for family to have with pasta & salad

Friday:
(lunch) Tuna pasta (tmx, from EDC - keeping it simple because I'll be tired!)
(dinner) Baked pumpkin, bacon & baby spinach risotto (tmx - based on this recipe, with baked pumpkin & spinach stirred in at the end) Cooking ahead and leaving in Thermoserver for family as I'll be at a demo.

Saturday:
(lunch) Potato salad (steamed in tmx) with sun dried tomato mayonnaise (tmx)
(dinner) Sue-Ellen's Singapore Noodles

Sunday:
(lunch) Cold meat & salads (coleslaw in tmx)
(dinner) Leftovers/sandwiches

Amigo enjoying a fruit smoothie :)

So what's on your menu this week? Link up below!

Jumat, 18 November 2011

Double Whammy Chocolate Cake


When my big sister was about seventeen, she used to buy 'Australian Gourmet Traveller' magazines. She loved to cook (yep, it runs in the family), and one of her favourite recipes was a flourless chocolate fudge cake. We loved that cake. I used to watch her make it, whipping up the egg whites, folding them into the rich chocolate batter, carefully placing it in the oven where it would rise, form a crispy crust, then the crust would crack and slightly crumble to reveal a dark, fudgy interior. She'd dust it with cocoa and we'd savour each bite. For some reason I never thought to ask her for the recipe until a couple of months ago when she came for a visit. Unfortunately, the recipe was long gone. But when she went home she sent me a few versions that are similar. One of them had a buttery, chocolate concoction on top that sounded amazing - but of course it had lots of sugar and dairy in the recipe. So I decided to come up with my own version, and after many trials and errors (which were happily eaten by my family and friends), here it is, the long-awaited... [drum roll...] Double Whammy Chocolate Cake recipe!

This is a very rich, decadent cake that has two layers - a flourless chocolate cake for the base, and a chocolate mousse-ish layer on top. A delicious 'double whammy' of chocolate. The method for each layer is very similar (and the ingredients are mostly the same) - but the base is baked, and the top is thickened with agar agar. Because of all the eggs (eight altogether!), dark chocolate and Rapadura, it's not something you'd make every day - but it's perfect for special occasions. It's similar to a chocolate cheesecake, except it's dairy free, gluten free, grain free and nut free... which is why I'm so excited about it!

The two layers

I love flourless cakes made with ground almonds or hazelnuts, but a lot of people can't have nuts. And if you can't have gluten or dairy either, eating cake becomes a very rare pastime. Which I think is very sad. So if you are one of those people, I hope this recipe makes you very happy. (And I'm pretty sure that even if you can have gluten, dairy and nuts, this cake will still make you very happy!) Enjoy.


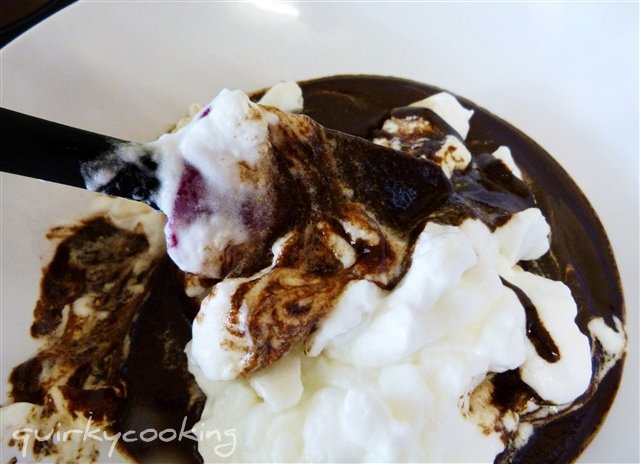
You really only need a thin sliver of this cake - it's very rich!


Double Whammy Chocolate Cake

Preheat oven to 150 degrees Celcius.
Line a springform cake tin with baking paper and set aside.

1. Grind Rapadura on speed 9 for 30 seconds in a very dry bowl:
- 200g Rapadura
    Tip into a small bowl and set aside.


2. Break chocolate in pieces, weigh into Thermomix bowl and grind on speed 8 for 10 seconds:
- 240g dark, dairy free chocolate (eg. homemade chocolate or 70% cocoa Lindt chocolate)
    Tip into another small bowl and set aside.

3. Weigh into Thermomix bowl and cook at 50 degrees for 3 minutes, speed 3:
- 120g of the ground chocolate
- 120g coconut oil (cold pressed)
    Allow mixture to cool to 37 degrees.

4. Add Rapadura, cocoa and stevia to the chocolate mixture and begin mixing on speed 5. While mixing, separate 4 eggs, adding yolks to mixture through the hole in the lid as you go. Turn speed off once you get to 5 minutes.
- 100g of the ground Rapadura
- 1 Tblspn organic cocoa (or cacao) powder
- 4 egg yolks


Green stevia powder

Scrape the chocolate mixture into a large mixing bowl, set it aside, and wash out the Thermomix bowl really well. (Or if you have a second bowl, leave the chocolate bowl unwashed to use for the chocolate topping, and use the second bowl for the egg whites.)

5. Insert the butterfly into the dry, clean bowl, and whisk the egg whites and cream of tartar on speed 4 for 4 minutes, until stiff:
- 4 egg whites
- a pinch of cream of tartar


6. Fold the egg whites gently into the chocolate mixture in the mixing bowl, using a spatula, until just combined.


7. Pour batter into lined cake tin and bake for approximately 1 hour at 150 degrees C, or until a knife inserted in centre of cake comes out clean.

8. Set cake aside to cool while you make the topping. Start off with the same method as you used with the cake - melt together the remaining chocolate and coconut oil at 50 degrees for 3 minutes on speed 3. (Use the first bowl that had chocolate mixture in it, if you have two - no need to wash out.)
- 120g ground chocolate
- 120g coconut oil (cold pressed)
    Allow mixture to cool to 37 degrees.

9. Add remaining Rapadura, cocoa and stevia to the chocolate mixture and begin mixing on speed 5. While mixing, separate 4 eggs, adding yolks to mixture through the hole in the lid as you go. Turn speed off once you get to 5 minutes.
- 100g ground Rapadura
- 1 Tblspn organic cocoa (or cacao) powder
- 1/4 tsp green stevia powder
- 4 egg yolks

10. Sprinkle agar agar over water in a measuring cup/jug and mix in until it dissolves. Add to the chocolate mixture and mix on speed 5 for a few seconds until well mixed.
- 2 heaped teaspoons agar agar
- 1/3 cup room temp water


Agar agar powder

The chocolate mixture will become thick and creamy, kind of like a pudding consistency - like this:


11. Scrape the chocolate mixture into a large mixing bowl, set it aside, and wash out the Thermomix bowl really well. (Or if you have a second bowl, use the one you already used for egg whites again for the next batch. No need to wash out unless you got some chocolate mixture in it.)

12. Insert the butterfly into the Thermomix bowl and whisk the egg whites and cream of tartar on speed 4 for 4 minutes, until stiff:
- 4 egg whites
- a pinch of cream of tartar

13. Fold the egg whites gently into the chocolate mixture in the mixing bowl, using a spatula, until combined. Pour topping mixture onto the cake in the springform tin. It doesn't seem to matter if the cake's not completely cool, as the topping is quite thick and will set anyway.


14. Cover the cake and set it carefully in the fridge to set overnight. Or if you're impatient, place it in the freezer for a couple of hours, then the fridge. It should set so that the topping is firm and can be sliced without losing it's shape.

This cake will keep for up to a week in the fridge, so it's great to make ahead if you're taking it to a party. Or you could just make it for yourself and eat a little tiny slice every day for days on end... ;) Just freeze the individually wrapped slices and they'll last for ages. And they taste great straight from the freezer too - like an ice cream cake!

Sigh. Mine's all gone now, and I've finished testing this recipe. I need to think of another excuse to make it now...


Tips & Variations:

* It's very handy to have two Thermomix bowls when making this recipe! You can have one bowl for the egg whites, one for the chocolate mixture, and it's a lot quicker and easier. But if you only have one bowl, that's okay - this cake is still worth the little bit of extra work.

* Room temperature egg whites whip up the best, so leave the eggs out of the fridge for a while before you make this.

* I buy my coconut oil in bulk either through my co-op or on the internet. It's a lot cheaper that way. If you'd rather, you can use butter instead of the coconut oil.

* The green stevia is added to cut down on the amount of Rapadura used. If you want to you can increase the Rapadura to 250g and leave out the stevia. Or you could cut the Rapadura down further and use more stevia - eg. 80g Rapadura + 1/2 tsp stevia for the base, same for top. If you can't find green stevia, you can order it online here - it tastes better than the white stevia powder or stevia liquid, and is just the dehydrated leaves, ground up.

Sabtu, 12 November 2011

Thermomix Menu Plans - 14th November


Do you come home at the end of a long day, tired and hungry, and stand in the kitchen with the fridge door open hoping dinner inspiration will bounce out at you? Everyone's cranky and there's no meat thawed out, everything you think of you don't have all the ingredients for, so you end up dashing out for some take-away... or having sandwiches - again! Sound familiar? If so, you need a menu plan!

A lot of people tell me that the thing they most dislike about cooking is deciding what to cook. When you sit down and work out a menu for the week, you get all that decision making out of the way in one go, saving yourself lots of time each day. You'll also eat healthier. And you will save money by doing all your shopping at once, instead of popping in and out of the shop every day. Because, as I'm sure you know, the more you go to the shops, the more unnecessary purchases you make.

I sometimes get slack with my menu planning - usually when I'm really busy, which is the worst time not to plan! What works best for me is to plan my menu on a Sunday, print it out, and stick it up on the fridge door alongside a calendar of what's on for the week. Every night after dinner I can check to see what food needs to be prepared and what's going on the next day. For example, do I need to get meat out of the freezer to thaw out, or soak nuts/seeds/grains, or have some baking done for the next day for school lunches and visitors... It's also a good idea to have family members' names next to any meals that they'll be cooking or helping with that week. For more ideas and tips for menu planning, check out my post on How to Menu Plan to see what I do to work out my menu for the week.


Get the kids involved in the planning and the cooking!

I've sent out a request on my Facebook page and on Twitter to ask who would be willing to share their Thermomix menu plans each week. I think it would be great if we could all get some ideas off each other, and encourage each other to be more organized in this area! I know I always stick to my plan better if I have put it out there for everyone to see - it kind of keeps me accountable. So who'd like to join in? The instructions are on this page tab, 'Thermomix Menu Plans'.

I was going to be super organized and have a printable menu plan template and calendar for you to write your own plan on, but then I found one over at My Little Thermomix that looked perfect! So pop over there and print it out - it looks great. And there's more menu planning tips there as well. Thanks Brooke :)

So here's my menu plan for this week - I hope you'll come back and share yours too! (If you don't have a blog or website, feel free to post your menu plan in the comments below.)

Monday:

(lunch) Spaghetti & Meatballs (all in one meal, sauce & pasta cook in the tmx bowl while meatballs steam in Varoma) with a green salad

(dinner) Corn & Bean Patties (made in tmx & shallow fried in pan) with raw vege sticks & a smoothie


Tuesday:

(lunch) Fried Rice (Thermomix style) - quick & easy; sandwiches & fruit for kids (it's their school day)


(dinner) Fish (shallow fried in pan), mashed potatoes & steamed veges (tmx - method here)


Wednesday:

(lunch) Mexican Quinoa (tmx) & Spelt Tortillas (dough made in tmx) with green salad


(dinner) Vege soup (tmx) & leftovers, with gluten free bread (tmx - Cyndi O'Meara's recipe)


Thursday:

(lunch) Spelt bread sandwiches (bread dough made in tmx)


(dinner) Slow cooker lamb chop casserole (out all day)


Friday:

(lunch) Pasta made with leftover lamb casserole meat & juices, more veges added (all in one tmx meal)

(dinner) Chicken Curry with Sticky Rice (all in one tmx meal)


Saturday:

(lunch) Baked potatoes & American Chop Salad (tmx)

(dinner) Huevos Rancheros ('Ranch Style Eggs' - sauce made in tmx, eggs poached in sauce in frying pan)


Sunday:

(lunch) Roast with baked veges (cooking while out), gravy in Thermomix

(dinner) Leftovers & bread


Rabu, 09 November 2011

Chicken with 40 Cloves of Garlic


I have very fond memories of my Grandma's delicious cooking. Getting to go to Grandma's house was always special, as Grandma lives in Texas (USA, not Queensland!) and we grew up in Australia, so we only got to visit Grandma now and then. Whenever I close my eyes and imagine Grandma, I see her with her apron on, wooden spoon in hand, standing over the stove in her homey, country kitchen in the cutest house you ever saw, happily cooking up something wonderful for bunches of hungry children and uncles and aunts. Grandpa would be sitting in the rocking chair in the kitchen telling us tall stories or making 'cowboy coffee' in a pan on the stove, everyone laughing and talking at once, kids running in and out, the smell of dinner cooking making us all hungry...

Mum says that when she was growing up, it didn't matter how early in the morning she got up, her mother was already in the kitchen cooking. I can hardly think of Grandma except in her kitchen! I was so heartbroken when she had to sell her house and move into a small unit after Grandpa died. I even had nightmares about it. I can hardly bear to think of someone else cooking in the kitchen that was Grandma's for over 50 years! Loved that house.


My Grandma is an amazing cook. So is my mum, obviously because she learnt from the master! It never seemed to matter how little was in the cupboard or fridge, they could make a three course meal out of it and everyone would be raving about how delicious it was. I have lots of Grandma's recipes written down on little recipe cards, all smudged and floury from years of use, ever since I got married and got my own little kitchen. We'd only been married about two weeks when we invited an older couple over for dinner (if only Grandma and Grandpa lived nearby we would've invited them!) - and of course I just had to cook my Grandma's cherry pie for dessert. It wasn't quite as good as hers (when I cut it, the filling kind of oooozed out of the crust and the whole thing deflated!), but it was reassuring to have Grandma's recipes there to see me through my first try at entertaining, at the tender age of 21.

My Grandma will be reading this blog post (Hi Grandma!) and she'll probably say what she always says whenever I talk to her on the phone: 'How do you DO all that you do! Every time I read your blog I have to go lay down, it makes me so tired!' Which is hilariously funny, because she was much busier than me, with rascally twin boys and two other kids, doing everything by hand the old fashioned way, sewing their own clothes, making everything 'from scratch' including bread and baby formula, and as I always remind her, she didn't have a Thermomix! I try to explain how this 'machine' saves me so much time, but she can't quite fathom it, never having seen one. I dream of one day hopping on a plane with my Thermomix tucked under my arm and turning up at Grandma's, and cooking with her for days on end. She can sit in the rocking chair and teach me her recipes and tell me the stories behind them, and I can show her how my amazing 'machine' can make preparing them so much easier. That's my dream.


But when it comes to this recipe for 'Chicken with 40 Cloves of Garlic', I'm afraid I just can't do it any other way than Grandma's way. This is how she taught me to make it, and I love it just the way it is, so I'm not changing it. But I don't make the bread by hand like she did, to serve with the deliciously mild, baked garlic cloves. And I don't make the mashed potatoes and veges by hand either, these days. All of that is done in the Thermomix while the chicken's bubbling away in the oven. So when dinner's done, I don't feel so tired I need to lie down. :)

Thanks, Grandma, this is for you.

(P.S. You've probably seen this recipe around the place - I have no idea where it originally came from. All I know is my Grandma used to make it for us, and in my mind it equals 'comfort food' at it's very best!)

*    *     *     *     *    

Update: I just had to share this gorgeous 'end' to the above story...

Grandma is in a nursing home 'assisted living' unit now, on her own, and doesn't cook much these days. My Aunt takes her a home-cooked dinner every day. (My Aunt is an amazing cook too!) But when Grandma read this blog post (as I knew she would), the memories of comforting family meals came flooding back, and she got up and cooked it once again, in her tiny little kitchenette, reliving the memories. She sounded so happy on the phone as she told me how much she enjoyed it. I only wish I could've been there to enjoy it with her. I'm sure she's still an awesome cook at the age of 91. :)


 Chicken with 40 Cloves of Garlic

1. Scatter garlic cloves over the bottom of a casserole dish. You can use a flat dish if you want more crispy skin, or a deep dish if you want softer, juicier chicken.
- 40 cloves of garlic, unpeeled!

   (Yes, that's a couple of bulbs of garlic - don't worry, baked garlic is really quite mild, just so long as you leave the cloves whole and unpeeled. I actually used a little less this time, since the organic garlic that I buy is gigantic!)


2. Place chicken pieces over the garlic, skin side up.
- 1 large, organic chicken, cut into pieces

3. Sprinkle the chicken with wine, juice or stock, oil, seasonings and herbs.
- 1/2 cup white wine or Verjuice or apple juice or chicken stock
(I usually use a mixture of apple juice and chicken stock, but I happened to have some de-alcoholised wine so I used that this time, and it was lovely)
- 3 Tablespoons extra virgin olive oil
- fresh thyme (or 1 teaspoon dried thyme)
- fresh sage, chopped finely (or 1/2 teaspoon dried sage)
- fresh parsley, chopped finely
- 4 small bay leaves
- 1 teaspoon herb salt & some freshly ground pepper (may need more salt if using apple juice)


4. Cover the dish tightly with foil (and a lid if it has one) so no steam can escape. Bake at 180 degrees C for 1 1/2 hours. Remove lid and foil, and return to the oven to brown for another 15 minutes. Discard bay leaves.

5. Serve with mashed potato* with the chicken juices drizzled over, lots of steamed veges or a big green salad, and some lovely fresh bread. Squeeze the garlic from the skins onto the bread, sprinkle with salt, and use it to mop up the lovely juices from the chicken.


* Here's how to make mashed potato and steamed veges in the Thermomix:

- Weigh 1000g of cubed potatoes into the Thermomix bowl. Sprinkle with salt, and add some butter or ghee if you like.

- Reset the scales and weigh in 200g of water and 200g of milk. (I use my rice-almond milk.)

- Place the Varoma on top and fill with thinly sliced veges, hard ones on the bottom, soft ones on the top. Make sure there's a hole poked through for the steam.

- Cook at Varoma temperature for 20 minutes, speed 1. Check that the veges are done - if not, add a couple more minutes.

- Remove Varoma dish, and bowl lid; push butterfly down into potato until it fits onto the blades. Replace lid and mix for 10-15 seconds on speed 4, until mashed.